How To Fix Automatic Burr Grinder Upper Burr Carrier Cross-Threading?
Does your automatic burr grinder feel stuck when you try to put the upper burr carrier back in place? You are not alone.
This is a common issue called cross-threading. It happens when the threads do not line up right during reinstallation.
The good news? You can fix this problem at home. You do not need special tools or expert help.
This guide walks you through the whole process. We will show you how to remove the old burr safely.
You will also learn the correct way to re-thread the upper burr carrier. Alignment is the secret here.
In a Nutshell
- Remove the screws from the burr attached to the upper burr carrier first. A simple screwdriver gets this job done.
- Take out the old burr carefully. This gives you clear access to the threads underneath.
- Re-thread slowly. Line up the carrier with the base before you turn it. Rushing this step causes cross-threading.
- Remember to thread counter-clockwise when you put the quick-release knob back in place. This small detail matters a lot.
- Stop tightening as soon as the cone starts to engage. Forcing it further can strip the threads.
- Always rotate the hopper counter-clockwise during removal. This keeps everything aligned for reassembly.
- Run the grinder once you finish. This lets you adjust the grind setting and confirm the fix worked.
Understanding the Upper Burr Carrier and Why Cross-Threading Happens
The upper burr carrier is the part that holds your grinder’s top burr in place. It sits inside your grinder and connects to the hopper. When you need to replace a worn burr, you remove this carrier, take out the old burr, and put it back together.
Cross-threading happens when the carrier threads don’t line up properly during reinstallation. The threads on the carrier and the threads inside your grinder get misaligned. Instead of sliding in smoothly, they catch at an angle. You might feel resistance or hear a grinding sound. This damage makes it hard or impossible to reinstall the carrier correctly.
Why does this happen? Most often, people rush the reinstallation process. They push the carrier in at a slight angle instead of straight. The threads start to engage incorrectly, and forcing it makes the problem worse. Even a tiny misalignment can cause cross-threading.
Another common cause is not fully removing the old burr before reinstalling the carrier. Burr fragments or debris can block the threads. This forces the carrier into the wrong position.
The alignment problem occurs because the upper burr carrier has a specific orientation. It must go in straight and centered. If you rotate it even slightly before the threads engage, the threads won’t match up. The internal threads in your grinder expect the carrier to enter at a precise angle.
Understanding this helps you prevent damage. The fix requires patience and careful alignment. You need to position the carrier correctly before you apply any pressure. Slow, deliberate movements work better than quick ones. This is why alignment and gentle threading matter so much when you reassemble your grinder.
Signs Your Burr Grinder Has a Cross-Threading Problem
Your automatic burr grinder sends you clear signals when cross-threading develops. Recognizing these signs early stops further damage.
The first sign is resistance when you turn the upper burr carrier. You notice the knob feels stuck or gritty as you rotate it. This grinding sensation means the threads are not lining up correctly. The carrier should turn smoothly without catching or hesitation.
Another obvious signal is a clicking or crunching sound during operation. This noise tells you the burr is not sitting flush against the stationary burr below. The grinder produces uneven sounds because the carrier is not fully seated in its proper position.
Check if your grinder produces inconsistent grind sizes. Cross-threading prevents the carrier from reaching its correct depth. This causes the upper burr to sit at an angle. You will notice some coffee grounds come out finer while others stay coarser than normal.
Look for visible gaps between the upper burr carrier and the grinder body. A properly installed carrier sits flush with no space showing. Gaps indicate the threads did not engage fully or correctly.
Pay attention to increased vibration during grinding. A misaligned carrier wobbles slightly, creating vibration you feel through the grinder’s handle. Normal operation should feel steady and balanced.
Finally, listen for grinding noises that sound different from your grinder’s usual operation. The burrs may be touching at an angle instead of parallel. This contact creates an unusual grinding sound that stands out immediately.
Catching these signs quickly prevents expensive damage to your grinder’s internal components. Stop using the grinder immediately when you notice any of these problems. Continuing to operate a cross-threaded grinder worsens the damage significantly.
Tools and Preparation Needed Before You Begin
Before you start fixing your automatic burr grinder’s upper burr carrier cross-threading issue, gather the right tools and prepare your workspace properly. Having everything ready prevents frustration and mistakes during the repair process.
You will need a screwdriver set with multiple sizes to remove the burrs from the upper burr carrier. Most automatic grinders use Phillips or flathead screwdrivers. Check your grinder’s manual to confirm which type fits your model.
A clean work surface is essential for this job. Use a flat table or counter where you can lay out all parts without losing anything. Small components like screws disappear easily, so consider using a small container or magnetic tray to keep them organized.
Grab some clean cloths or paper towels to wipe away coffee residue and dust. The upper burr carrier often has old coffee grounds stuck to it. Cleaning these away helps you see the threading clearly and prevents debris from interfering with reinstallation.
You should have a flashlight or work lamp nearby to see inside your grinder clearly. Proper lighting helps you spot the threading grooves and alignment marks on the carrier. This visibility prevents you from forcing parts together incorrectly.
Consider keeping a small bowl of water and cloth available to clean your hands between steps. Coffee oils make parts slippery and harder to grip securely.
Finally, have your grinder’s instruction manual within reach. Different models have slightly different carrier designs. Your manual shows the correct alignment position and threading direction specific to your grinder.
Taking time to prepare properly sets you up for success and keeps your grinder safe from further damage.
Step-by-Step Guide to Removing the Upper Burr Carrier
Start by unplugging your grinder from the electrical outlet. This safety step prevents accidental operation while you work on the internal components.
Next, locate the upper burr carrier assembly at the top of your grinder. You’ll see it’s connected to the hopper. Rotate the hopper counterclockwise to detach it from the grinder body. This gives you clear access to the upper burr carrier underneath.
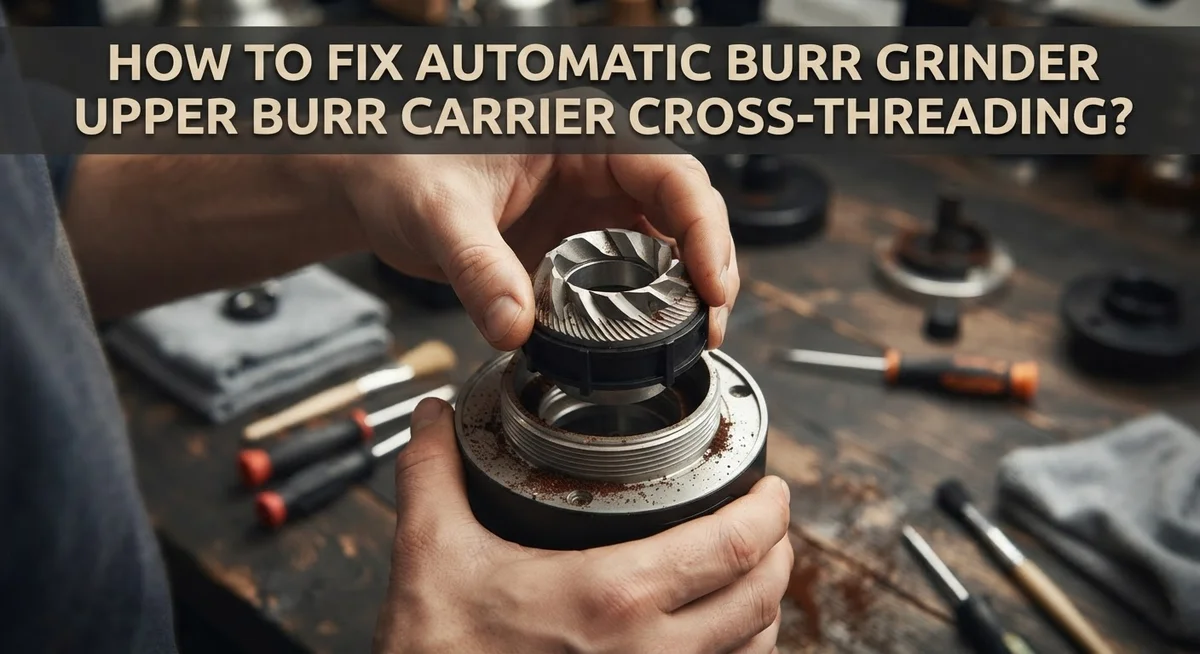
Once the hopper is removed, examine the burr attached to the upper burr carrier. You’ll notice screws holding this burr in place. Using your appropriately sized screwdriver, carefully remove each screw. Work slowly and keep these screws in a safe location so you don’t lose them.
After removing all screws, gently lift the old burr away from the carrier. Some residual coffee grounds may stick to the burr or carrier surface. Wipe both surfaces clean with your cloth to remove any debris or buildup.
Now comes the critical part. Before you reinstall anything, examine the threading area on the upper burr carrier. Look for any visible damage or bent threads. If the threads appear intact, you’re ready to proceed with proper reinstallation.
Take a moment to understand the carrier’s orientation. Notice how it fits into the grinder’s body. The correct alignment matters significantly for preventing cross-threading during reassembly.
Position your hands to hold the carrier steady. You’ll need to thread it carefully back into place. Move deliberately and avoid rushing this step. Proper alignment during removal preparation sets you up for successful reinstallation later.
Step-by-Step Guide to Correctly Re-Threading the Carrier
Start by examining the upper burr carrier closely. You need to understand how it sits inside your grinder before you reinstall it. The carrier has a specific shape and orientation that only fits one way correctly.
Hold the carrier in your hand and look at its threading pattern. Notice the direction the threads spiral. This matters because you must thread it back the same way it came out. Most carriers thread counter-clockwise when you’re looking down from above.
Position the carrier back into the grinder housing slowly. Align it carefully so the threads begin to engage smoothly. This is where most people rush and cause problems. Take your time here.
Gently turn the carrier counter-clockwise by hand. Feel for smooth resistance as the threads catch. The carrier should move easily without any grinding sensation. If you feel resistance or hear clicking, stop immediately and remove it.
Start threading again from the beginning. Make sure the carrier sits flush against the housing. Continue turning counter-clockwise until the cone begins to engage with the burr seat. You will feel this moment as slight increased pressure.
Tighten slowly until the cone makes full contact. Do not force it. Over-tightening damages both the carrier and the threads inside your grinder. The carrier should feel snug but not tight.
Once properly threaded, reinstall your burr onto the carrier using the screws you removed earlier. Tighten these screws evenly by alternating between them. This prevents uneven pressure on the burr.
Finally, reinstall the hopper and plug your grinder back in. Run it briefly without beans to confirm smooth operation. The carrier should rotate freely without resistance or unusual sounds.
Adjusting the Grind Setting After Reinstallation
After you’ve successfully reinstalled the upper burr carrier without cross-threading, your grinder needs a proper adjustment period. This step ensures everything works smoothly and your grind setting matches your preferences.
Start by plugging your grinder back in and running it empty for about 10 to 15 seconds. This allows the burrs to settle into their new position. Listen carefully during this test run. The sound should be consistent and smooth without any grinding or scraping noises.
Next, add a small amount of coffee beans to your hopper. Run the grinder for just a few seconds. Check the output texture. Your grind should match what you expect for your current setting. If the grind feels too coarse or too fine, you’ll need to adjust.
Turn the grind adjustment dial slowly in small increments. Make one small turn, then run a brief test with a few beans. This approach prevents over-correcting your setting. Wait a few seconds between each adjustment to let the mechanism respond.
Pay attention to how the grinder sounds and feels during operation. Any vibration or unusual noise means something isn’t quite right. Stop immediately and recheck your carrier installation.
After several test runs, your grinder should perform normally. The burrs need time to align properly with the carrier in its new position. Run the grinder with a full hopper for about 30 seconds to complete the settling process.
Once everything sounds and feels correct, your adjustment is complete. Your automatic burr grinder is now ready for regular use with the cross-threading issue resolved.
Common Mistakes That Cause Cross-Threading
Cross threading happens when you force the upper burr carrier into the housing without proper alignment. The threads don’t match up correctly, and you end up damaging both the carrier and the grinder housing itself.
Misaligning the carrier during threading is the most common mistake people make. You might rush the process and skip the crucial step of checking the carrier’s orientation. The threading pattern has a specific direction, and if you don’t position the carrier correctly from the start, the threads won’t engage smoothly.
Forcing threads without proper positioning causes immediate damage. Many people apply pressure too quickly, thinking they can push the carrier into place. This aggressive approach strips the delicate threads inside your grinder. Once stripped, these threads cannot be repaired easily.
Incorrect rotation direction during installation creates another major problem. The carrier requires counter clockwise rotation when you’re threading it back in. If you turn it clockwise instead, the threads cross and lock up. This mistake happens fast and causes real damage within seconds.
Many users also fail to pause and feel the threading process. You should move slowly and deliberately. The carrier should slide in smoothly with minimal resistance. If you feel grinding or clicking sounds, stop immediately and reposition.
Overlooking the cone engagement point leads to issues too. You need to tighten until the cone begins to engage with the burr assembly. Stopping too early leaves a gap. Going too far causes over tightening and thread damage.
Taking your time prevents all these mistakes. Check your alignment before you start. Rotate slowly. Listen and feel for smooth threading. These simple habits protect your grinder from cross threading problems.
Troubleshooting Persistent Threading Issues
When your upper burr carrier keeps cross-threading, you need a systematic approach to identify and fix the root cause. The problem usually stems from one of several specific issues that you can address step by step.
First, check your carrier alignment carefully. Remove the hopper and look directly into the grinder housing. The carrier’s threading pattern should match the housing threads perfectly. If you see any misalignment, remove the carrier completely and start fresh. Sometimes debris or old burr particles get stuck in the threads and prevent proper seating.
Next, inspect the threads themselves for damage. Run your finger gently along the carrier’s threaded section. You should feel smooth, even ridges. If you notice rough spots or missing sections, the threads may already be damaged from previous cross-threading attempts. In this case, you may need professional service.
Pay close attention to your rotation direction. You must thread counter-clockwise when reinstalling the quick-release knob. Many people accidentally rotate clockwise, which causes immediate cross-threading. Remember this direction before you begin any reinstallation.
Feel the threading resistance as you work. When you turn the carrier by hand, it should move smoothly with gentle, consistent pressure. If you feel sudden resistance or grinding sensations, stop immediately. This indicates cross-threading is starting. Back off slowly and realign the carrier.
Finally, clean the entire threading area thoroughly. Use a dry cloth to remove any coffee dust or residue. This simple step prevents many threading problems. Once everything is clean and aligned, thread slowly and deliberately. Patience prevents damage that rushing causes.
Final Thoughts
Fixing cross-threading on your upper burr carrier does not need to feel like a puzzle. Patience and careful alignment solve most problems right away.
Remember that speed causes damage. Slow, deliberate movements protect your threads every single time.
Your grinder rewards attention to detail. Feel each turn instead of forcing it forward.
Correct rotation direction matters more than people realize. Counterclockwise threading during reinstallation prevents most common errors.
Stop the moment you feel resistance. This simple habit saves you from stripped threads and costly repairs.
Testing your grinder after reassembly confirms your work. Listen for smooth operation without grinding noises or vibration.
Coffee lovers know that a properly working grinder makes better coffee. Fresh grounds depend on burrs that align correctly.
Regular maintenance prevents future threading issues too. Clean your grinder parts often to avoid buildup that causes misalignment.
Check your carrier threads periodically even when things seem fine. Small problems caught early stay small.
Your grinder deserves gentle handling during every reassembly. Rushing through steps almost always leads to mistakes.
Keep these techniques in mind for future maintenance. You now have the knowledge to handle threading issues confidently.
Practice makes this process easier over time. Each successful reassembly builds your skill and confidence.
Do not hesitate to start over if something feels wrong. Beginning again beats forcing damaged threads together.
Your automatic burr grinder can serve you well for years. Proper care during reinstallation keeps it running smoothly.
Trust the process and take your time. Cross-threading becomes a rare problem once you master these simple techniques.
With practice, reassembling your grinder becomes second nature. You will handle future maintenance tasks with ease and confidence.
Frequently Asked Questions
What causes cross-threading in automatic burr grinders?
Cross-threading happens when the upper burr carrier doesn’t align properly with the housing threads. You force the carrier at an angle instead of straight in. The threads catch incorrectly and strip. This damage occurs fast, so slow movement matters.
Rotation direction also plays a role. Threading in the wrong direction creates immediate problems. Many users rush this step without feeling the natural resistance of proper alignment.
How do I know if my upper burr carrier is cross-threaded?
You’ll feel grinding or catching sensations as you thread the carrier. The resistance feels wrong compared to normal installation. The carrier may sit at an odd angle in the housing.
Stop immediately when something feels off. Don’t force it further. Continuing will damage the threads beyond simple repair. Listen and feel for these warning signs during reinstallation.
Can I fix cross-threaded burr carrier threads myself?
Minor cross-threading sometimes reverses with careful removal and realignment. Remove the carrier slowly by rotating counter-clockwise. Check the threads for visible damage or debris.
Clean the threading area thoroughly before reinstalling. Align the carrier straight into the housing opening. Thread slowly counter-clockwise until the cone begins to engage. Tighten gently without forcing.
Severe cross-threading may require professional help or carrier replacement.
What’s the proper way to reinstall the upper burr carrier?
Start with a clean threading area. Position the carrier straight into the housing opening. Rotate counter-clockwise slowly and deliberately. Feel for natural resistance as threads catch.
Stop when the cone begins to engage. Don’t over-tighten. Run your grinder after reinstallation to verify proper operation.

Hello, i’m Ivoria i am the face behind Tech Tracker Blog. I am passionate about my work and love to explore gadgets and share about my experience.