How To Fix a Podcast Mixer Fader Knob That Snapped Off?
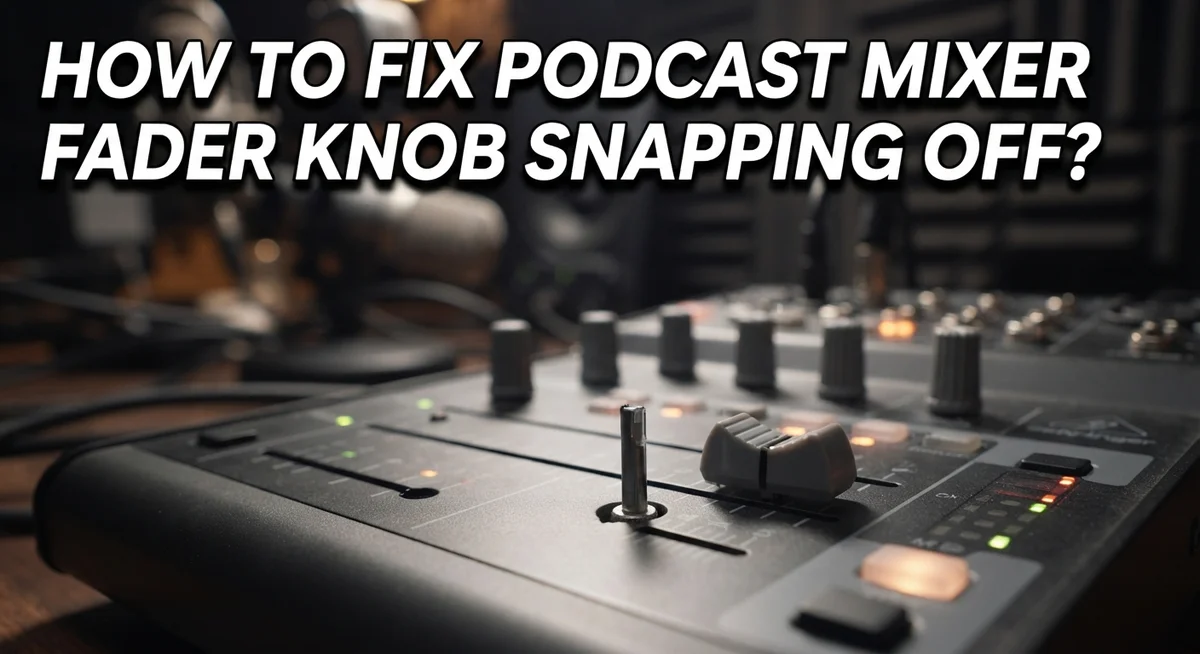
Your podcast mixer fader knob just snapped off mid recording. Don’t panic. This is a common problem that happens to almost every podcaster who uses their mixer often.
Fader knobs take a lot of physical stress. You push them, pull them, and adjust them during every episode. Over time, this constant use wears down the small plastic piece that holds the knob in place.
The good news is that your mixer still works fine even without the knob. The fader shaft underneath still functions normally. You just lose the easy grip for smooth adjustments.
Fixing this issue is much simpler than you might think. Most fader knobs simply pop back onto the shaft. Some knobs have multiple parts that need proper reassembly first.
In this guide, we will walk you through the exact steps to fix your broken fader knob. You will learn how to detach it, reassemble any loose parts, and snap it back securely.
This whole repair takes about 60 seconds. No special tools or technical skills are needed. Let’s get your mixer back to full working condition.
In a Nutshell
Here’s a quick summary to help you fix that broken fader knob fast.
-
Pop the knob off first. Most fader knobs simply pull away from the shaft with gentle force. No tools needed for this step.
-
Check for multiple parts. Some knobs split into three separate pieces. Keep track of each part during removal.
-
Inspect the shaft closely. Look at the fader shaft to understand how the knob connects. This helps you reassemble it correctly.
-
Put the pieces back together. Align all parts in their original order. Take your time here to avoid mistakes.
-
Push the knob back onto the shaft. Press firmly until it clicks into place. It should feel snug and secure.
-
Test the fader movement. Slide the knob up and down to confirm it works properly. Your mixer should function exactly as before.
This entire process takes about a minute. Beginners can handle this repair without any special skills or extra tools. The key is patience during reassembly, especially with multi-part knobs.
Why Fader Knobs Snap Off Over Time
Fader knobs snap off because they experience constant physical stress during normal use. Every time you adjust your levels, you apply force to the knob. This repeated motion creates wear on the connection between the knob and the shaft underneath.
Frequent use accelerates the damage. If you record multiple episodes per week or use your mixer for live streaming, your fader knob gets pushed and pulled thousands of times. Each adjustment adds cumulative stress to the attachment point.
The material itself also matters. Most fader knobs are made from plastic or rubber compounds. Over time, these materials become brittle and lose their flexibility. Temperature changes in your studio can make this worse. Cold environments make plastic more fragile, while heat can soften the connection.
The snap usually happens suddenly. You might not notice gradual weakening. One day the knob just gives way during a normal adjustment. This surprises many people because they didn’t see it coming.
The good news is that snapping doesn’t mean your mixer is broken. The internal fader mechanism stays intact and continues working perfectly. You can still control your levels even without the knob attached. You just need to use a different tool or reattach the knob.
Understanding why this happens helps you prevent future breaks. Avoid twisting the knob side to side when adjusting levels. Use straight up and down motions instead. This reduces stress on the connection point. Being gentle during adjustments can extend your knob’s lifespan significantly.
Tools and Materials You’ll Need
Before you start fixing your fader knob, gather a few basic items. You probably have most of these around your home or studio already.
First, you need good lighting. A desk lamp or flashlight helps you see the small components clearly. Fader knobs are tiny, and you don’t want to lose any pieces in dim conditions.
Next, find a clean, flat work surface. A table or desk works perfectly. Make sure the area is free from clutter so you can organize your parts as you remove them.
You’ll want a soft cloth or microfiber towel nearby. This protects your mixer from scratches and keeps the work area clean. Dust and debris can interfere with fader movement after reassembly.
A small container or dish helps you keep track of components. If your knob splits into multiple pieces, you need a safe place to store them while you work. This prevents losing parts under furniture or mixing them up.
Consider having a reference photo or video available on your phone. Take a quick picture of your fader knob before disassembly. This visual guide helps you remember how everything connects.
Optional but helpful items include tweezers for handling small parts and a magnifying glass for detailed inspection. These tools aren’t essential, but they make the job easier if you have trouble seeing fine details.
Your hands are your primary tool here. No special equipment is required for most repairs. The entire process stays simple and straightforward, so you won’t need anything complicated or expensive to get your fader knob working again.
Step-by-Step: Removing the Broken Knob
Starting the removal process is straightforward. Begin by examining where your fader knob connects to the shaft. Most knobs sit on top of a metal or plastic shaft that extends from your mixer’s internal fader mechanism.
Gently grasp the knob with your fingers. Apply steady, even pressure as you pull straight upward. The knob should pop off with minimal force. Avoid twisting or bending the knob sideways, as this can damage the internal connector or shaft.
If the knob resists, don’t force it. Instead, rock it gently side to side while pulling upward. This slight rocking motion helps release any friction points. Stop immediately if you feel excessive resistance.
Once the knob separates, examine it closely. Look for any visible cracks or breaks in the material. Check the interior hollow section where it connects to the shaft. This area often shows wear patterns that explain why it snapped.
Some knobs come apart into multiple pieces. If yours does, carefully separate each component. Keep all pieces in one location so you don’t lose anything. Take a quick photo of the separated parts to remember their original arrangement.
Inspect the shaft itself for damage. Run your finger along the connection point to feel for burrs or rough spots. A damaged shaft can prevent proper reattachment later.
Clean all components with a soft, dry cloth. Remove any dust or debris from the knob’s interior and the shaft. This cleaning step ensures a secure fit when you reassemble everything.
Set everything on your work surface in an organized manner. Arrange pieces in the order you’ll reassemble them. This preparation makes the reconstruction process much faster and more reliable.
Step-by-Step: Disassembling and Inspecting the Knob Parts
Start by examining your fader knob components under good lighting. You should see the main knob body and the shaft it connects to. Look closely at how these pieces fit together to understand the connection mechanism.
Most fader knobs have a simple design with just two or three parts. The outer knob shell slides onto a metal or plastic shaft. Some models include a small insert or collar piece that helps secure the connection. Take a photo of the assembled knob before you start so you have a reference guide.
Gently separate each component and lay them out in order on your clean work surface. Inspect the interior of the knob where it connects to the shaft. Look for cracks, breaks, or worn areas inside the knob body. These damaged spots often cause the knob to slip or fail to reattach properly.
Check the shaft itself for damage too. Run your fingers along it carefully to feel for rough spots or breaks. A damaged shaft may need attention beyond simple knob replacement. Look at the connection point where the knob slides on. This area typically has a small notch or flat edge that keeps the knob from spinning freely.
Examine the knob’s exterior for visible cracks or pieces missing. Sometimes damage isn’t obvious from the outside but shows up during inspection. Clean all parts with a soft, dry cloth to remove dust and debris that might affect reassembly.
Document any damage you find with photos. This helps you decide whether you can repair the knob or need to consider other options. Understanding the damage helps you reassemble correctly and prevents the same problem from happening again quickly.
Step-by-Step: Reassembling and Reattaching the Knob
Reassembling your fader knob requires patience and attention to detail. Start by arranging all components in the order you removed them. This reference system helps you remember which piece goes where.
Begin with the smallest internal parts first. If your knob has a spring or tension piece inside, position it correctly on the shaft. Misplacing this component causes the knob to feel loose or spin freely without resistance.
Next, slide the main knob body back onto the shaft. Push gently but firmly until you feel it settle into place. The knob should sit flush against the mixer’s surface. If it wobbles or sits crooked, remove it and check the internal alignment.
Test the fit by rotating the knob slowly. It should move smoothly without grinding sounds or unusual resistance. Listen carefully for any clicking or catching that suggests misalignment.
Once reassembled, reattach the knob to your mixer’s fader shaft. Most knobs simply pop back onto the shaft with light pressure. Push straight down until the knob seats completely. You’ll often hear or feel a subtle click when it locks into position.
Verify the knob stays firmly attached by gently tugging on it. A properly reattached knob resists removal without excessive force. If it pops off easily, remove it again and inspect the shaft connection point.
Test your fader’s full range of motion. Move it from minimum to maximum several times. The knob should stay attached throughout this entire process.
This reassembly process typically takes about 60 seconds once you understand the proper sequence. Take your time during the first attempt. Speed comes naturally after you’ve successfully completed the repair once.
Tips for a Secure, Long-Lasting Fit
A secure, long-lasting fit starts with understanding how your fader knob connects to the shaft. Most knobs use a simple friction fit or a small set screw mechanism. Check your mixer’s manual to identify which type yours has. This knowledge prevents future detachment issues.
Proper alignment matters significantly when reattaching your knob. The knob must slide straight onto the shaft without forcing. Forcing causes internal damage and weak connections. Align the knob opening with the shaft before pushing gently into place.
Apply consistent, even pressure during reattachment. Push the knob straight down the shaft rather than at angles. You should feel a slight resistance as the knob seats properly. Stop pushing once you feel it settle into position.
Test the connection immediately after reattaching. Gently tug upward on the knob with moderate force. A secure fit resists this upward pull without moving. If the knob shifts or wobbles, remove it and realign.
Avoid over tightening if your mixer uses a set screw. Hand tighten only until snug. Over tightening strips the threads and damages the shaft. Your fader should rotate smoothly without grinding sounds.
Prevent future problems by handling your mixer gently during use. Avoid sudden, forceful fader movements. Let your fader move naturally without pushing it to extreme positions rapidly.
Store your mixer in a protective case when not in use. Transport it carefully to avoid impact damage. Regular, gentle use extends the lifespan of all components, including fader knobs.
Check your connection every few weeks during regular use. Early detection of loosening prevents complete detachment. A quick inspection takes seconds and saves repair time later.
Common Mistakes That Prevent a Firm Reattachment
Many people make simple mistakes when reattaching their fader knob. These errors stop the knob from staying firmly in place. Understanding what goes wrong helps you get it right the first time.
The most common mistake is rushing the reassembly process. You need to pay attention to the order of each component. If you put pieces back together incorrectly, the knob won’t seat properly on the shaft. Take your time and follow the sequence carefully.
Another frequent error is ignoring the shaft condition. Before you reattach anything, inspect the fader shaft closely. If the shaft has damage, corrosion, or debris, your knob won’t grip securely. Clean the shaft with a soft, dry cloth to remove any dust or residue that prevents a tight connection.
Many people also forget to align the knob correctly with the shaft. The knob must slide straight onto the shaft without tilting. If you push it on at an angle, it won’t seat flush. This misalignment creates a loose, wobbly connection that fails quickly.
Applying uneven pressure during reattachment causes problems too. You should use consistent, steady force when pushing the knob back onto the shaft. Pushing harder on one side than the other creates an improper fit.
Finally, people sometimes overtighten set screws if their mixer uses them. This can strip the threads or crack the knob. Hand tighten only until the knob feels snug and doesn’t move. Stop immediately when you feel resistance.
Avoiding these mistakes means your fader knob stays attached longer. Check your work before you start using your mixer again. A properly reattached knob should feel solid and spin smoothly through its full range.
Troubleshooting a Loose or Wobbly Knob After Repair
After you reattach your fader knob, it might still feel loose or wobbly. This happens more often than you’d think. The good news is that fixing this issue takes just a few simple steps.
Check your reassembly first. A wobbly knob usually means the internal parts didn’t go back together correctly. Take the knob off again and examine each component. Make sure all pieces sit flush against each other with no gaps.
When you slide the main knob body back onto the shaft, listen for a click. That click tells you the knob seated properly. If you don’t hear it, remove the knob and try again.
Inspect the shaft itself. Sometimes the shaft gets slightly bent or damaged when the knob snaps off. Run your finger along the shaft to feel for rough spots or dents. A damaged shaft won’t hold a knob securely no matter how well you reassemble it.
Test the connection by gently tugging upward on the knob. It should resist your pull without moving. If it still feels loose, remove it once more and reposition it carefully.
Apply even pressure when pushing the knob back onto the shaft. Use both hands if needed to ensure balanced pressure from all sides. Uneven pressure causes the knob to seat at an angle, creating that wobbly feeling.
If wobbling continues after these checks, the shaft might need replacement. Most mixers allow you to access the fader assembly without major disassembly. Consider whether your mixer is worth the repair cost, or if upgrading makes more sense for your setup.
Final Thoughts
Fixing a snapped fader knob is a simple task anyone can handle. You don’t need special tools or technical skills.
Most repairs take about 60 seconds. Just pop the knob back onto the shaft and check the fit.
Your mixer still works even with a detached knob. This means you can finish your podcast session first and fix the knob later.
Take your time during reassembly. Rushing causes most reattachment problems.
Multi-part knobs need careful assembly. Each piece must sit correctly before you reattach the whole unit to the shaft.
Regular use naturally wears down faders over time. This wear is normal and doesn’t mean your mixer is broken.
Gigging often speeds up this wear process. Frequent handling puts extra stress on small parts like fader knobs.
Once your knob feels secure, test it right away. Push the fader up and down a few times.
Listen for smooth movement without wobbling. A properly reattached knob should feel stable under normal pressure.
If problems continue, don’t worry. Most fader knob issues are fixable without needing a replacement part.
Understanding your mixer’s construction helps you make quick repairs whenever needed. This knowledge saves you time and money in the long run.
Podcast mixers face daily wear from constant use. Learning basic fixes like this keeps your setup running smoothly.
With practice, you’ll fix future knob issues even faster. This small skill keeps your podcast production moving without interruption.
Remember that detached knobs are common and rarely serious. A little patience and the right technique will have your mixer back to normal in under a minute.
Frequently Asked Questions
Will my mixer still work if the fader knob is detached?
Yes, your mixer works perfectly fine without the knob attached. The fader shaft continues to function normally. You can still adjust levels by moving the shaft directly with your fingers. The only inconvenience is losing the grip that the knob provides. Your audio quality and mixer performance remain unaffected.
How do I know if my fader knob snapped off or just popped loose?
Most fader knobs pop off rather than break completely. You’ll find the knob sitting separately near your mixer. The shaft underneath stays intact and undamaged. If the knob feels cracked or has visible fractures, it truly snapped. A popped knob simply needs reattachment to the shaft. Check the shaft for any bending or damage before reattaching.
Can I reattach the knob myself without special tools?
Absolutely. You need no special tools for this repair. Most knobs pop back onto the shaft by hand pressure alone. Simply align the knob with the shaft opening and push firmly downward. Listen for a click sound, which signals proper seating. Some multi part knobs require you to reassemble internal components first. The entire process takes about 60 seconds.
Why does my fader knob keep popping off after I reattach it?
Improper alignment causes repeated popping. Make sure the knob sits fully onto the shaft before releasing pressure. The shaft condition matters too. A bent or damaged shaft won’t hold the knob securely. Apply even pressure when pushing the knob down. Uneven pressure creates a loose fit. If problems persist, the shaft itself may need inspection or replacement.

Hello, i’m Ivoria i am the face behind Tech Tracker Blog. I am passionate about my work and love to explore gadgets and share about my experience.