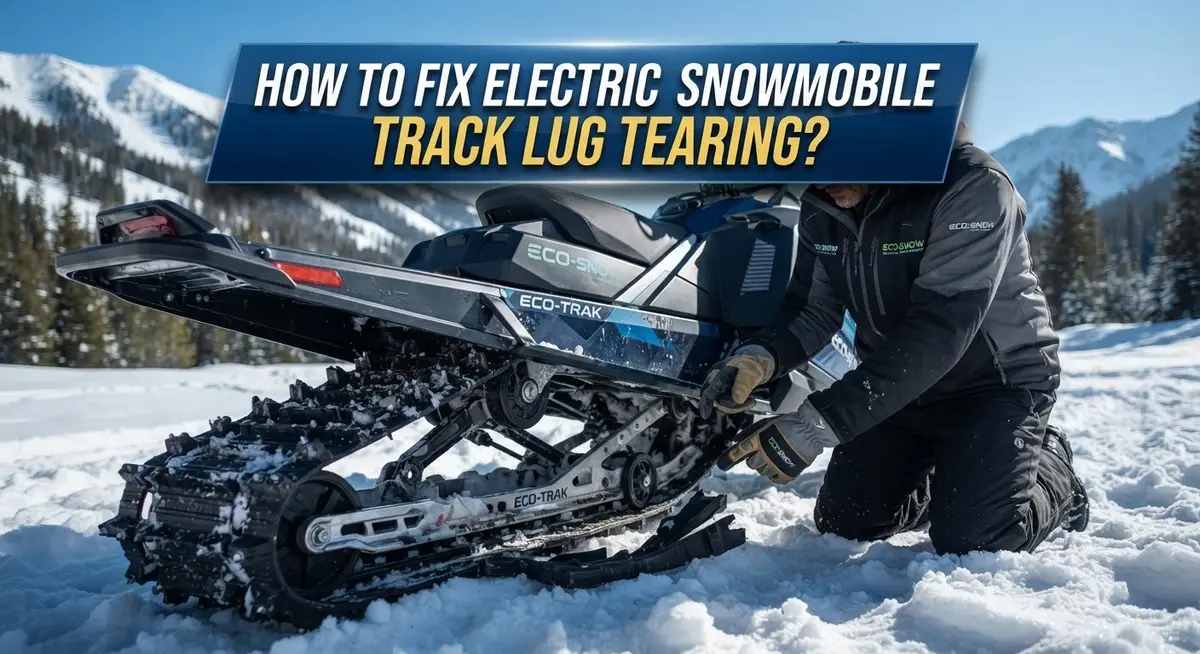
How To Fix Electric Snowmobile Track Lug Tearing?
Torn track lugs can turn a fun snowmind ride into a frustrating problem. Mountain riding puts extra stress on your electric snowmobile track. Over time, lugs start to tear and rip apart.
Many riders think a torn lug means buying a whole new track. This can cost thousands of dollars. But that is not always true.
You can often fix torn lugs right at home. With the right tools and a bit of patience, your track can work like new again. This guide walks you through simple repair steps anyone can follow.
In a Nutshell
- Small tears do not mean disaster. You can fix most torn lugs without buying a new track. This saves money and time.
- Super glue is your first tool. Use a needle applicator for clean, precise lines. This helps you apply glue exactly where you need it.
- A repair kit adds strength. These kits include patches that make the fix last longer. They work well for lugs that see heavy use.
- Mountain riding causes more wear. Rough terrain puts extra stress on your track. Check your lugs often if you ride in these conditions.
- This method works for most electric snowmobiles. Riders with popular models have used this fix successfully. It is a simple process you can do at home.
- Skipping the repair is the biggest mistake. Many riders toss a torn track too soon. A few simple steps can bring it back to life.
Understanding Track Lug Tearing on Electric Snowmobiles
Track lug tearing happens when the rubber teeth on your snowmobile track break or separate from the base. These lugs grip the snow and provide traction, so damage affects your ride quality fast.
Why lugs tear in the first place matters for prevention. Electric snowmobiles experience the same wear as gas models. Hard impacts, sharp ice edges, and repeated flexing all cause stress on the rubber. Mountain terrain creates the most damage because rocks and rough ground catch the lugs at odd angles.
The location of the tear tells you how serious the problem is. Tears at the base (where the lug connects to the track) are harder to fix than surface cracks. Partial tears where the lug still hangs on are easier to repair than complete breaks.
Temperature affects tear development. Cold weather makes rubber more brittle, so small cracks spread faster in deep winter. This means a small tear today becomes a large problem by next week if you ignore it.
Electric snowmobiles put different stress patterns on tracks compared to traditional machines. The instant torque from electric motors can catch lugs suddenly, creating stress points. However, the smooth power delivery also means fewer shock loads than gas engines produce.
Understanding your riding style matters too. Aggressive acceleration, hard cornering, and rapid deceleration all increase tear risk. Riders who cruise at steady speeds see fewer lug problems than those who push their machines hard.
Worn tracks are more prone to tearing. If your lugs already look short or rounded, they’ll tear more easily than fresh rubber. Inspecting your track regularly helps you catch damage before it spreads.
Recognizing these causes helps you decide whether to repair or replace. Minor tears in good tracks deserve repair attempts. Severely damaged or old tracks might need replacement instead.
What Causes Lug Tears in Mountain and Deep Snow Riding
Mountain riding creates intense stress on track lugs. The uneven terrain forces lugs to bend and twist at extreme angles. Sharp rocks, ice edges, and hardpacked snow all dig into your track differently than groomed trails.
Deep snow riding causes different damage patterns. When you ride in powder, lugs compress and release repeatedly. This constant flexing weakens the rubber over time. The lug eventually tears where the rubber connects to the track base.
Speed matters too. Faster riding generates more friction and heat on the lugs. This heat makes rubber softer and more prone to tearing. Sudden stops in deep snow create the worst damage because the lugs lock up while the track still moves underneath.
Aggressive cornering in mountains tears lugs on the sides of your track. The centrifugal force pulls the outer lugs outward. If your track is already worn, these side lugs separate first. Inner lugs tend to tear from compression rather than pulling forces.
Temperature plays a big role in how quickly tears develop. Cold weather makes rubber brittle. A small crack in freezing temperatures spreads faster than the same crack in milder conditions. Deep snow riding in extreme cold accelerates lug failure.
Your riding style directly impacts lug damage. Riders who accelerate hard, brake suddenly, and corner sharply see more tears. Smooth, steady riding keeps lugs intact longer. Even on the same mountain, different riders experience different wear patterns based on their technique.
Electric snowmobiles have unique stress patterns. The instant torque from electric motors creates sudden acceleration forces. This differs from gas engines that build power gradually. Your track lugs experience sharper stress spikes with electric machines.
Understanding these causes helps you prevent future damage. You can adjust your riding style to reduce wear. You can also spot early warning signs before a small tear becomes a major problem requiring track replacement.
Tools and Materials Needed for a DIY Lug Repair
When you’re ready to repair a torn lug, you need specific items on hand. Super glue is your foundation tool. This adhesive bonds the rubber pieces together. Look for versions with a needle applicator attached. The thin needle lets you apply glue exactly where the tear is. This prevents messy overflow and wasted product.
A repair kit designed for track lugs comes next. These kits include multiple patches made from durable rubber material. The patches reinforce the glue bond. They stop the tear from reopening during riding. Kits typically contain enough patches for several repairs. This makes them cost effective for riders who experience multiple small tears.
You’ll also need basic cleaning supplies. A dry cloth removes dirt and debris from the torn area. Clean surfaces help glue stick better. Some riders use rubbing alcohol to wipe the lug. This removes oils that block adhesion. Let the area dry completely before applying glue.
A small brush or applicator helps spread glue evenly. Some repair kits include brushes for this purpose. If yours doesn’t, a toothbrush works in a pinch. Gentle pressure ensures the glue reaches into the tear completely.
Consider having sandpaper on hand. Light sanding roughens the lug surface slightly. This texture helps the patch grip better. Use fine grit sandpaper only. Aggressive sanding damages the rubber more.
Clamps or heavy weights help hold the repair together while glue dries. You can use rocks, boards, or actual clamps. The pressure keeps the lug and patch in firm contact. Most glues need several hours to cure fully.
Finally, keep the repair area warm and dry during curing. Cold temperatures slow the glue setting process. A garage or indoor space works better than outdoor conditions. Once everything is gathered, you’re ready to begin the actual repair process.
Step-by-Step Guide to Repairing a Torn Track Lug
Start by examining the torn lug carefully. Look at the size and location of the tear to understand how badly it’s damaged. Small tears work best for DIY repair methods. Large tears that separate the lug from the track base need more attention.
Clean the area thoroughly before starting. Use a brush to remove dirt, ice, and debris from the torn section. Wipe the lug dry with a cloth. A clean surface helps the glue bond much better. Don’t skip this step because dirt prevents proper adhesion.
Attach the needle applicator to your glue bottle. This small tool lets you apply glue precisely along the tear. Squeeze glue slowly into the torn area. Work your way along the entire length of the damage. Apply enough glue to fill the crack but avoid excess that drips onto surrounding areas.
Press the torn pieces together carefully. Hold them in place for the time your glue requires. Most adhesives need 30 seconds to a few minutes of pressure. If your repair kit includes patches, apply them over the glue for extra strength. The patches reinforce the repair and prevent the tear from reopening.
Use clamps or heavy weights to hold the repair steady while it cures. Position them so they press the lug back to its original shape. Leave everything undisturbed for the full curing time. Don’t rush this part because premature movement weakens the bond.
Keep the repair area warm and dry during the entire curing process. Cold temperatures slow adhesive bonding. Moisture can also interfere with the glue setting properly.
After the glue fully cures, test the repair by flexing the lug gently. It should feel solid and not move at the tear line. If the repair holds, your track is ready for riding again. This simple process saves money and extends your track’s lifespan significantly.
Tips for a Durable, Long-Lasting Lug Repair
A durable lug repair starts with choosing the right materials and techniques. The foundation of any successful repair depends on using quality adhesives specifically designed for rubber. Standard household glue won’t hold up to the extreme forces your electric snowmobile track experiences.
Proper surface preparation is absolutely critical. Before applying any glue, clean the torn area completely. Remove all ice, snow, dirt, and debris from both sides of the tear. A small brush works well for this step. The cleaner your surface, the stronger your bond will be.
Apply glue using a needle applicator for precision. This tool lets you place adhesive exactly where you need it without creating messy excess. Work the glue into the tear carefully and press the torn pieces together firmly. Hold them in position for the full time recommended by your adhesive manufacturer.
Use clamps or heavy weights to maintain pressure while the glue cures. This constant contact ensures the pieces bond completely and evenly. Don’t rush this step. Most repairs need several hours to set properly, and some require overnight curing.
Temperature control matters significantly during curing. Keep your repaired track in a warm, dry location. Cold temperatures slow the curing process and can weaken the final bond. Avoid exposing the repair to moisture or snow during this critical period.
Once fully cured, test your repair gently. Flex the lug slightly to check the bond strength. A successful repair should feel solid with no movement between the pieces.
Prevention extends your repair’s life. Reduce aggressive cornering and hard acceleration when possible. Smooth riding habits put less stress on repaired areas. Monitor your track regularly for new damage. Catching small tears early prevents them from becoming major problems that require full track replacement.
Common Mistakes to Avoid When Fixing Lug Tears
Many riders make simple mistakes that weaken their lug repairs right from the start. The most common error is skipping proper surface preparation. You must clean the torn area completely before applying any glue. Dirt, ice, and debris create a barrier that prevents the adhesive from bonding properly to the lug material.
Another frequent mistake is using too much glue. More glue does not mean a stronger repair. Excess adhesive actually creates weak spots and takes longer to cure. Apply glue in a thin, even layer along the torn section using your needle applicator.
Many people remove clamps or weights too early. The glue needs its full curing time to reach maximum strength. Removing pressure before the adhesive sets completely results in a repair that fails quickly under riding stress.
Temperature control is often overlooked during the curing process. Cold weather slows glue curing significantly. Keep your repair in a warm area while the adhesive sets. Rushing this step by exposing the repair to extreme cold creates weak bonds that tear again.
Some riders apply repair patches incorrectly. The patch must make full contact with both the lug and the torn surface. Air pockets underneath patches create failure points. Press patches firmly and hold them steady until the glue cures.
Not testing your repair gently before riding is another mistake. After curing, flex the lug carefully to check for weakness. This simple test reveals if your repair holds properly before you ride.
Finally, avoid discarding damaged tracks without attempting repair first. Many tracks with torn lugs can be saved with proper repair techniques. This approach saves you significant money compared to full track replacement while keeping your snowmobile ready for the next ride.
Troubleshooting Persistent or Recurring Lug Damage
When lug damage keeps happening on your electric snowmobile track, the problem usually goes deeper than just the surface tear. Recurring damage signals that something in your riding style or track condition needs attention.
Mountain riding creates the most common cause of persistent lug tearing. The aggressive terrain puts extreme stress on track lugs as you navigate steep slopes and uneven surfaces. If you ride mountains frequently, expect more wear and tear on your track system.
Your riding technique matters more than you might think. Aggressive acceleration, hard turning, and sudden stops all put extra pressure on individual lugs. When you notice repeated tears in the same area, your riding habits are likely the culprit. Consider smoothing out your acceleration and taking wider turns to reduce stress on the track.
Track tension plays a huge role in lug durability. A track that’s too loose allows excessive movement and flexing, which causes lugs to tear repeatedly. A track that’s too tight creates different problems but still leads to premature wear. Check your track tension regularly and adjust it to the manufacturer’s specifications for your specific model.
The surface you ride on also affects lug longevity. Riding over sharp rocks, ice chunks, or debris damages lugs faster than smooth snow. When possible, stick to groomed trails and avoid rough terrain that shreds lugs quickly.
Temperature swings cause material brittleness. Cold weather makes track rubber less flexible, making lugs more prone to cracking and tearing. Warmer conditions keep the material more pliable and resistant to damage.
If damage keeps returning after repair attempts, your track may have reached the end of its useful life. Multiple tears in different locations suggest the entire track is deteriorating. At this point, replacement becomes more practical than repeated repairs. However, addressing your riding technique and track maintenance first can extend your track’s life significantly and reduce future lug problems.
Final Thoughts
Fixing a torn lug on your electric snowmobile track does not have to feel impossible. With the right glue, a steady hand, and some patience, you can bring your track back to life. This simple fix saves you money and keeps you riding longer.
Remember that small tears grow bigger if ignored. Acting quickly protects the rest of your track from further damage. A five minute repair job today can prevent a costly replacement next season.
Every rider faces lug tears eventually. Mountain trails, rocky paths, and cold weather all take a toll on your track. This is a normal part of owning an electric snowmobile, not a sign that something is wrong with your machine.
Your track represents a big investment. Taking care of small problems early protects that investment for years to come. A well maintained track performs better and lasts longer than one that gets neglected.
Patience matters just as much as skill when fixing lug tears. Rushing through glue application or skipping cure time often leads to weak repairs. Slow, careful work always produces better results than quick fixes.
Keep spare repair supplies in your garage or shed. Having glue and patches ready means you can fix small tears the moment you spot them. This habit keeps your track in top shape all season long.
Think of lug repair as regular maintenance, not an emergency task. Riders who check their tracks often catch problems before they grow serious. This simple habit saves time, money, and frustration down the road.
Your electric snowmobile deserves proper care. A little effort now keeps your track strong through many rides ahead. With practice, fixing lug tears becomes a quick and easy part of your routine.
Frequently Asked Questions
Can I repair a torn lug myself or do I need professional help?
You can absolutely repair a torn lug at home. A DIY approach saves you thousands of dollars compared to replacing the entire track. The repair process is straightforward and uses basic materials like super glue and repair patches. Most riders complete this task in their garage or shed without special equipment.
What’s the fastest way to fix a small lug tear?
Start by attaching a needle applicator to your glue bottle. Apply super glue directly along the torn lug. Press the lug back into place and hold it firmly. Use a repair kit that includes patches designed for your track type. The glue cures within hours, so you can test your repair gently the next day.
How long does a repaired lug typically last?
A properly repaired lug can last through several riding seasons if you maintain it correctly. The durability depends on your riding style and conditions. Mountain riding puts more stress on lugs, so repairs may not last as long in aggressive terrain. Regular inspection helps catch new damage before it spreads.
Why do my lugs keep tearing in the same spot?
Repeated tearing usually means something deeper is wrong. Track tension problems are the most common culprit. A track that’s too loose allows excessive movement and flexing. Your riding technique also matters. Consider checking your track tension and adjusting your riding style on rough terrain. If damage keeps returning after multiple repairs, your track may need replacement.
Should I repair a lug or replace the whole track?
Repair the lug if the damage is isolated and the rest of your track looks healthy. Replace the entire track only when you see widespread damage across multiple lugs or the track has reached the end of its life. Small tears grow bigger if ignored, so act quickly when you spot damage.

Hello, i’m Ivoria i am the face behind Tech Tracker Blog. I am passionate about my work and love to explore gadgets and share about my experience.