How To Fix Electric Toothbrush Motor Shaft Loosening?
Does your electric toothbrush feel wobbly or weak? A loose motor shaft is often the hidden culprit. This small internal part controls the vibration that powers your clean.
Over time, screws inside the handle can loosen. Debris and daily use also add extra stress to the shaft. The result? A shaky brush head and a less effective clean.
The good news is you can fix this at home. You do not need to buy a new toothbrush right away. With a few basic tools, you can repair the shaft yourself.
In a Nutshell
- Check the shaft first. A wobbly brush head almost always points to a loose internal shaft. This is the most common reason for weak vibration.
- Small tools get the job done. A precision screwdriver set helps you open the handle safely. Always wear basic safety gear during this step.
- Clean before you tighten. Debris around the connection point stops a proper fix. Wipe this area well before you touch any screws.
- Thread locker is your best friend. Apply it directly to the screw threads after tightening. This simple step prevents future loosening for good.
- Know when to stop. If parts inside the handle look worn or broken, repair may not help. In that case, reach out to the manufacturer instead.
- This fix works across brands. Most electric toothbrushes, including popular Sonicare and Oral-B models, share a similar internal design. The same steps apply to nearly all of them.
What Causes Motor Shaft Loosening in Electric Toothbrushes
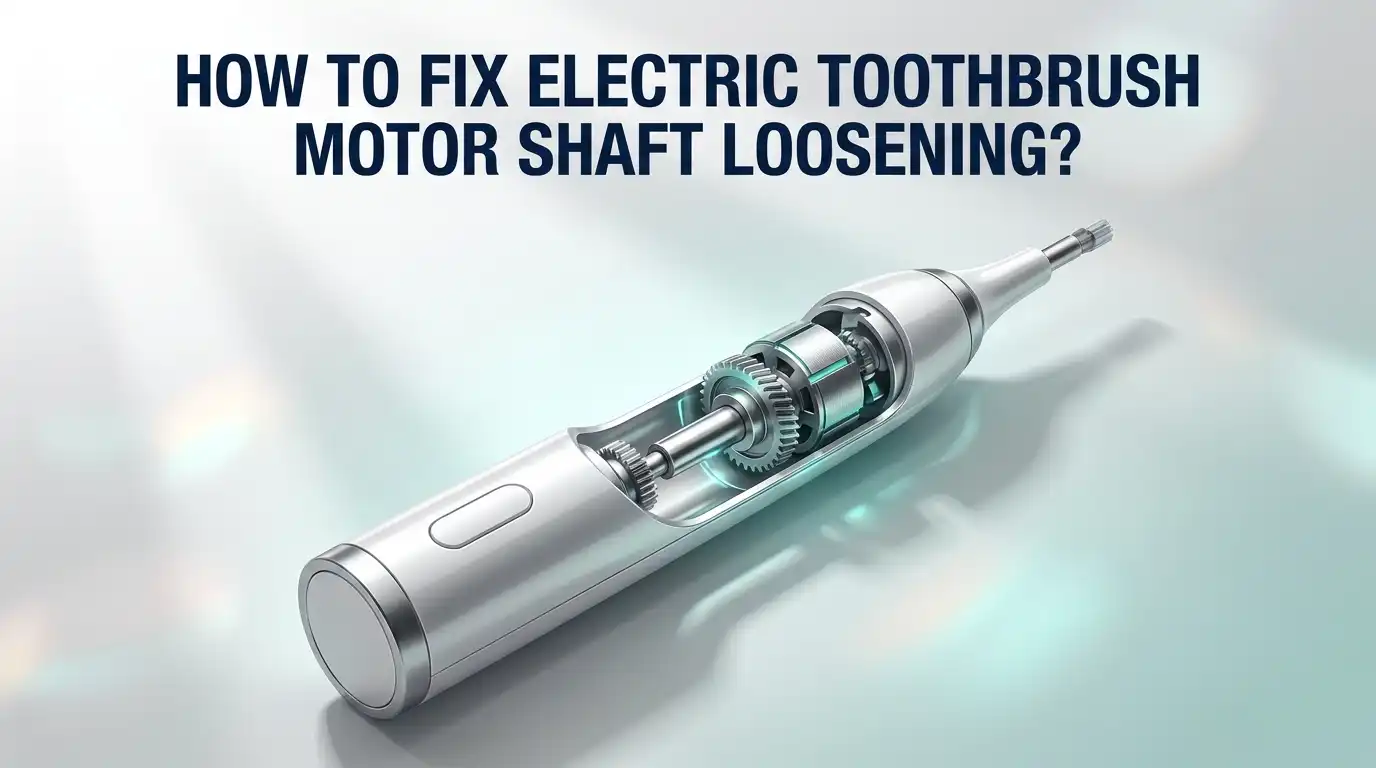
The motor shaft in your electric toothbrush sits deep inside the handle. It connects the motor’s spinning power to your brush head. When this shaft loosens, vibration becomes weak and the brush head wobbles side to side.
Several factors cause this problem. Repeated use creates friction that gradually loosens the screws holding the shaft in place. Each time you brush, tiny vibrations work against these fasteners. Over months or years, they slip out of position.
Moisture plays a major role too. Water seeps into the handle during cleaning or rinsing. This moisture corrodes the metal screws and weakens their grip. Corrosion essentially eats away at the connection between the screw and the shaft assembly.
Impact and pressure also contribute to loosening. Dropping your toothbrush or pressing too hard while brushing creates stress on internal parts. These forces push the shaft slightly out of alignment with each use.
Debris buildup is another common cause. Toothpaste residue, water minerals, and dust accumulate around the shaft connection. This debris prevents screws from sitting flush against the shaft. The result is a loose fit even when screws appear tight.
Manufacturing tolerances matter as well. Some toothbrushes have tighter internal tolerances than others. Models with looser tolerances tend to develop shaft problems faster.
The good news is that all these causes share one solution. Regular maintenance and proper tightening prevent most shaft loosening issues. Understanding these causes helps you prevent future problems after you complete your repair.
Signs Your Toothbrush Shaft Needs Repair
Your electric toothbrush sends clear warning signs when the motor shaft starts to loosen. Learning to spot these signals helps you catch the problem early and avoid further damage.
The most obvious sign is a wobbly brush head. When you hold the toothbrush, the head moves side to side instead of staying perfectly still. This movement happens because the metal shaft connecting the motor to the head has come loose from its mounting point.
Reduced vibration is another key indicator. Your toothbrush may feel weaker than normal, even with a fresh battery. The motor still runs, but the loose shaft prevents proper power transfer to the brush head.
Listen for unusual sounds coming from the handle. A loose shaft often creates rattling or clicking noises during operation. These sounds happen as the shaft moves inside the casing with each vibration cycle.
Pay attention to how the brush head sits on the handle. If it appears tilted or doesn’t align properly with the handle body, shaft loosening may be the cause.
Check if the brush head requires more force to insert or remove than it used to. A loose internal shaft changes how the connection mechanism operates.
You might also notice uneven brush head movement. Instead of vibrating smoothly in a consistent pattern, the head may move erratically or stutter during use.
Finally, examine the handle itself for any visible cracks or damage. Internal loosening sometimes causes stress that creates visible wear on the exterior plastic.
These signs tell you it’s time to inspect the internal shaft. Early action prevents the problem from worsening and keeps your toothbrush working effectively.
Tools and Safety Gear You’ll Need
You need just a few basic items to safely repair your electric toothbrush motor shaft. Gather these tools before you start taking anything apart.
A precision screwdriver set is your most important tool. This set includes small flathead and Phillips head screwdrivers that fit inside the toothbrush handle. Regular screwdrivers are too large and will damage the tiny screws.
Keep a small flashlight or headlamp nearby. You’ll need good light to see inside the handle once you open it. The motor shaft sits in a tight space, and shadows make it hard to spot looseness or debris.
Grab a soft cloth or microfiber towel for cleaning. You’ll use this to wipe away moisture, toothpaste residue, and dust around the shaft connection. A clean surface helps your repair hold better.
Thread locker solution prevents the shaft from loosening again after you tighten it. This liquid hardens around screw threads and keeps them secure. Apply it carefully to avoid getting it on other parts.
Have a small container ready for tiny screws. These pieces are easy to lose, so keep them in one spot while you work.
Wear safety glasses to protect your eyes from small metal pieces. These screws can pop out unexpectedly during disassembly.
Consider wearing cotton gloves for better grip and to keep oils off the internal parts. Moisture and skin oils can cause future problems.
A small brush or old toothbrush helps you clean tight spaces inside the handle. This removes stubborn debris that a cloth alone cannot reach.
These items cost very little and last through multiple repairs. Having everything ready before you start makes the entire process faster and safer.
Step-by-Step Guide to Fixing a Loose Motor Shaft
Start by powering off your toothbrush completely. Remove the brush head by twisting it counterclockwise or pulling it straight out, depending on your model.
Next, examine the metal shaft where the brush head connects. Look for visible wear, rust, or debris stuck in the grooves. Use your small flashlight to see inside the handle clearly.
Clean the connection area thoroughly with a soft cloth. Remove any toothpaste residue, mineral deposits, or debris. A small brush works well for tight spaces between the shaft and handle.
If cleaning doesn’t solve the problem, you’ll need to disassemble the internal assembly. Locate the small screws holding the motor housing together. Use your precision screwdriver to remove them carefully. Place each screw in your small container so you don’t lose them.
Once opened, inspect the metal shaft for damage or wear. Check that all internal components sit properly in place. Tighten any loose screws you find inside the motor housing.
Now apply thread locker directly to the screw threads before reinstalling them. This prevents the screws from loosening again due to vibration. Let the thread locker dry according to the product instructions before reassembling.
Carefully reassemble the motor housing by reversing your disassembly steps. Tighten each screw firmly but don’t overtighten, as this can strip the threads.
Reattach the brush head and test your toothbrush. The brush head should sit firmly without any wobbling. The vibration should feel consistent and strong across the entire brush head.
If problems persist after these steps, the internal motor components may be worn beyond repair. Contact the manufacturer for replacement options in that case.
How to Apply Thread Locker Correctly
Thread locker is a liquid compound that prevents screws from loosening due to vibration and movement. Your electric toothbrush motor shaft experiences constant vibration, which naturally causes fasteners to work themselves loose over time.
Preparation is key to success. Before applying thread locker, ensure the screw threads are completely dry and clean. Remove any debris, dust, or old lubricant from the shaft area using a soft cloth. A clean surface helps the thread locker bond properly to the metal.
Apply thread locker directly onto the screw threads themselves, not the surrounding area. Use a small amount only. Too much product creates excess that can drip into motor components and cause damage. A thin coat on the threads is all you need for an effective seal.
Insert the screw back into the shaft opening while the thread locker is still wet. This allows the compound to coat the threads as you tighten. Tighten the screw firmly but do not overtighten, as this can strip the threads or crack internal components.
Allow adequate curing time before use. Most thread lockers require 24 hours to fully harden. Check the product instructions for your specific type. During this time, keep your toothbrush stationary and do not attempt to use it.
After curing, test the brush head connection. It should feel solid with no wobbling or movement. The thread locker creates a permanent bond that resists vibration far better than tightening alone.
This simple step prevents your motor shaft from loosening again in the future. Combined with proper tightening technique, thread locker provides long lasting results for your electric toothbrush repair.
Common Mistakes to Avoid During Repair
One major mistake people make is skipping the cleaning step. Many users try to tighten the shaft without removing debris first. Dust and dried toothpaste particles prevent proper connections and cause the same problem to return quickly.
Don’t rush the disassembly process. Moving too fast can damage small plastic clips or strip screw heads. Take photos as you remove each part so you remember how everything fits back together.
Another common error is applying thread locker incorrectly. Some people coat the entire screw or the shaft opening instead of the threads themselves. This wastes the product and reduces its effectiveness. Thread locker works best when applied directly to the screw threads before insertion.
Forgetting to let thread locker cure fully is a critical mistake. Many users reassemble their toothbrush immediately after applying it. The compound needs time to harden properly, usually about 24 hours. Using the toothbrush too soon means the screw will loosen again.
Avoid over tightening the shaft. Forcing the screw too hard can crack the plastic housing or damage the internal metal shaft. Tighten until snug, then stop.
Some people fail to inspect for actual wear or damage. If the metal shaft itself is bent or the plastic connection point is cracked, tightening alone won’t help. You may need replacement parts in these cases.
Finally, don’t skip the test phase. After reassembly, turn on your toothbrush and check for wobbling before regular use. This catches problems early and prevents further damage to the motor.
Troubleshooting: When Repair Isn’t Enough
Sometimes your electric toothbrush motor shaft stays loose even after you’ve tried basic fixes. This happens when the internal damage goes deeper than simple tightening can solve. You need to know when repair stops working and what your options are.
Worn metal components cause persistent loosening that thread locker alone cannot fix. If the shaft threads are stripped or damaged, no amount of tightening will keep the connection secure. The metal simply no longer grips the screw properly. Similarly, if the plastic housing around the shaft is cracked or broken, the shaft has nothing to anchor against.
Motor bearings can also wear out over time. When bearings deteriorate, the entire shaft wobbles regardless of how tight you make it. You’ll notice the brush head moving side to side even when the screw feels snug. This indicates internal motor wear rather than a loose connection.
Identifying permanent damage requires honest assessment. Disassemble the toothbrush and look for visible cracks in the plastic housing. Check if the metal shaft itself is bent or corroded. Examine the screw threads under good lighting to see if they’re stripped or flattened.
Contact the manufacturer if you find significant damage. Many companies offer repair or replacement programs for internal motor failures. Some provide warranty coverage depending on your purchase date. Attempting further repairs on severely damaged components risks breaking other parts.
Disposal becomes necessary when repair costs exceed replacement costs. Most retailers and manufacturers accept old electric toothbrushes for proper recycling. Check local electronic waste programs in your area. This ensures harmful materials get handled safely and responsibly.
Tips to Prevent Future Shaft Loosening
Preventing shaft loosening starts with understanding what causes the problem in the first place. Vibration from daily use gradually loosens screws inside your toothbrush handle. You can stop this from happening by taking a few simple steps.
Regular cleaning is your first defense. Remove the brush head after each use and wipe the connection area dry. Moisture and toothpaste debris can weaken the grip between components. A quick dry cloth keeps everything secure longer.
Check your brush head connection weekly. Gently wiggle the head side to side while it’s attached. If you feel any movement, tighten it immediately before the problem gets worse. Catching looseness early prevents damage to internal parts.
Apply thread locker during routine maintenance. Even if your shaft feels tight now, a small amount of thread locker on the screws provides insurance against future problems. You don’t need to disassemble everything. Just remove the brush head, apply a tiny drop to visible screws, and reattach the head. This takes two minutes.
Store your toothbrush upright in a dry location. Laying it flat or storing it in damp environments can loosen connections over time. A simple cup or holder keeps it stable and dry.
Avoid dropping your toothbrush on hard surfaces. Impact can loosen internal screws instantly. Handle your device with care, especially around the handle and brush head area.
Finally, replace your brush head regularly according to the manufacturer’s guidelines. Worn heads put extra stress on the shaft connection. Fresh heads fit more snugly and reduce unnecessary vibration that causes loosening.
Final Thoughts
Fixing a loose motor shaft is a simple task you can handle at home. You just need basic tools and a bit of patience.
Cleaning, tightening, and applying thread locker solves most shaft problems. This process works for many electric toothbrush brands and models.
Your toothbrush deserves regular care to keep it working well. Small maintenance steps now save you money later.
Skipping steps often causes repairs to fail. Take your time during each stage of the process.
Rushing leads to mistakes that damage internal parts. Careful work always produces better results than fast work.
Sometimes a shaft problem points to bigger issues inside the handle. Worn bearings or damaged components need professional attention.
Know when a repair job becomes a replacement decision. This choice depends on your toothbrush age and repair costs.
Cheap toothbrushes may not justify repair time and materials. Expensive models often make repair the smarter choice.
Think about your daily habits after finishing repairs. Good habits prevent future shaft problems from happening again.
Store your brush properly and clean it after each use. These simple actions extend your toothbrush life significantly.
Your effort today creates a toothbrush that lasts longer. This means better oral care and less money spent on replacements.
Electric toothbrushes serve you well when properly maintained. Basic repair skills empower you to handle minor issues yourself.
Don’t feel intimidated by opening your toothbrush handle. With careful steps, you can fix common problems confidently.
Trust the process outlined here for reliable results. Your toothbrush will thank you with smooth, steady performance.
Remember that prevention beats repair every time. Build good habits now and enjoy a dependable toothbrush for years ahead.
Frequently Asked Questions
Why does my brush head wobble side to side?
A wobbly brush head almost always means the motor shaft has loosened inside the handle. The shaft connects your brush head to the motor. When screws loosen over time, the connection becomes unstable. You’ll notice the brush head moves more than it should during use.
This wobbling reduces the toothbrush’s cleaning power. The vibrations become uneven and weak. The good news is this problem has a simple fix in most cases.
Can I fix a loose shaft myself without special tools?
Yes, you can fix it at home. You need a precision screwdriver set with small tips. These sets cost very little and work on most electric toothbrush models.
Start by removing the brush head completely. Look inside the connection area for visible screws. Clean away any debris or toothpaste buildup first. Then tighten each screw gently but firmly. Apply thread locker to the screw threads before reinstalling them. This prevents the same problem from happening again.
What is thread locker and how do I use it?
Thread locker is a liquid adhesive that keeps screws from loosening. It comes in small bottles at hardware stores. You apply just a tiny drop directly onto the screw threads before tightening.
Let it dry completely before using your toothbrush. This usually takes 24 hours. Thread locker works by creating friction that holds the screw in place permanently.
When should I replace my toothbrush instead of repairing it?
Replace your toothbrush if internal metal parts show significant wear or damage. Bent shafts or worn motor bearings cannot be fixed with thread locker alone. Contact the manufacturer if you discover deep damage inside the handle.
Cheap toothbrushes may not be worth the repair time and effort.

Hello, i’m Ivoria i am the face behind Tech Tracker Blog. I am passionate about my work and love to explore gadgets and share about my experience.