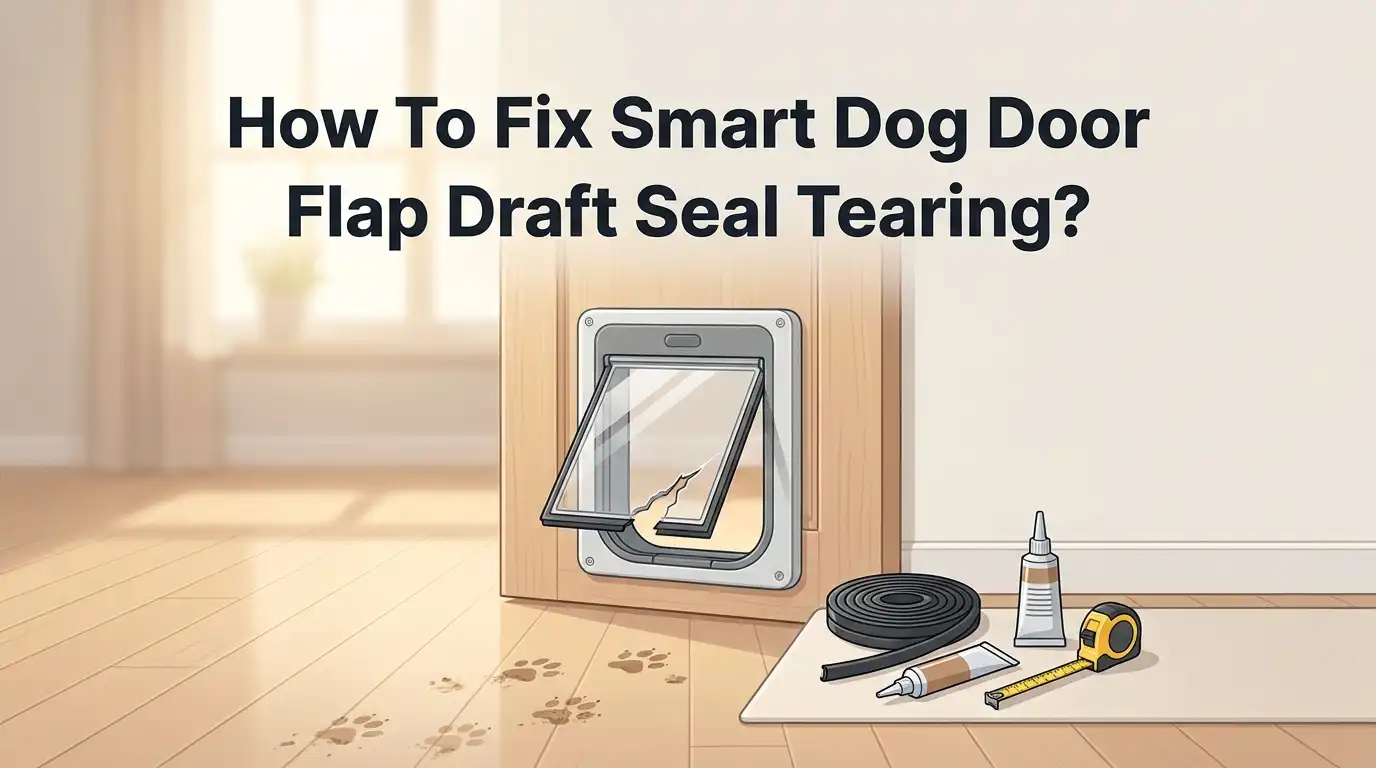
How To Fix Smart Dog Door Flap Draft Seal Tearing?
Does your smart dog door flap have a torn draft seal? You are not alone. Many pet owners face this problem after months of daily use.
A torn seal lets cold air sneak into your home. It also lets warm air escape during summer. This makes your energy bills climb higher each month.
The good news? You can fix this issue without buying a whole new door. Small tears often need simple repairs. Bigger tears might need a fresh flap assembly.
This guide walks you through every step. We cover quick temporary fixes for those in a hurry. We also explain permanent solutions that last for years.
In a Nutshell
- Check magnet alignment first. Many draft problems come from misaligned magnets. Pinch the frame sides and remove the threshold to fix this quickly.
- Stretch the bellows on a flat surface. Apply gentle heat and let the material reconnect to the frame magnet. This restores the seal without full replacement.
- Clean the surface thoroughly before adding any adhesive. Skipping this step causes patches to peel off fast.
- Use adhesive foam weather stripping for small gaps. It seals drafts and stays flexible in changing temperatures.
- Glue rubber strips to the frame edges for extra protection. This overlaps sliding door gaps and blocks cold air.
- Replace the whole flap assembly if tears are severe. Patching only works for minor damage. Full replacement saves you from repeat repairs.
Small fixes work for small tears. Bigger tears need bigger solutions. Follow these steps in order for the best results.
Why Draft Seals Tear on Smart Dog Door Flaps
Draft seals on smart dog door flaps tear for several clear reasons. Understanding these causes helps you prevent future damage and fix current problems.
Temperature changes create the biggest problem. Your door flap expands and contracts as temperatures shift between seasons. This constant movement stresses the seal material over time. The plastic becomes brittle and eventually cracks or tears.
Weather exposure damages seals rapidly. Rain, snow, and UV sunlight break down the rubber and plastic compounds. Moisture seeps into small cracks and freezes during cold months. This expansion forces the tears to grow larger.
Pet activity wears seals faster than you might expect. Dogs push the flap open repeatedly throughout the day. Their nails scratch the surface. Their weight presses against the seal edges. Over months, this constant friction weakens the material.
Poor magnet alignment causes uneven stress on the seal. When magnets don’t line up properly, the flap doesn’t close evenly. One side bears more pressure than the other. This imbalance creates tear points at stress zones.
Shipping damage sometimes causes initial tears. Smart dog doors arrive with bent or creased flaps. The plastic doesn’t recover fully. These weak spots tear easily once the door operates.
Low quality materials fail faster in harsh conditions. Some seals use thinner rubber compounds. These break down quicker under normal use. Budget models often experience premature seal failure.
Improper installation creates gaps that expand into tears. If the frame doesn’t sit flush against your door, the seal stretches unevenly. Air pressure and temperature fluctuations then exploit these weak points.
Recognizing these causes helps you choose the right repair method for your specific situation.
Signs Your Flap Seal Needs Attention
Your smart dog door flap seal shows specific warning signs before complete failure happens. Knowing these signs helps you fix problems early and avoid bigger damage later.
Look for visible cracks or splits in the rubber material around your flap edges. Even small tears grow quickly when your pet pushes through the door repeatedly. Run your hand along the seal and feel for rough spots or separation from the frame.
Check for cold air drafts coming from around the flap area. Stand near the door on a cold day and feel where air moves. You might notice temperature differences on different sides of the door. This indicates the seal no longer blocks air properly.
Inspect magnet alignment carefully. The flap should sit flat and centered when closed. If it hangs unevenly or tilts to one side, magnets need realignment. Misaligned magnets force the seal material to stretch unnaturally and tear faster.
Watch for gaps between the flap and frame. These spaces let drafts escape directly into your home. Gaps mean the bellows material has lost its flexibility and won’t spring back into position.
Notice moisture or frost around the door edges during humid or cold weather. This shows warm inside air meets cold outside air at the seal location. The seal fails to create a proper barrier.
Listen for rattling or flapping sounds when wind blows outside. This noise means the flap moves too freely and the seal has lost tension. The material no longer holds the flap securely in place.
Catching these signs early makes repairs simpler and cheaper than waiting for complete seal failure.
Tools and Materials Needed Before You Start
Before you start fixing your smart dog door flap draft seal, gather the right tools and materials. Having everything ready makes the repair faster and more effective.
Basic hand tools help with disassembly and reassembly. You’ll need a flathead screwdriver to gently pry open the frame sections. A Phillips head screwdriver works for any fasteners holding the flap assembly in place. Needle nose pliers help you remove small pins or clips that hold magnets in position. Keep a flashlight nearby to see inside tight spaces clearly.
Cleaning supplies are essential before any repair work. Grab a soft cloth or microfiber towel for wiping surfaces. Rubbing alcohol removes dust, dirt, and old adhesive residue that prevent new sealants from bonding properly. A plastic scraper helps lift stubborn debris without scratching the frame.
Adhesive and sealing materials form the core of your repair kit. Adhesive foam weather stripping comes in rolls and sticks directly to surfaces. Silicone caulk works well for sealing gaps around frame edges. Flexible rubber cement bonds torn sections temporarily if replacement isn’t immediately possible.
Protective materials help with temporary fixes while you order replacements. Heavy duty tape serves as a quick patch for small tears. Plastic sheeting blocks drafts during extreme weather until permanent repairs happen.
Optional but helpful items include a heat gun for softening bellows material and a work surface like cardboard or a utility mat for laying out parts during disassembly. Keep a container nearby for organizing small screws and magnets so nothing gets lost.
Organizing your workspace before starting prevents frustration and lost pieces during the repair process.
Step-by-Step: Realigning Magnets and Stretching the Bellows
Realigning your magnets is the first critical step when your flap seal tears. Start by carefully removing the threshold. Pinch the frame sides gently until the threshold pops out. This gives you access to the magnet system underneath.
Inspect both magnets closely. Look for magnets that sit at angles or positions that don’t match each other. Misaligned magnets create uneven pressure on your flap material. This stress concentrates in weak spots and causes tearing over time.
Reposition each magnet so they face each other directly and sit at equal distances from the flap. Use your fingers to adjust them slowly. Check alignment by looking from the side to ensure they’re parallel. Proper alignment distributes pressure evenly across your entire seal.
Next, you’ll address the bellows. Remove the bellows carefully from the frame magnet. Place it on a flat work surface like a utility mat or cardboard. Bellows material often becomes stiff or compressed, which prevents proper sealing.
Apply gentle heat using a heat gun on low setting. Hold it several inches away from the bellows. Move it slowly across the material for 30 to 60 seconds. Heat softens the material and restores its flexibility.
Stretch the bellows gently by hand. Pull it slightly longer than its original length. This increases its ability to compress and expand smoothly against the flap.
Allow the bellows to cool completely. This helps it retain its new stretched shape. Reconnect it to the frame magnet once it’s cool.
Clean all surfaces thoroughly before reassembling. Dust and debris prevent proper magnet contact. Wipe everything with a dry cloth. This simple step prevents most alignment problems from returning quickly after your repair finishes.
Step-by-Step: Patching and Sealing Torn Sections
When your flap seal tears, patching and sealing those torn sections stops drafts from entering your home. Start by cleaning the damaged area completely with a dry cloth or mild cleaner. Remove any dirt, dust, or debris that might prevent adhesive from bonding properly.
For small tears, adhesive foam weather stripping works well. Cut a piece slightly larger than the damaged area. Press it firmly onto the torn section and hold for several seconds to ensure good contact. This material compresses slightly, filling gaps and creating an airtight seal around the damage.
For larger tears in the rubber material, you’ll need a different approach. Clean the torn edges carefully and let them dry completely. Apply a flexible adhesive designed for rubber surfaces along the edges of the tear. Press the torn sections together and hold them firmly for the time recommended by your adhesive product.
Once the adhesive sets, reinforce the repair by applying foam weather stripping over the patched area. This adds an extra layer of protection and improves the seal quality significantly.
Check your magnet alignment after patching. Magnets must face each other directly and sit at equal distances from the flap. Misaligned magnets prevent the flap from closing properly, which defeats your sealing efforts.
Important note: temporary patches work for small damage, but severe tears across large sections require full flap replacement. Patching only delays the inevitable if the tear extends more than a few inches or if multiple tears exist in different areas.
Test your repair by checking for drafts around the flap edges. Run your hand around the perimeter to feel for air movement. If drafts persist, you may need to repeat the sealing process or consider replacing the entire flap assembly.
When to Replace the Entire Flap Assembly
When your smart dog door flap experiences severe damage, replacing the entire flap assembly becomes the best solution. You should consider full replacement when tears span large sections of the rubber material or when multiple damage points exist across the flap.
Severe structural damage makes partial repairs ineffective. If the flap no longer seals properly after patching attempts, the internal framework may be compromised. Bent plastic sheets or warped bellows material often cannot be straightened successfully. These issues develop from shipping damage or years of wear and tear.
Signs that replacement is necessary include flaps that no longer respond to magnet alignment, persistent drafts despite multiple sealing attempts, and visible cracks in the plastic frame. When the bellows material becomes brittle or loses its flexibility, heating and stretching no longer work.
Replacing the entire assembly takes several hours but provides a permanent solution. You’ll need to remove the current flap by unclipping it from the frame or unscrewing mounting brackets. Most smart dog doors have standardized flap assemblies that fit into existing frames without additional modifications.
Order the replacement flap assembly from the manufacturer before removing your current one. This prevents leaving your door without protection during the repair. Installation typically involves sliding the new flap into the frame and securing it with clips or screws.
New flap assemblies come with fresh magnets, new rubber seals, and intact bellows material. This restores your door’s draft prevention to like new condition. The investment in replacement costs less than continuous energy loss from a damaged seal. Your home maintains proper temperature control, and your dog enjoys reliable door access.
Common Mistakes That Cause Repeat Tearing
Most people damage their smart dog door flap seal repeatedly because they skip basic prep work. Rushing into repairs without cleaning the surface first is the biggest mistake. Dirt, dust, and pet hair prevent adhesives from bonding properly. Your patch will fail within days if the surface isn’t clean.
Another common error is forcing the flap back into place without checking magnet alignment. Misaligned magnets create uneven pressure on the seal material. This causes stress points that tear again quickly. Take time to inspect both magnets and ensure they face each other directly.
Many people attempt partial fixes instead of addressing the root cause. They patch one tear, but the underlying problem remains. If the bellows material is stretched or the magnets are weak, new tears will appear in different spots. You’re treating symptoms rather than solving the actual issue.
Applying sealant over dirty or damp surfaces ranks high on the mistake list. Moisture prevents adhesive from setting correctly. Your repair becomes a temporary bandage instead of a lasting fix.
People also overlook magnet strength issues. Weak magnets don’t hold the flap securely, causing excessive movement and friction. This movement accelerates seal deterioration. Check whether your magnets still hold firmly together.
Finally, many owners ignore small tears thinking they’ll go away. Early damage spreads quickly, especially in high traffic areas. What starts as a minor rip becomes a major problem within weeks.
The solution is simple: clean thoroughly, check your magnets, address the actual cause, and allow proper drying time. These steps prevent frustration and repeat failures.
Troubleshooting Persistent Draft and Malfunction Issues
When your smart dog door flap draft seal starts tearing, you need to identify what’s causing the problem before attempting any fix. Persistent draft issues often stem from magnet misalignment rather than the seal itself. Check if your flap closes completely and sits flush against the frame. A gap means magnets aren’t positioned correctly.
Start by removing the threshold. Pinch the frame sides gently to release it. Once removed, examine how the flap sits. The magnets should pull the flap snugly against the door opening. If they don’t, realign them carefully and test the closure again.
For torn bellows material, you’ll need to stretch it on a flat surface first. Apply gentle heat to make the material more pliable. This allows the bellows to reconnect properly to the frame magnet without additional stress on the tear.
Surface preparation is absolutely critical before applying any sealant. Wipe down the damaged area completely with a dry cloth. Remove dust, debris, and any moisture. Dirty surfaces prevent adhesive from bonding correctly, which causes your repair to fail quickly.
After cleaning, apply adhesive foam weather stripping directly over the torn section. Press firmly and allow the adhesive to set fully according to package instructions. Don’t rush this step.
Once sealed, test your flap operation multiple times. Open and close it gently to ensure the magnets still function properly. Check around all edges for drafts using your hand to feel for air movement.
If your flap continues malfunctioning after these steps, the damage likely runs deeper than surface tears. Severe structural damage requires replacing the entire flap assembly rather than patching individual sections.
Final Thoughts
Fixing a torn draft seal does not have to feel overwhelming. Most tears happen because of skipped prep work or misaligned magnets. Once you understand this, small repairs become simple.
Start with the basics every time. Clean the surface before you apply any adhesive or sealant. This one step prevents most repeat failures.
Check your magnets first. Many owners rush to patch bellows or flaps without testing magnet alignment. A weak or misaligned magnet causes ongoing drafts even after a repair.
Temporary fixes work well for minor tears. Adhesive foam weather stripping or rubber strips can seal small gaps quickly. These solutions buy you time without major cost or effort.
Severe tears need a different approach. If your flap no longer responds to magnets or drafts persist despite patching, replacement is the right call. Trying to force a damaged flap back into service usually leads to bigger problems later.
Test your flap after every repair. Open and close it several times to confirm the seal holds and the magnet reconnects properly. This quick check saves you from repeating the same fix next week.
Think of seal maintenance as routine care, not a one time job. Regular inspection catches small tears before they turn into bigger drafts. A few minutes of checking each month keeps your door working well.
Whether you patch a small tear or replace the whole assembly, the goal stays the same. You want a tight seal that blocks drafts and lets your dog pass through easily. Follow these steps, and your smart dog door will stay efficient for a long time.
Frequently Asked Questions
Why does my smart dog door flap tear so easily?
Draft seal flaps tear for several reasons. Repeated friction from your dog pushing through causes wear over time. Improper magnet alignment forces the flap to stick or bind, creating extra stress. Shipping damage can also weaken the plastic material before you even install it.
Temperature changes make the problem worse. Cold weather shrinks materials while heat expands them. This constant movement creates small cracks that grow larger. Poor installation or misaligned frames adds unnecessary pressure to the seal.
Can I use a temporary patch on a torn flap?
Yes, temporary patches work well for minor tears. An adhesive foam weather stripping applied directly over the tear stops drafts quickly. This buys you time while you plan a permanent fix.
Clean the area thoroughly before applying any patch. Moisture or dirt prevents adhesive from sticking properly. Press the patch firmly and allow it to set for several hours. Test your flap multiple times to ensure it still opens and closes smoothly.
When should I replace the entire flap assembly?
Replace the whole assembly when tears are severe or when patching fails. If your flap no longer responds to magnets or drafts persist after multiple repair attempts, replacement becomes necessary.
Small surface tears respond well to patches. Deep tears, bent plastic, or damaged bellows material usually require full replacement. A completely torn flap also affects your home’s insulation and your dog’s comfort.
How do I prevent future flap tears?
Check your magnet alignment regularly. Proper alignment reduces stress on the flap material. Keep the frame clean and free of debris that could interfere with movement.
Inspect your flap monthly for small tears. Catching damage early prevents it from spreading. Consider your climate. In extreme temperatures, check your flap more often since material stress increases.

Hello, i’m Ivoria i am the face behind Tech Tracker Blog. I am passionate about my work and love to explore gadgets and share about my experience.