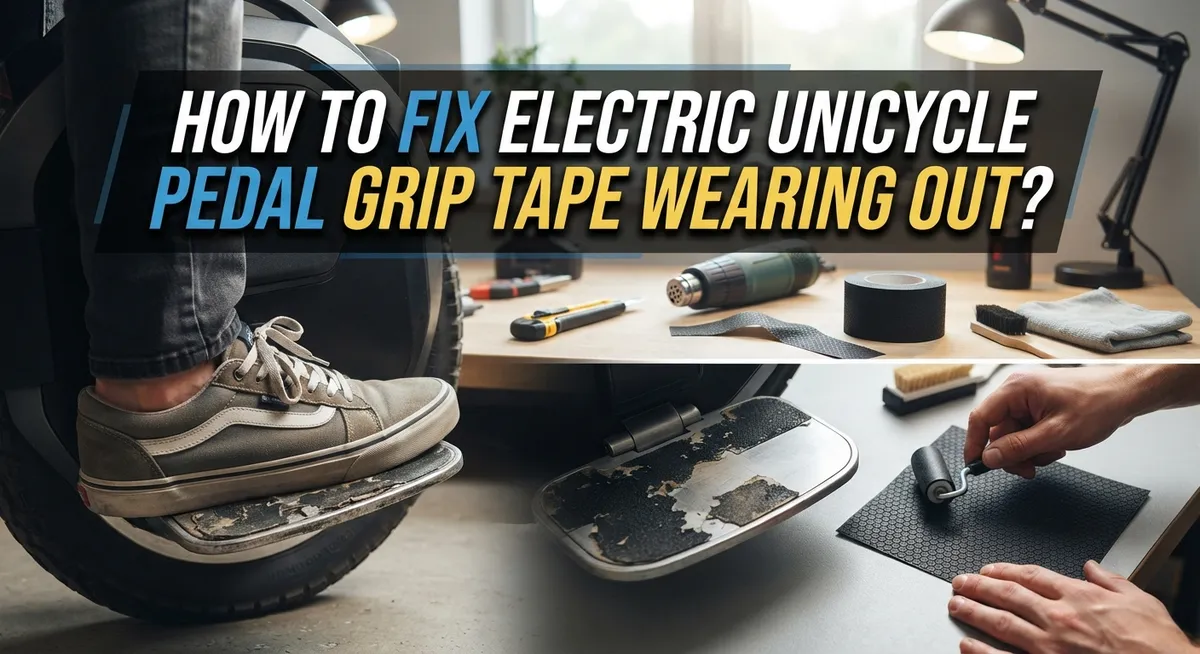
How To Fix Electric Unicycle Pedal Grip Tape Wearing Out?
Your electric unicycle feels less steady lately. You notice your feet slipping on the pedals during rides. This is a common problem, and it usually points to one thing: worn out grip tape.
Grip tape takes a beating every time you ride. Rain, dirt, and constant foot pressure wear it down over time. Once it loses its texture, your control and safety take a hit too.
The good news? You can fix this yourself. No need to spend hundreds of dollars on professional repairs. With a few tools and some patience, you can restore your pedals to their original grip.
This guide walks you through the entire process. We will cover how to remove old, worn tape safely. You will learn how to clean and prep your pedals properly. We will also show you how to apply new grip tape the right way.
In a Nutshell
- Remove old tape first. Use a heat gun or blow dryer to loosen the adhesive. This makes peeling much easier.
- Clean pedals completely. Wipe away all old glue residue. Dirty pedals stop new tape from sticking well.
- Align tape with pedal pins. Peel the backing off new grip tape. Match it up with existing pins for a snug fit.
- Press down firmly. Apply strong pressure across the entire surface. This step gets skipped often, and it causes early peeling.
- Trim edges carefully. Cut tape slightly bigger than needed. File down rough edges so nothing feels sharp under your feet.
- Check wear regularly. Most riders replace tape around every 2000 miles. Visible smoothness or peeling means it’s time.
- Consider extra layers. Cloth tape or foam padding adds comfort. This also helps tape last longer between replacements.
This whole process takes less than an hour. You save money by skipping professional service fees.
Signs Your Pedal Grip Tape Needs Replacing
Your feet tell you when grip tape is failing. Pay attention to what your body communicates during rides.
Slipping sensations happen first. Your shoes slide slightly on the pedals, especially during acceleration or when climbing hills. You notice your feet shifting position more often than before. This is the earliest warning sign that grip is declining.
Visible wear patterns appear next. Look at your pedals in good light. You’ll see shiny, smooth spots where the grip texture has worn away. These bare patches show where your shoes make contact most. The tape looks faded or polished in those areas.
Reduced traction in wet conditions becomes obvious quickly. Grip tape works fine when dry, but fails immediately when damp. If your feet slip during light rain or morning dew, the tape is near the end. This is a safety concern you shouldn’t ignore.
Peeling edges signal that adhesive is failing. Check where the tape meets the pedal edges. If corners lift up or curl away, replacement time is here. Peeling tape also catches on your shoes and feels uncomfortable.
Difficulty maintaining foot position during tricks or uneven terrain means the tape can’t hold your feet anymore. Your shoes wander around the pedal surface instead of staying locked in place.
Audible crunching or crackling sounds indicate the tape is breaking down internally. The material loses its grip structure over time.
Check your pedals monthly during regular maintenance. Catching these signs early prevents accidents and keeps your rides smooth. Most riders notice multiple signs appearing together, not just one. When you see two or more of these indicators, ordering replacement grip tape makes sense.
Tools and Materials You’ll Need
Before you start replacing grip tape, gather the right equipment. Having everything ready makes the job faster and prevents frustration halfway through.
Heat source removes old tape without damage. A heat gun works best, but a blow dryer does the job too. Heat softens the adhesive so tape peels away cleanly instead of tearing into pieces.
Cleaning supplies matter more than most people realize. Get rubbing alcohol and clean rags to remove all old glue residue. Leftover adhesive prevents new tape from sticking properly. A plastic scraper helps lift stubborn bits without scratching your pedals.
New grip tape comes in rolls or pre cut sheets. Standard skateboard grip tape works fine for unicycle pedals. Make sure you have enough to cover both pedals with some extra for mistakes.
Cutting tools keep edges neat and safe. A utility knife or box cutter trims tape precisely. A metal file smooths sharp edges after cutting so your feet don’t get scratched.
Pressure tools ensure strong adhesion. Your hands work fine, but a rubber roller or old credit card applies even pressure across the entire surface. This prevents bubbles and weak spots.
Optional items add durability. Cloth tape reinforces edges. Foam padding underneath provides comfort on longer rides. Sandpaper (120 grit) roughens the pedal surface for better new tape adhesion.
Safety gear protects you during removal. Wear gloves when using heat sources. Eye protection shields you from peeling tape bits. A dust mask catches particles if you sand the pedal surface.
Most jobs need just five to seven items total. Check your garage first before buying anything new.
Removing Old Grip Tape Safely
Start by gathering your heat source. A heat gun works best, but a blow dryer on high heat does the job too. The goal is to soften the adhesive without damaging the pedal underneath.
Hold the heat source about 6 inches from the grip tape. Move it slowly across the surface for 30 to 60 seconds. You’ll notice the tape becoming more flexible as the glue warms up.
Begin peeling from one corner. Work slowly and steadily. If the tape resists, apply more heat to that section. Rushing this step can tear the tape into small pieces, making cleanup harder later.
Use a plastic scraper or old credit card to lift stubborn edges. Metal scrapers can scratch your pedals, so avoid them. The plastic tool gives you enough leverage without causing damage.
Once the tape comes off, you’ll see adhesive residue stuck to the pedal surface. This leftover glue must go completely. Wipe the pedal with a damp cloth first to loosen the residue.
For sticky spots that won’t budge, apply heat again and scrape gently. Some riders use rubbing alcohol on a cloth to dissolve stubborn adhesive. Let the alcohol sit for a minute before wiping.
Dry the pedal thoroughly with a clean towel. Any moisture left behind will prevent new tape from sticking properly. Wait five minutes after drying to ensure the surface is completely dry.
Inspect the pedal for damage. Small scratches are normal and won’t affect new tape adhesion. Deep gouges or dents should be noted, as they may cause uneven tape application later.
Your pedal is now ready for fresh grip tape.
Step-by-Step Guide to Applying New Grip Tape
Start by measuring your pedal surface to determine how much new grip tape you need. Unroll the grip tape and lay it flat on a clean work surface. Position the backing so you can see the adhesive side clearly.
Align the grip tape with your pedal shape. Most electric unicycle pedals have pin positions or markers that help guide placement. Position the tape so it covers the entire foot contact area while leaving space around the edges for trimming.
Peel back a small section of the backing paper, about two inches. Press this initial section firmly onto the pedal. Use steady, even pressure to create a strong bond. Avoid air bubbles by smoothing as you go.
Continue peeling the backing paper slowly while pressing down the grip tape. Work from one end to the other in a controlled motion. Apply consistent pressure across the entire surface to ensure proper adhesion.
Once fully applied, use a file or sandpaper to trim any overhang. Round off sharp corners carefully. This prevents edges from catching on your shoes or clothing during rides.
For extra durability, consider adding a second thin layer of cloth tape over the top. This protects your grip tape from quick wear and extends its lifespan significantly.
Let the adhesive cure for at least two hours before riding. Some adhesives benefit from a full 24 hour curing period for maximum strength.
Test the grip by running your hand across the surface. The tape should feel rough and secure with no loose sections. Your pedals are now ready for normal use. Monitor the edges over the next few weeks to catch any peeling early.
Enhancing Durability with Extra Layers or Hardware
Adding extra layers and hardware upgrades transforms your pedal grip from basic to bulletproof. This approach extends the life of your grip tape significantly.
Foam layer reinforcement works by placing a thin foam backing under your grip tape. The foam absorbs impact and reduces stress on the adhesive. Cut foam to match your pedal shape exactly. Apply the foam first, then add grip tape over it. This combo prevents the tape from peeling at edges during hard riding.
Cloth tape wrapping provides an additional protective barrier. After your main grip tape dries, wrap cloth tape around the pedal edges and underneath. Cloth tape handles moisture better than standard grip tape alone. It also protects the edges where peeling typically starts. Use quality cloth tape that resists fraying.
Hardware reinforcement involves adding studs or spikes to your pedal surface. Stainless steel hardware (3 to 4mm size) anchors grip tape more effectively. Install studs before applying grip tape so the tape sits flush. Studs create mechanical grip in addition to adhesive grip. This dual system prevents slipping even when tape wears thin.
Layering strategy means combining multiple methods. Start with foam, add grip tape, wrap cloth tape around edges, then install studs. This takes more time but creates maximum durability. Your pedals will last through 3000 plus miles instead of 2000.
Maintenance matters even with these upgrades. Check your pedals monthly for any lifting edges. Press down firmly on any loose spots. Clean your pedals regularly to prevent dirt buildup under the tape. These simple habits keep your enhanced pedals performing well between replacements.
Common Mistakes to Avoid During Replacement
When replacing grip tape, many riders make simple mistakes that cause the job to fail. Understanding what to avoid saves time and money.
Insufficient pressure is the biggest error. Many people press the new tape down lightly, thinking it will stick on its own. The adhesive needs firm, consistent pressure across the entire surface. Use your palm or a roller tool to press hard for several minutes. Light touching won’t create a strong bond, and the tape will peel up within days.
Not removing all old adhesive causes serious problems. Leftover sticky residue prevents new tape from adhering properly. Even small patches of old glue create weak spots. After heat removal, inspect the pedal carefully. Use a plastic scraper to remove every trace of adhesive. Wipe the surface with a clean cloth and let it dry completely before applying new tape.
Improper trimming creates safety hazards. Rough or sharp edges can cut your feet during rides. File the edges smoothly after applying new tape. Work slowly and carefully around the pedal perimeter. Overhang that extends beyond the pedal edges should be trimmed flush.
Another common mistake is applying tape while the pedal surface is wet or dusty. Any moisture or debris traps air bubbles and weakens adhesion. Always ensure the pedal is bone dry and clean before starting.
Finally, rushing the curing process damages your work. New adhesive needs time to set properly. Wait at least two hours before riding, even if the tape feels dry. This patience ensures your replacement grip tape lasts thousands of miles instead of weeks.
Troubleshooting Grip Issues After Reinstallation
After you reinstall fresh grip tape, problems can still happen. The tape might feel loose, slip during rides, or peel at the edges. Let me help you fix these issues.
Tape feels loose or shifts during riding
This usually means the adhesive didn’t bond properly. Check if you pressed down firmly across the entire pedal surface. Many riders apply light pressure and expect the tape to stick. It won’t. You need to press hard for at least 30 seconds on each section.
If the tape is already installed and loose, remove it carefully and reapply with stronger pressure. Use a roller or your palm to create even contact across the whole pedal.
Tape peels at the edges
Edges peel when they don’t make full contact with the pedal. This happens if you didn’t trim properly or if moisture got under the tape. Remove the peeling section gently and repress it down firmly. If it won’t stay, you may need to reapply that section with fresh tape.
Slipping happens during rides
Your shoes matter here. Smooth soled shoes slip more than textured ones. Wear shoes with good grip patterns on the bottom. If your footwear is fine, the tape surface might be too smooth. Some riders add a thin cloth layer on top for extra texture.
Sharp edges cause discomfort
After trimming, file the edges smooth. Rough edges can cut your feet or catch on your shoes. Sand all trimmed areas until they feel smooth to your touch.
Let your adhesive cure for two full hours before riding hard. Rush this step and your work fails.
Maintaining Grip Tape for Longer Lifespan
Grip tape degrades naturally over time through constant friction and exposure to moisture. Understanding how to extend its lifespan saves you money and keeps your rides safe. The key is prevention combined with smart maintenance habits.
Wear the right footwear to reduce unnecessary wear. Shoes with smooth soles create less friction against grip tape than rough or textured boots. Avoid dragging your feet or shifting your weight aggressively during rides. Every unnecessary movement accelerates tape breakdown.
Keep your pedals dry whenever possible. Moisture weakens the adhesive bond between tape and pedal surface. After riding in wet conditions, wipe your pedals with a dry cloth. Store your unicycle indoors rather than outside where rain and humidity damage the tape.
Inspect your grip tape regularly for early signs of wear. Look for fraying edges, soft spots, or areas where the tape lifts slightly. Catching problems early lets you replace just the worn section instead of the entire pedal surface.
Clean your pedals weekly with a soft brush or cloth. Remove dirt, sand, and debris that accumulate on the surface. These particles act like sandpaper and accelerate deterioration. A quick cleaning takes seconds but extends tape life significantly.
Rotate your foot position slightly during longer rides. This distributes wear evenly across the tape surface rather than creating worn spots in one area. Different pressure points mean slower overall degradation.
Replace tape proactively around 2000 miles of riding. Don’t wait until grip tape fails completely. Fresh tape maintains better traction and safety. Planning replacement on your schedule beats dealing with worn tape during a ride when you need grip most.
Final Thoughts
Worn out grip tape is a small problem with a simple fix. You don’t need special skills to solve it.
Fixing this issue keeps you safe on every ride. Good grip means better control and fewer accidents.
Remember the basics we covered. Remove old tape completely. Clean the pedal surface well. Apply new tape with firm pressure. Trim edges carefully and let everything cure.
These steps work every time when you follow them in order. Skipping steps causes most problems riders face later.
Watch your grip tape condition often. Check it every few rides if you use your unicycle daily. Early detection saves you time and effort down the road.
Your riding style affects how fast tape wears out. Heavy braking and sharp turns create more friction. Adjust your habits if you notice quick wear.
Fresh grip tape changes everything about your riding experience. You feel more connected to your pedals. Your confidence grows with each ride.
Don’t wait until tape becomes dangerous to replace it. Acting early prevents slips and falls. It also saves your pedals from further damage.
This maintenance task fits into your regular routine easily. Treat it like checking tire pressure on a bike. Small efforts prevent bigger problems.
Trust yourself with this repair. Thousands of riders handle grip tape replacement without professional help. You have the knowledge now to do the same.
Keep spare tape on hand for quick fixes. This way you’re never caught off guard by sudden wear.
Safe rides start with good grip. Take care of this simple task and enjoy smooth, controlled rides every time you step on your electric unicycle.
Frequently Asked Questions
How often should I replace my electric unicycle pedal grip tape?
Most riders replace grip tape around 2000 miles of regular riding. However, you should check sooner if you notice visible wear, fraying edges, or reduced grip. Wet conditions and frequent riding speed up wear significantly. Inspect your tape monthly to catch problems early and avoid slipping during rides.
Can I remove old grip tape without damaging the pedal?
Yes, you can remove it safely. Use a heat gun or blow dryer to warm the adhesive for 30 to 60 seconds. The heat softens the bond and makes peeling easier. Work slowly and peel at a shallow angle. After removal, clean any leftover adhesive residue with rubbing alcohol and let the pedal dry completely before applying new tape.
What’s the difference between grip tape and pedal studs?
Grip tape offers a smooth, textured surface that works well for most riders. Studs or spikes provide more aggressive traction for extreme conditions or muddy terrain. Start with quality grip tape first. If you find yourself slipping constantly despite proper footwear, then consider upgrading to studs. Many riders find tape sufficient for everyday riding.
Why does my new grip tape feel loose after installation?
Loose tape usually means insufficient pressure during application. When you press the new tape down, use firm, steady pressure across the entire surface. Apply pressure for at least one to two minutes. Poor adhesive contact creates gaps that shift during rides. Also ensure the pedal surface was completely clean and dry before installing the tape.

Hello, i’m Ivoria i am the face behind Tech Tracker Blog. I am passionate about my work and love to explore gadgets and share about my experience.