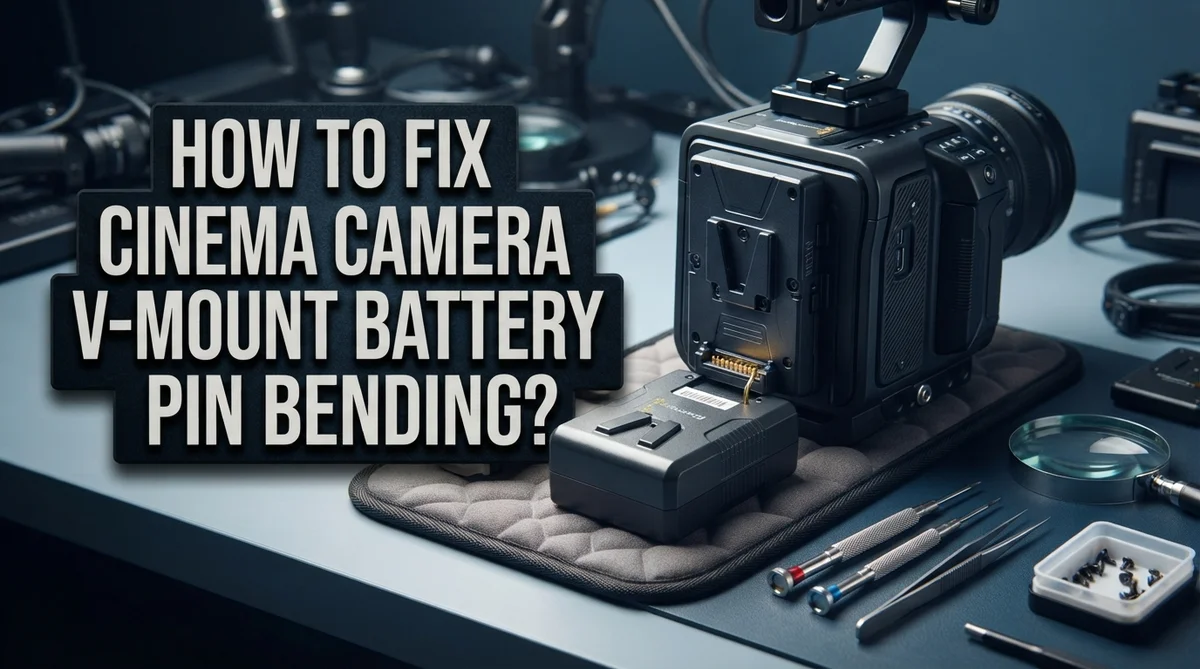
How To Fix Cinema Camera V-Mount Battery Plate Pin Bending?
Have you ever loaded your camera and noticed the battery just won’t sit right? That small wobble often points to a bent pin inside your V mount plate. It’s a common problem, but it can feel scary the first time you spot it.
Your V mount battery plate is a small part with a big job. It sends power from your battery straight to your cinema camera. When even one pin bends, that connection gets weak or breaks completely.
The good news is that this is often a fixable issue. You don’t always need a full replacement or a costly repair shop visit.
In this guide, we will walk through why pins bend in the first place. We will also cover the exact tools you need to gently reposition them. You will learn the safest way to prise out a springy contact without causing more damage.
In a Nutshell
- Bent pins usually happen during rough insertion or removal of the battery. Careless handling puts stress on the small contacts.
- A precision screwdriver or small pin works best for repairs. Use it to gently prise out the springy contact piece.
- Do not pull too hard. Over extraction can cause the pin to detach completely, turning a small fix into a bigger problem.
- Gentle repositioning fixes most issues. Slowly align the contact back to its original position for a snug connection.
- Mounting position matters too. Placing your battery on top of the cage, slightly offset to your dominant side, reduces strain on pins.
- Severe damage needs expert help. If pins are badly bent or broken, a professional repair service keeps your camera safe.
Understanding V-Mount Battery Plates and Pin Function
A V-Mount battery plate is the connector that sits on your cinema camera. It holds your battery in place and transfers power to your camera system. The plate contains small metal pins that create an electrical connection between the battery and your camera.
These pins are delicate. They carry power from your battery directly into your camera’s internal systems. When pins bend or misalign, your camera may not recognize the battery at all. Your camera could shut down unexpectedly during shooting, or worse, fail to power on completely.
The pins themselves are spring loaded. This design allows them to flex slightly when you insert or remove a battery. However, this flexibility has limits. Push too hard or angle the battery incorrectly, and the pins bend permanently.
Why does this matter? A bent pin breaks the electrical connection. Your camera loses power or receives unstable power delivery. External power systems are especially sensitive to connection problems. Poor contact can actually damage your camera’s internal power management circuits.
Understanding pin function helps you avoid damage. Each pin serves a specific purpose in the power delivery chain. Some pins carry positive current. Others carry negative current or ground signals. A single bent pin disrupts the entire system.
The good news is that bent pins are often fixable. Simple repositioning using precision tools can restore proper alignment. The key is acting quickly before the pin cracks or breaks completely.
Regular inspection prevents major problems. Check your battery plate before each shoot. Look for visible bending or corrosion on the pins. Catch issues early, and you’ll keep your camera running smoothly throughout your production day.
What Causes V-Mount Pins to Bend
V-Mount pins bend for several specific reasons during normal camera operation. Understanding these causes helps you prevent damage before it starts.
Rough insertion and removal is the most common culprit. When you push the battery plate onto the camera connector too quickly or at an angle, the pins experience sideways pressure. This lateral force bends them out of alignment. The same problem happens when you yank the battery off without careful handling.
Improper mounting angles also cause pin stress. If you insert the battery plate while the camera sits at an awkward position, the pins don’t align perfectly with their slots. This creates friction and bending as the connection forces into place.
Dust and debris trapped inside the connector create resistance during insertion. Your battery plate meets unexpected friction, and you push harder than necessary. This extra force bends the delicate pins inside the socket.
Repeated wear and tear weakens the pins over time. Each insertion and removal cycles the metal slightly. Eventually, the repeated stress causes permanent bending, especially if you handle the connector roughly.
Cable tension and weight can bend pins if external power cables pull on the connector. Heavy cables hanging from the battery plate create downward pressure that gradually bends the contact points.
Impact or accidental drops obviously damage pins. Even a small bump can knock pins out of position. Cinema cameras move around sets constantly, so collisions happen.
The key takeaway is this: most pin bending results from rushed handling or poor connector care. Slow, deliberate movements during battery installation protect your pins. Keeping the connector clean and free of debris also prevents unnecessary stress. These simple habits save you expensive repairs.
Tools You Need Before Attempting a Repair
Before you start working on your V-Mount battery plate, gather the right equipment. You need specific tools to safely handle delicate pins without causing additional damage.
A precision screwdriver set is essential. Look for one with very small, flat head tips. These allow you to gently manipulate the spring contacts inside the connector without slipping and scratching the internal mechanism.
A small pin or needle tool works equally well for this task. Some people use jeweler’s picks or dental picks. The goal is having something thin enough to fit between components but sturdy enough to apply gentle pressure.
You’ll want a magnifying glass or loupe. V-Mount pins are tiny, and you need to see exactly what you’re doing. Poor visibility leads to mistakes that worsen the problem.
Have compressed air on hand. This removes dust and debris from inside the connector. Debris often causes pins to bend during insertion because it creates resistance.
A soft workspace mat prevents pins from rolling away if they detach. Losing a pin makes repair impossible.
Lighting matters too. Use a bright desk lamp or headlamp. You’re working with small components, and shadows hide important details.
Finally, keep a clean cloth nearby. You’ll wipe away any dust or residue from the connector. Cleanliness prevents future pin issues.
Don’t rush and gather these items beforehand. Having everything ready reduces frustration and helps you work slowly and carefully. Rushing causes the very damage you’re trying to fix.
Step-by-Step Guide to Fixing Bent V-Mount Pins
Start by examining the bent pin closely under good lighting. Use your magnifying glass to see exactly which pin is damaged and how far it bends. This helps you understand what you’re working with before touching anything.
Locate the springy contact bit inside the V-Mount connector. This is the metal piece that actually touches your battery. Gently insert your precision screwdriver or small pin tool underneath this contact. Work slowly and carefully to avoid breaking it further.
Apply steady, gentle pressure to prise the contact upward. Don’t rush this step. The contact should move slightly, but you want complete control over the motion. If it feels stuck, stop and examine why before forcing it.
Once you’ve lifted the contact slightly, assess the bent pin’s position. You may need to adjust it back to its original alignment. Use your tool to carefully guide the pin back into shape. Work in small increments rather than making one large adjustment.
Check that the pin sits parallel to its neighboring pins. They should all line up evenly. If one pin sticks out or angles differently, it won’t make proper contact with your battery.
Test the connection by inserting your battery slowly. The battery should slide in smoothly without resistance. If it feels tight or catches, stop immediately and recheck the pin alignment.
Remove the battery and inspect once more. The pins should now sit at the correct angle. If the pin still bends or the battery doesn’t fit properly, this indicates damage beyond simple repositioning. Professional repair becomes necessary at this point to avoid damaging your camera’s power system.
Proper Battery Mounting Techniques to Prevent Future Damage
Proper mounting prevents most V-Mount pin damage before it starts. The key is developing consistent habits every time you attach your battery plate.
Always insert your battery straight and level. Avoid angled or forced insertions. Push the plate in slowly and steadily. You’ll feel a slight resistance, then a click when it seats correctly. Never force the connection if something feels wrong.
Mount your battery on the top of your camera cage, offset toward your dominant side. This position keeps cables away from your body and reduces accidental tugging. The battery sits securely without stress on the connector pins.
Cable management is critical for pin protection. Route your power cables away from the V-Mount connection point. Use cable ties or clips to secure excess cable length. Loose cables create tension that bends pins during camera movement or when you set the rig down.
Handle the battery plate with care during removal. Grip the plate itself, not the cable. Pull straight out using steady pressure. Quick jerking motions stress the pins and connectors.
Inspect your V-Mount connector regularly for dirt or debris. Use compressed air to clean the connection area weekly. Dust particles create resistance during insertion, forcing you to push harder and bend pins.
Store your battery plates in a protective case when not in use. Keep them in a clean, dry environment. Moisture and dust accumulation cause connection problems later.
Develop a pre-shoot checklist. Before each filming day, visually inspect your V-Mount plate and battery connector. Look for bent pins, corrosion, or loose contacts. Catch problems early before they damage your camera or interrupt your shoot.
These simple habits save you expensive repairs and keep your equipment reliable.
Common Mistakes to Avoid During Repair
When repairing bent V-Mount battery plate pins, certain mistakes can make your problem worse. Understanding what to avoid saves you time and protects your equipment from additional damage.
Over manipulating spring contacts is the biggest error people make. The springy contact bits inside your V-Mount connector are delicate. If you pry too hard or adjust them repeatedly, they can detach completely. Once detached, these contacts become nearly impossible to reposition correctly. Work slowly and make small adjustments. Stop as soon as the pin aligns properly.
Rough insertion and removal of battery plates causes most initial pin bending. Many users force batteries into connectors at angles or remove them too quickly. This aggressive handling bends pins outward or inward. Always insert your battery straight and level. Remove it with the same gentle care.
Inadequate cable management creates hidden stress on pins. Power cables running too close to your V-Mount connection can pull on the connector during operation. Each movement tugs the pins slightly. Over time, this repeated stress bends them. Route your cables away from the connection point and secure them properly.
Skipping visual inspections before repair is another common mistake. Many people assume they see the problem clearly without magnification. Bent pins are often subtle. Poor lighting makes diagnosis impossible. Always inspect under bright light with magnification.
Finally, avoid attempting repairs on severely damaged connectors. If pins are cracked, missing pieces, or heavily corroded, professional service is your best option. Pushing forward with DIY repair risks damaging your camera’s power system permanently. Know when to stop and seek professional help.
Troubleshooting Persistent Connection Issues After Repair
After you’ve repaired your bent V-Mount pins, connection problems can still happen. These issues require a different approach than the initial fix.
Start by testing your battery connection repeatedly. Insert your battery fully, then remove it slowly. Do this five times in a row. Watch for any resistance or clicking sounds. These signs tell you the pins aren’t sitting correctly yet.
Check if your battery sits flush against the plate. A gap between the battery and connector means pins aren’t making full contact. The battery should feel snug but not forced. If it wobbles, the pins need repositioning again.
Inspect the springy contacts for residue or corrosion. Even clean pins can fail if dirt sits between them and your battery terminals. Use a dry cloth to wipe both the connector pins and battery terminals gently. Avoid moisture or liquids during this step.
Test with a different battery if you have one available. This tells you whether the problem is your plate or your battery itself. A different battery that works perfectly means your repair succeeded. If problems continue with every battery, your pins need adjustment again.
Monitor your camera’s power display during operation. If the voltage reading flickers or drops unexpectedly, your connection is still unstable. Unload your battery immediately and inspect the pins once more.
Document what you observe. Note which pin seems loose or which direction the battery tilts. This information helps you make precise corrections. If connection issues persist after multiple repair attempts, professional service becomes your best option. Severe internal damage requires tools and expertise beyond DIY repair.
When to Seek Professional Repair Services
If your V-Mount battery plate pins remain bent after your own repair attempts, professional help becomes necessary. You should consider seeking expert services when the damage goes beyond simple pin misalignment.
Severe pin damage requires professional attention. If pins are cracked, completely flattened, or show metal fatigue, attempting further repairs risks permanent connector failure. Professional technicians have specialized tools and replacement parts that home repairs cannot match.
Contact a repair service when your camera shows power inconsistencies even after you’ve repositioned the pins. Intermittent power loss or unexpected shutdowns during filming indicate deeper connection problems. These issues suggest internal contact damage that needs professional diagnosis.
Professional repair becomes urgent if your camera won’t power on at all. A completely non-responsive camera means the V-Mount system may have internal damage beyond the visible pins. Technicians can test your camera’s internal power circuits and identify whether the problem lies in the connector itself or elsewhere.
You should also seek professional help if you notice corrosion or oxidation on the pins. Rust or discoloration indicates chemical damage that requires specialized cleaning or component replacement. Home cleaning methods may worsen corrosion rather than fix it.
Consider professional services if you’ve attempted repairs multiple times without success. Repeated failed attempts can cause additional damage to the connector housing or surrounding components. Technicians can assess cumulative damage and recommend whether repair or replacement makes more sense.
Finally, seek professional help if your camera powers external recording devices or monitors. Damaged V-Mount connections can send unstable power to these accessories, potentially causing equipment failure. Professional technicians understand how to safely restore power delivery across your entire system without risking additional damage.
Final Thoughts
Fixing bent V-Mount battery plate pins is simple once you know the right steps. Small tools and a gentle touch go a long way. You don’t need special training to handle minor pin damage.
Your camera depends on a solid power connection. Bent pins break that connection fast. Taking care of them protects your entire cinema setup.
Prevention matters more than repair. Handle your battery plates with care every time you mount or remove them. Slow, steady movements protect your pins better than quick swaps between shots.
Good cable management also plays a big role. Keep power cables away from your V-Mount connection. This simple habit stops hidden stress from building up on your pins over time.
Mounting position matters too. Place your battery on top of your cage. Offset it to your dominant side for better balance and easier access during shoots.
Regular inspection keeps small problems from becoming big ones. Check your pins before and after each shoot. Catching a slight bend early saves you from bigger repairs later.
Remember that external power systems carry real risk. A mishandled connection can damage your entire camera. Always treat your V-Mount system with respect and patience.
Not every fix requires professional help. Many bent pins respond well to careful adjustment with basic tools. But know your limits and call in help when damage looks severe.
Your camera gear represents a real investment. Treating pin repair with patience protects that investment. A few careful minutes now can save you from costly camera problems later.
Stay observant, stay gentle, and your V-Mount connections will serve you well for years of reliable shooting.
Frequently Asked Questions
What causes V-Mount battery plate pins to bend in the first place?
Bent pins happen during normal use. You insert and remove your battery repeatedly over time. Rough handling during mounting or unmounting creates stress on the springy contacts. Improper angle during insertion pushes pins sideways instead of straight in. Cable tension can also pull pins out of alignment if your power cable lacks proper support.
Can I fix bent pins myself without special tools?
Yes, you can attempt a basic fix at home. A small precision screwdriver or thin pin works well for gently repositioning the springy contact bits. The key is working slowly and carefully. Avoid pulling contacts too far out because they can detach completely. Gentle adjustment is far better than aggressive manipulation. If pins are cracked or completely flattened, professional service becomes necessary.
How do I know if my repair actually worked?
Test your battery connection multiple times after repair. Insert your battery fully and remove it slowly. Check that your battery sits flush against the plate with no tilting. Monitor your camera’s power display during operation to confirm consistent power delivery. If your camera powers on reliably and shows stable voltage readings, your repair succeeded.
Should I change how I mount my battery to prevent future bending?
Positioning matters for protection. Mount your battery on your cage top, offset to the right side for right handed operation. This reduces accidental bumps and cable stress. Proper cable management keeps tension off the connector. Avoid mounting your battery where it hangs freely or gets squeezed between other gear.

Hello, i’m Ivoria i am the face behind Tech Tracker Blog. I am passionate about my work and love to explore gadgets and share about my experience.