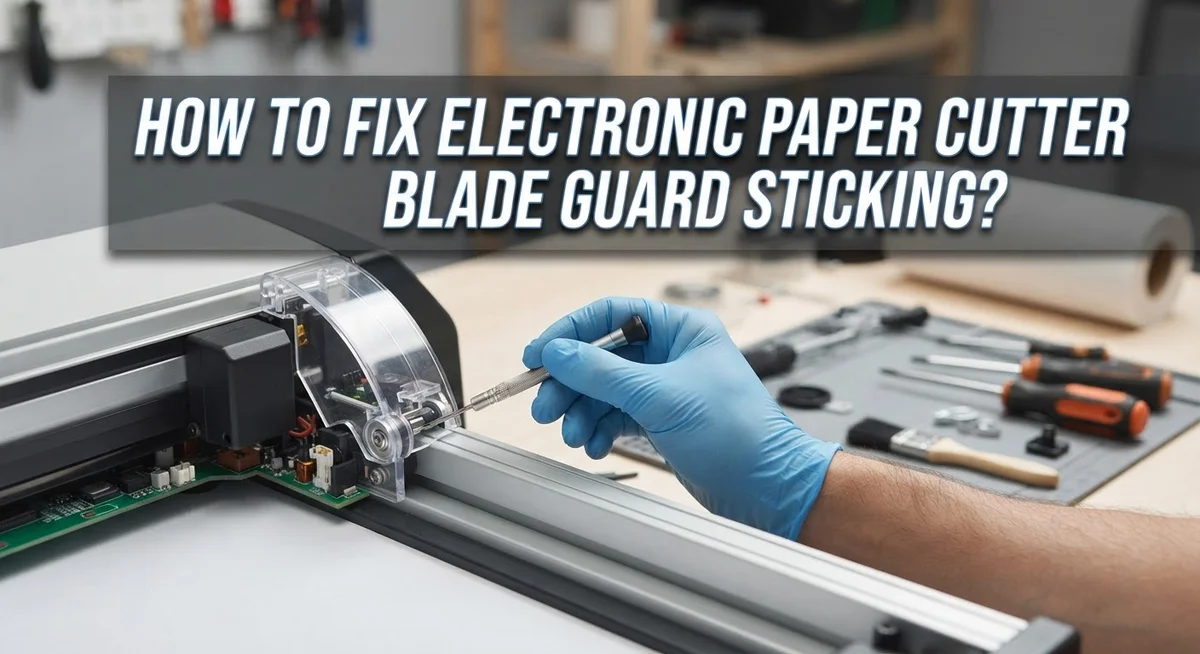
How To Fix Electronic Paper Cutter Blade Guard Sticking?
Does your electronic paper cutter suddenly feel stuck or stubborn? You are not alone. Many users notice the blade guard sticking after the machine sits unused for a while.
This annoying problem can slow down your work. It can also make simple cuts feel frustrating and messy.
The good news is that most sticking issues have simple fixes. Often, the cause is loose blade mounting or slight misalignment between the blade and base.
Sometimes, it is just about adjusting your cutting technique near angled edges. Other times, small maintenance steps make a huge difference.
In a Nutshell
- Check the blade screw first. A loose screw often causes the guard to catch. Tighten it firmly to remove any wobble.
- Look at the metal cutting plate. Damage or misalignment on the base can block smooth guard movement. Inspect it closely for dents or shifts.
- Replace a worn cutting stick. An old stick loses its grip and causes resistance. Flip it or swap it in for a fresh one.
- Adjust your cutting angle. Guards often catch when you cut at an angle. Pull the guard back slightly as you approach the cut.
- Avoid thick paper during testing. Thick stacks can make the blade seem missing or stuck. Test with normal paper thickness instead.
- Do routine maintenance. Regular checks prevent most sticking problems before they start. A little upkeep keeps your cutter running smoothly for years.
Understanding the Blade Guard Mechanism
Your electronic paper cutter’s blade guard is a safety feature that protects your fingers during operation. Understanding how it works helps you fix sticking problems quickly.
The blade guard sits on a track or rail system above the cutting blade. When you push the guard back, it moves along this track to expose the blade for cutting. When you release it, a spring mechanism pulls the guard forward to cover the blade again. This back and forth motion happens dozens of times per day.
The guard connects to the blade through a mounting system. This connection must be tight and properly aligned for smooth movement. If any part of this system becomes loose or misaligned, the guard will catch or resist movement.
The cutting stick sits on your machine’s base plate. This stick provides a surface for the blade to cut against. When the stick wears down, its surface becomes uneven. An uneven surface can block the guard’s smooth travel along the track.
Several components work together in this mechanism. The blade itself must sit at the correct height above the base. The guard’s track must be clean and free from debris. The spring that retracts the guard must have enough tension to pull it back reliably.
Wear and tear gradually affect all these parts. Dust accumulates in the track. Metal components can shift slightly from repeated use. Springs lose tension over time. Storage in humid conditions can cause minor corrosion on metal parts.
Recognizing these components helps you identify where sticking occurs. You can then target your fix to the right area. Most sticking problems involve just one or two of these parts, not the entire mechanism.
Common Causes of Blade Guard Sticking
Blade guard sticking happens for specific reasons. Understanding these causes helps you fix the problem quickly and prevent it from happening again.
Loose blade mounting is the most common culprit. The screw that holds your blade to the base can loosen over time. When this screw becomes slack, the blade shifts slightly. This misalignment forces the guard to catch and resist movement. Tightening this single screw often solves the entire problem.
Misalignment between blade and base creates friction. The blade should sit perfectly level on the cutting plate. If the blade tilts or sits unevenly, the guard struggles to move smoothly. Even small shifts cause noticeable sticking.
Damage to the metal cutting plate blocks smooth guard operation. The base plate can develop dents, warps, or corrosion. These imperfections prevent the blade from sitting flush. Your guard then catches on uneven surfaces.
A worn cutting stick contributes to sticking issues. The cutting stick is the replaceable material on your base that the blade cuts against. Over time, this stick becomes compressed and damaged. A worn stick loses its grip and creates resistance during guard movement.
Dust and debris accumulation in the track system causes friction. Particles collect in the rail where your guard slides. This buildup prevents smooth operation and creates sticking sensations.
Improper cutting technique can trigger temporary sticking. When you cut at sharp angles, the guard naturally catches. This is normal behavior, not a mechanical failure. Adjusting your approach angle prevents this type of catching.
These causes work alone or together to create blade guard problems. Identifying which cause affects your machine helps you apply the right fix.
Step-by-Step Guide to Fixing a Sticking Blade Guard
Start by unplugging your electronic paper cutter completely. Safety comes first when working with cutting machines.
Examine the blade screw at the base where your blade attaches. Use the appropriate wrench or Allen key to tighten it firmly. A loose blade causes the guard to shift and catch during operation. Turn the screw clockwise until snug, but avoid over tightening which can strip threads.
Next, inspect the metal cutting plate on your machine’s base. Look for dents, warping, or debris that blocks smooth guard movement. Run your finger along the plate surface to feel for rough spots. If you find damage, you may need to replace this component or have it professionally repaired.
Check the cutting stick on your base plate. This replaceable component wears down over time and loses its grip. If it appears flattened or compressed, flip it to the unused side. When both sides are worn, replace it with a new one.
Clean the track system where your guard slides. Use a dry cloth or soft brush to remove dust and paper debris. Accumulated material creates friction that makes the guard feel stuck. Pay special attention to corners and crevices where particles hide.
Test the guard movement by hand after each adjustment. Push it back and forth smoothly to confirm it glides without resistance. Your guard should move freely along its entire path.
If sticking persists after these steps, apply a thin layer of silicone based lubricant to the track. Wipe away excess lubricant to prevent paper dust from sticking to it. Test the guard again to ensure smooth operation before cutting paper.
Checking and Adjusting Blade-to-Base Alignment
Blade to base alignment directly affects how smoothly your guard moves. When these parts drift out of position, friction increases and sticking occurs.
Start by locating the blade mounting screw at the base of your cutter. This screw holds your blade firmly in place. Loosen it slightly, then check if the blade sits perfectly flat against the base plate. The blade should make full contact with the metal cutting plate underneath. Tighten the screw gradually while monitoring the blade position.
Next, inspect the metal cutting plate itself for any warping or damage. Run your hand across the surface to feel for dips, bumps, or raised edges. Even small imperfections cause the guard to catch and stick. If you notice damage, the plate may need replacement or professional flattening.
Check your cutting stick alignment too. This stick sits on top of the base plate and supports your paper during cuts. A worn or misaligned cutting stick throws off the entire blade to base relationship. Flip the cutting stick to its unused side if it shows wear patterns. Replace it completely if both sides are damaged.
After adjusting these components, manually slide the guard back and forth several times. Movement should feel smooth and consistent. The guard should glide without resistance from one end to the other.
Test your alignment by running a thin piece of scrap paper through the cutter. The blade should cut cleanly without the guard catching. If sticking still happens, the alignment issue may be more serious and require professional service. Proper alignment prevents most sticking problems from returning.
Proper Cutting Technique to Prevent Guard Catching
Your cutting technique directly affects whether the blade guard catches or moves freely. Many operators experience sticking simply because they approach the cut incorrectly.
Angle your approach carefully. When you feed paper into your cutter, keep your hand and the material as straight as possible. Angled approaches force the guard to work against the paper’s direction, creating resistance. The guard naturally catches when you push material at an angle toward the blade.
Pull the guard back slightly as you approach the cut. This simple adjustment prevents the guard from catching on thick paper or uneven material edges. You’re not forcing the guard open, just giving it a small amount of clearance. This technique works especially well when cutting cardstock or multiple sheets at once.
Position your hands correctly throughout the operation. Keep one hand steady on the paper while your other hand manages the guard. Never let the paper bunch up under the guard. Bunched paper creates artificial resistance that feels like sticking but actually results from poor positioning.
Use smooth, controlled motions. Jerky or rushed movements increase the chances of the guard catching. Move the guard down in one steady motion rather than stopping and starting repeatedly. This consistent action prevents the guard from binding on worn or misaligned components.
Test your technique with scrap material first. Before cutting your actual project, practice with similar weight paper or cardstock. This helps you find the right angle and hand position for your specific material.
These technique adjustments solve most sticking problems that aren’t caused by mechanical issues. You’ll notice smoother operation immediately when you adjust your approach.
Preventive Maintenance Tips
Regular maintenance keeps your blade guard moving smoothly. Start with a simple routine that takes just minutes each week.
Check your blade mounting screw regularly. This single fastener holds your blade in place. A loose screw creates tiny gaps that cause misalignment. Tighten it firmly using the correct wrench size. Do this before you notice any problems.
Inspect your cutting stick monthly. This replaceable component wears down with use. A worn cutting stick forces your blade out of alignment. Flip it to the fresh side when one side shows wear. Replace it entirely when both sides look flattened or grooved.
Clean your tracks weekly. Dust settles in the spaces where your guard slides. Use a soft brush or compressed air to remove debris. Wipe the tracks with a dry cloth afterward. Never use water or oil based cleaners on the track system.
Test your guard movement before each cutting session. Slide the guard back and forth by hand several times. It should move smoothly without resistance. If you feel any sticking, stop and investigate before cutting.
Store your cutter properly. Keep it in a dry location away from temperature changes. Humidity and cold cause metal parts to shift slightly. Cover your machine when not in use for extended periods.
Keep a maintenance log. Write down when you tighten screws, replace the cutting stick, and clean tracks. This simple record helps you spot patterns. You’ll notice if sticking returns at certain intervals.
These preventive steps stop problems before they start. Your blade guard stays responsive and reliable.
Common Mistakes to Avoid
Many people make mistakes that actually cause blade guard sticking problems. Understanding these errors helps you avoid them entirely.
Testing with paper that’s too thick is a major mistake. When you use heavy cardstock or thick materials, the guard may seem stuck. What’s actually happening is the blade struggles to cut through, creating resistance. Always start with standard copy paper to test your cutter’s performance.
Ignoring blade mounting hardware tightness causes serious issues. The screw holding your blade to the base loosens over time from vibration and use. People often skip this check and assume the guard itself is broken. A loose blade creates misalignment, which makes the guard catch and stick. Check this screw before assuming anything else needs repair.
Improper guard handling during cuts leads to catching problems. Some people force the guard forward while cutting instead of pulling it back gently. This causes the guard to catch on thick paper edges. Your technique matters more than you might think.
Neglecting regular maintenance is another common error. People wait until the guard completely sticks before taking action. By then, dust has built up in the tracks and components have shifted out of alignment. Weekly cleaning prevents most sticking issues before they start.
Storing your cutter in damp or temperature changing environments creates corrosion. Metal components rust slightly, and this friction makes movement difficult. Keep your cutter in a dry, stable location.
Finally, people often skip the alignment check after storage. Machines left unused for months develop misalignment naturally. Always inspect your blade to base alignment before your first cut after storage. These simple steps prevent most sticking problems entirely.
Troubleshooting Persistent Sticking Issues
When your blade guard sticks persistently, the problem usually goes deeper than surface dust. Misalignment between your blade and base is the most common culprit here. This happens when components shift slightly out of position, creating friction that makes the guard resistant to movement.
Start by checking the blade mounting screw. This single fastener holds tremendous responsibility. Loosen it slightly, then wiggle your blade gently to see if it sits flush against the base. Tighten the screw firmly but do not over tighten, as this can strip the threads. A properly seated blade eliminates most resistance problems.
Next, inspect your metal cutting plate on the base carefully. Look for dents, warping, or debris stuck in grooves. Even small damage can cause the guard to bind. If you find damage, you may need to replace this component or have it professionally repaired.
Your cutting stick also plays a role in persistent sticking. When this replaceable component wears down, it no longer provides proper support. The blade sits lower, and the guard catches more easily. Replace your cutting stick if you notice visible wear or flattening.
After storage, misalignment happens frequently. Run a thin piece of scrap paper through your cutter to test blade positioning. The paper should cut cleanly without resistance. If you feel tugging or hear grinding sounds, realignment is necessary.
Clean the guard tracks thoroughly with a soft brush. Dust buildup restricts smooth movement. Wipe away any moisture or debris lurking in these spaces. Once you address alignment, mounting hardware, and wear components, persistent sticking typically resolves completely.
Final Thoughts
Fixing a sticking blade guard does not need to be complicated. Most problems come from loose screws, worn cutting sticks, or simple dust buildup.
You now know the main causes behind this issue. Misalignment after storage, mounting hardware that loosens over time, and debris in the tracks all play a part.
The good news is that these fixes are simple. A screwdriver and a few minutes of your time solve most sticking problems right away.
Consistency matters more than perfection. You do not need to be an expert to keep your cutter working well. You just need a routine you actually follow.
Check your screws often. Watch how your guard moves before you start cutting. These small habits catch problems early.
Remember that some guard catching is normal when you cut at an angle. This is not a sign of damage. It simply means you need to adjust your approach and pull the guard back as you work.
If sticking continues even after basic checks, look deeper. The metal plate, the blade alignment, and the cutting stick condition all deserve attention.
Your cutter reflects how well you care for it. A machine that sits unused for months will likely need more attention than one used regularly.
Take a few minutes each week to inspect your tool. This small effort prevents bigger headaches later.
With the right habits, your blade guard will glide smoothly again. You will spend less time troubleshooting and more time getting your cutting jobs done.
A well maintained cutter is a reliable one. Keep these tips close, and your tool should serve you well for a long time.
Frequently Asked Questions
Why does my blade guard stick after I store the cutter for a while?
Sticking after storage happens for a few reasons. Misalignment between the blade and base is the most common cause. When your cutter sits unused, small shifts occur. Loose blade mounting hardware also contributes to this problem. Metal parts can corrode slightly in storage, which adds friction.
The fix is simple. Tighten the screw that holds your blade to the base. Check that the metal cutting plate sits flat and straight. If corrosion appears, clean it gently with a soft cloth.
Is it normal for the guard to catch when I cut at an angle?
Yes, this is normal behavior. When you approach your cut at an angle instead of straight on, the guard naturally catches. This happens because the guard moves at a different angle than your cutting path.
The solution involves adjusting your technique. Pull the guard back slightly as you approach the cut. Keep your paper aligned straight with the blade. Most users find that a straight approach eliminates this catching entirely.
What should I check first if the guard feels stuck?
Start with the blade mounting screw. Use the correct tool to tighten it firmly. Loose hardware creates slop, which makes the guard feel stuck even when it isn’t.
Next, inspect the metal cutting plate on your base. Look for dents or warping. A damaged plate prevents smooth guard movement.
Finally, check your cutting stick. Worn cutting sticks cause extra resistance.
Can thick paper make the blade guard seem stuck?
Yes, absolutely. Testing with paper that’s too thick creates a false sense of sticking. The blade may not cut through, so the guard doesn’t move as expected.
Use paper within your cutter’s recommended thickness range. Your manual specifies the correct weight. This simple adjustment often solves the problem immediately.

Hello, i’m Ivoria i am the face behind Tech Tracker Blog. I am passionate about my work and love to explore gadgets and share about my experience.