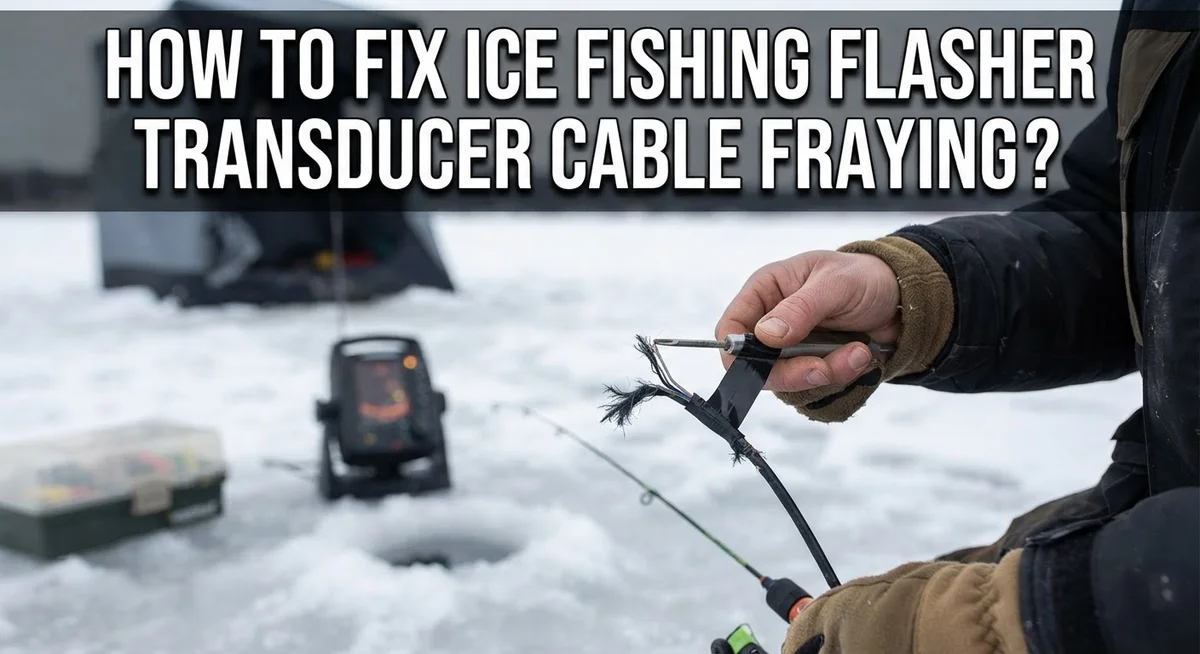
How To Fix Ice Fishing Flasher Transducer Cable Fraying?
Ice fishing rewards patience. But a frayed transducer cable can ruin your day fast.
Your flasher depends on that cable. It sends sonar signals from the transducer to your display screen.
When the cable frays, your readings get spotty. Sometimes the screen goes blank completely.
Fraying happens for a few common reasons. Fishing line wraps around the cord. Ice edges scrape against it. Constant tangling weakens the outer layer over time.
The good news? You do not need to buy a brand new unit. Most frayed cables can get fixed with simple tools and a little patience.
In a Nutshell
- Frayed cables cause weak or missing signals. Your flasher screen may flicker or show blank spots when this happens.
- Tape the transducer body and cable first. Use painter’s tape to protect the sensor and cable area before applying any sealant.
- Layer sealant over the damaged spot. Marine grade sealant or a liquid gasket product works well to seal out water and moisture.
- Add heat shrink tubing for extra strength. This step reinforces the repair and keeps the cable protected long term.
- Test your connections at the head unit. Loose plugs often mimic fraying symptoms, so check this before assuming the worst.
- Prevention beats repair every time. Keep your cable secure in the hole so it does not tangle or rub against the ice edge.
Why Transducer Cables Fray on the Ice
Transducer cables fray for several straightforward reasons during ice fishing season. Understanding these causes helps you prevent damage and spot problems early.
Tangling is the most common culprit. When you lower your transducer through the hole, the cable can twist around itself or catch on ice edges. This friction gradually wears through the outer protective layer. The cable sits in cold water for hours, and repeated movement weakens the insulation over time.
Fishing line wrapping creates another major problem. Your main line, backing, or other gear can wrap around the cable while you’re setting up or adjusting your flasher. This tight binding cuts into the cable jacket and exposes the wires underneath. Even small cuts allow water to seep in and corrode the internal conductors.
Direct abrasion from ice damage happens when the cable rubs against rough ice edges or sharp spots in your hole. Ice naturally develops jagged edges, and your cable passes through this opening repeatedly. The constant friction slowly strips away the protective coating.
Connector issues also lead to fraying. When the transducer connector loosens or sits improperly in the head unit, the cable experiences stress at that connection point. This strain can cause the cable jacket to crack or separate near the connector.
Cold water exposure accelerates all these problems. Freezing temperatures make cable insulation more brittle and prone to cracking. Water trapped in small breaks freezes and expands, forcing cracks wider.
Improper positioning makes everything worse. If you place your transducer too far below the ice surface, the extra cable length sits loosely in the hole. This slack allows more movement and tangling.
The key takeaway? Fraying cables don’t fail overnight. Small damage starts small but grows quickly in harsh conditions. Catching these issues early means simpler repairs and better sonar performance all season long.
Signs Your Cable Needs Attention
Your ice fishing flasher will start showing you clues when the transducer cable needs help. Learning to spot these signs early saves you time and frustration on the ice.
Weak or missing sonar signals are the first red flags. Your flasher screen might flicker, show blank spots, or display fish marks that disappear randomly. The image quality drops noticeably compared to what you normally see. This happens because frayed sections break the electrical connection between your transducer and head unit.
Visual damage on the cable itself tells you exactly what’s wrong. Look for exposed wire strands, cracked outer coating, or peeling insulation. Run your fingers gently along the entire cable length. You will feel rough spots, splits, or areas where the protective layer has worn away.
Intermittent connection problems show up as on and off performance. Your flasher works fine one moment, then cuts out the next. This pattern suggests the cable damage is partial rather than complete. Movement or vibration makes the connection worse temporarily.
Corrosion or discoloration near the connector indicates water has entered the cable. You might see white crusty buildup, green tarnish, or dark spots around where the cable meets your head unit or transducer.
Unusual cable stiffness or brittleness develops from cold exposure and UV damage. The cable becomes hard to bend or cracks when you flex it. This brittleness means the protective jacket is breaking down.
Connector looseness feels different from cable fraying but causes similar symptoms. Wiggle the cable where it connects to your head unit. If it moves freely or feels loose, that’s your problem.
Check these signs before you head out each season. Early detection means simple repairs instead of replacing your entire system. Pay special attention after your flasher sits unused through warm months.
Tools and Materials You’ll Need
Before you start fixing a frayed transducer cable, gather the right supplies. Having everything ready makes the repair faster and more effective.
Marine grade sealant is your first essential item. This product seals out water and prevents further damage to exposed wires. Liquid gasket products work well for this purpose. Regular caulk won’t hold up in cold water conditions.
Heat shrink tubing comes next on your list. This reinforces the repair and protects the cable long term. Get tubing that’s large enough to slide over your cable diameter. You’ll need a heat source like a heat gun or lighter to activate it properly.
Painter’s tape protects areas you don’t want to seal. Tape the transducer body and cable 2 to 3 inches above the damage. This keeps sealant off your sensor and connector pins.
Wire strippers and a utility knife help you expose damaged sections carefully. You may need to remove outer cable sheathing to assess internal damage. Work slowly to avoid cutting the wires inside.
Electrical tape provides temporary protection during the repair process. Layer it over frayed sections before applying permanent sealants. This keeps loose strands contained and organized.
A multimeter tests your cable after repair. This tool checks for continuity and confirms the repair worked. It helps you catch connection problems before heading back to the ice.
Sandpaper or a file smooths rough edges on the cable. Smooth surfaces help sealant adhere better. Sand gently to avoid cutting through the cable jacket.
Clean rags or paper towels remove debris and dry the cable. Moisture prevents sealant from bonding properly. Dry the damaged area completely before applying any products.
Collect these items before starting your repair. Proper preparation prevents frustration and produces better results on your ice fishing equipment.
Step-by-Step: Repairing a Frayed Transducer Cable
Start by turning off your flasher unit completely. This protects both you and the equipment from electrical damage during the repair process.
Locate the frayed section on your cable. Run your fingers along the entire length to feel for damage. Look closely at areas near the connector and where the cable enters your hole. Mark any problem spots with a piece of tape.
Clean the damaged area with a dry cloth. Remove ice, salt, and debris from the cable surface. If the cable is wet, dry it thoroughly before proceeding. This helps sealant stick properly and prevents moisture from getting trapped inside.
Wrap painter’s tape around the transducer body itself. Leave the damaged cable section exposed. Tape the cable 2 to 3 inches above the damaged spot. This protects the transducer from sealant and keeps your repair neat.
Apply a marine grade sealant directly over the frayed section. Work the sealant into any cracks or splits in the cable jacket. Cover the entire damaged area with a thin, even layer. Let this cure according to the product instructions, usually 24 hours.
Slide heat shrink tubing over the sealed area once the sealant dries. The tubing should cover the repair and extend 1 inch beyond it on each side. Use a heat gun or hair dryer to shrink the tubing tightly around the cable. Don’t use an open flame, which can damage the cable.
Remove all painter’s tape carefully. Test your flasher with the transducer in water to confirm the signal returns. If the signal is still weak, the damage may extend deeper into the cable.
This repair works best for minor fraying and surface damage. Severe cable damage may require replacement instead of repair.
Troubleshooting Sonar Issues Before and After Repair
Before you test your flasher after cable repair, check a few critical things. Start by inspecting the connection point where your cable meets the head unit. Wiggle the connector gently while watching for any signal changes on your display. A loose connection mimics fraying damage, so tighten it firmly and test again.
Next, examine the entire cable length from connector to transducer. Run your fingers along it slowly to feel for any remaining rough spots or exposed wire. Look for areas where the outer jacket still appears damaged or where sealant didn’t fully cure. These spots can cause intermittent signals that appear and disappear randomly.
Test your repaired cable with a known working transducer if possible. This step isolates whether the problem lives in your cable or somewhere else in your system. Swap transducers temporarily to confirm your repair actually fixed the signal issue. If the signal returns with a different transducer, your cable repair succeeded.
Verify the wire gauge matches marine specifications if you rewired any sections. Incorrect gauge causes signal loss even when the cable looks fine. Check your flasher manual for the proper wire size requirement.
Watch for these common post repair problems. Weak signals that fade after five minutes suggest incomplete sealing. Water may still be entering the cable through tiny gaps. Intermittent dropouts indicate the heat shrink tubing didn’t seal properly. Unusual buzzing or noise on your display means electromagnetic interference is getting through damaged shielding.
Run your flasher in a test tank or bucket before heading to the ice. This reveals problems in a controlled setting rather than on the water. Listen for any crackling sounds. Check that your display shows steady, clear readings without flickering.
Give sealant and heat shrink tubing at least 24 hours to fully cure before using your flasher in cold conditions. Premature use in freezing temperatures can compromise the seal.
Preventing Future Cable Damage on the Ice
Cable damage happens fast on the ice. Wind, cold temperatures, and constant movement create the perfect conditions for fraying. The good news is that preventing future damage takes just a few smart habits.
Secure your cable positioning before you even drill your hole. Run the cable straight down through the center of the hole rather than letting it loop or angle to the side. This simple step stops the cable from rubbing against sharp ice edges. Sharp ice acts like a blade and cuts through protective outer layers quickly.
Keep your transducer at the right depth. Positioning it too far below the ice surface creates slack cable in your hole. Slack cable tangles easily and wraps around itself or fishing line. A transducer sitting 12 to 18 inches below the surface works best for most situations. Check your flasher manual for the exact depth your model needs.
Protect the cable during storage and transport. Coil it loosely without kinking or twisting. Tight coils stress the internal wires and damage the outer jacket over time. Store your flasher in a padded case or bag that cushions movement during car rides.
Use cable management during fishing sessions. Secure loose sections with soft straps or clips that won’t pinch the cable. Avoid wrapping fishing line around the cable. Many anglers accidentally create weak points this way.
Inspect your cable monthly during the season. Look for early signs of wear like minor cracks or color changes. Catching these problems early prevents major fraying later. A quick visual check takes 30 seconds and saves hours of repair work.
Cold temperatures make cables brittle. Handle your setup gently in freezing conditions. Avoid bending or twisting the cable sharply when temperatures drop below 20 degrees Fahrenheit. Let your equipment warm up slowly indoors after fishing rather than moving it between extreme temperatures rapidly.
Common Mistakes to Avoid During Repair
Many anglers make mistakes during transducer cable repair that actually make the problem worse. Understanding these errors helps you fix your cable correctly the first time.
Using non marine grade materials is the biggest mistake people make. Regular electrical tape, caulk, or sealants don’t hold up in freezing water. They crack and peel off quickly. Always choose products specifically labeled for marine or underwater use.
Applying sealant too thin creates another common problem. A thin coat won’t protect the frayed wires inside. You need multiple layers to seal out moisture and cold. Build up the sealant gradually rather than applying one thick coat that won’t cure properly.
Skipping the heat shrink tubing leaves your repair vulnerable. Some people stop after applying sealant and think they’re done. Heat shrink tubing adds critical reinforcement and waterproofing. It keeps everything in place and protects against future abrasion.
Rushing the curing process causes failures on the ice. Sealants and adhesives need time to fully harden. Using your flasher before the repair fully sets means water can still seep in. Wait the full time recommended by the product instructions.
Positioning your transducer too far below the ice creates tangling problems that lead to fraying. Keep your cable slack managed in the hole. Secure it so it can’t wrap around itself or catch on ice edges.
Ignoring early fraying signs turns a small fix into a major problem. Small scraped areas get worse fast in cold water. Address minor damage immediately before it spreads along the cable.
Testing only the flasher display without checking the actual cable connection wastes time. Verify the connector at the head unit sits tight and clean. A loose connection mimics cable damage symptoms.
These mistakes are easy to avoid once you know them. Take your time, use proper materials, and follow curing times carefully. Your repaired cable will work reliably all season long.
Final Thoughts
A frayed transducer cable does not mean your flasher is done for the season. With the right materials and a little patience, you can restore a solid connection and get back on the ice quickly.
The key is treating the repair with care. Rushed jobs using random tape or glue rarely hold up in freezing conditions. Marine grade sealant and proper heat shrink tubing make the difference between a lasting fix and a repeat problem.
Remember that prevention saves you time and money. A little attention to cable positioning and storage habits goes a long way toward avoiding fraying in the first place.
Every angler deals with cable wear eventually. It is simply part of owning electronics that get used in harsh winter environments. What matters is how you respond to it.
Take your time during each repair step. Let sealant cure fully before testing. Check your work in calm conditions before trusting it out on the ice.
If a repair does not hold, do not force it. Sometimes a section of cable needs full replacement rather than a patch. Knowing when to rewire instead of repair saves frustration later.
Your flasher is only as reliable as the cable connecting it to the transducer. Treating that cable well keeps your sonar readings accurate all season long.
Small habits make a big difference. Coiling your cable properly, avoiding sharp bends, and checking for wear regularly can add years to its life.
Ice fishing rewards preparation. A well maintained flasher setup means fewer surprises and more time focused on catching fish.
With these repair steps and prevention tips in mind, you are ready to handle fraying issues confidently. Your gear will serve you well trip after trip.
Frequently Asked Questions
Why does my transducer cable fray so easily on the ice?
Cable fraying happens because ice fishing puts your cable under stress. The cable gets tangled around fishing line, scraped against sharp ice edges, or bent at awkward angles. Cold temperatures also make the cable covering brittle and prone to cracking. The outer insulation breaks down faster when exposed to repeated movement and abrasion.
Most fraying starts near the transducer connector where the cable flexes the most. If you leave your transducer too deep in the hole, the cable gets pulled and twisted as it moves around.
Can I repair a frayed cable myself, or do I need a new transducer?
You can fix fraying yourself with basic materials. Most cable damage is repairable if caught early. Start by taping the transducer body with painter’s tape. Then tape the cable 2 to 3 inches above the transducer.
Apply marine grade sealant over the damaged area. Layer heat shrink tubing on top for extra protection. Let everything cure for 24 hours before using your flasher. This approach works well for minor fraying and small abrasions.
What materials should I use for cable repair?
Use only marine grade materials for durability. Silicone caulk works well for sealing damaged spots. Marine friendly liquid gasket also provides good protection. Large heat shrink tubing reinforces the repair and keeps moisture out.
Never use regular electrical tape or non marine materials. These fail quickly in cold water and ice conditions. The sealant and tubing combination creates a waterproof barrier that lasts through the season.
How do I prevent cable fraying in the future?
Position your transducer at the correct depth before fishing starts. Keep the cable secured and organized in your hole. Avoid letting the cable bunch up or tangle with your fishing line. Store your flasher with the cable loosely coiled, not wrapped tightly. Inspect your cable monthly during the season for early signs of wear.

Hello, i’m Ivoria i am the face behind Tech Tracker Blog. I am passionate about my work and love to explore gadgets and share about my experience.