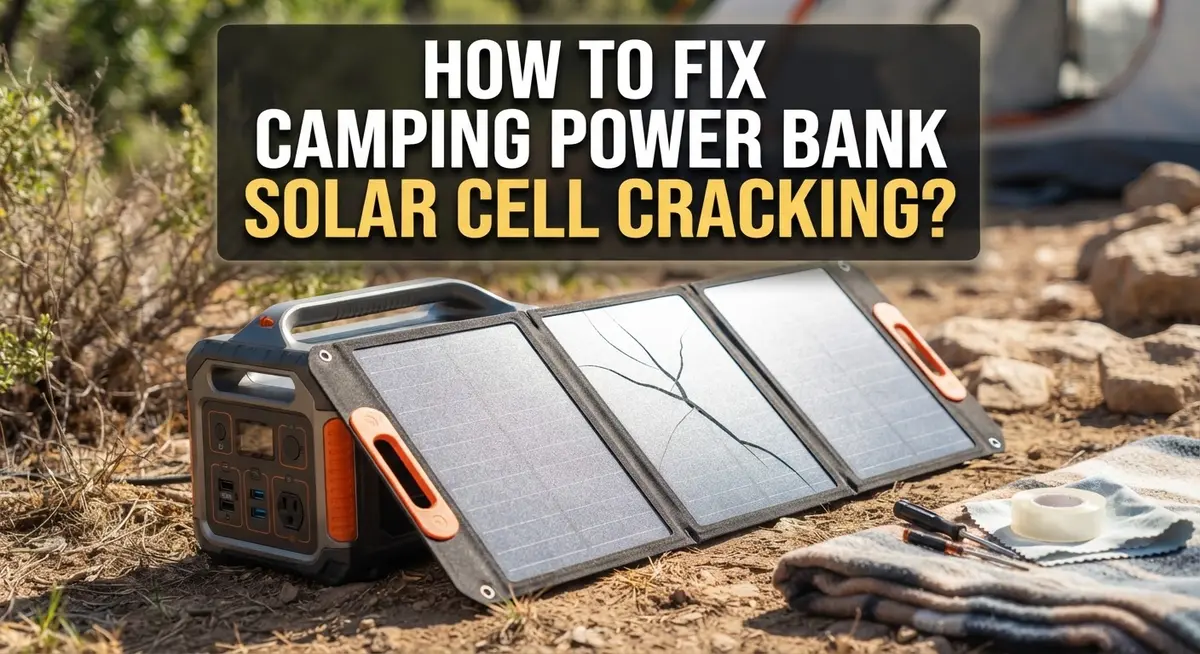
How To Fix Camping Power Bank Solar Cell Cracking?
Cracked solar cells can ruin a good camping trip fast. Your power bank stops charging. Your devices stay dead. And that expensive gear starts looking like a paperweight.
The good news? You can often fix this problem yourself.
Solar cell cracking happens more than most campers realize. Rough handling, extreme temperatures, and constant bumps in your backpack all take a toll. Small cracks turn into big problems when moisture sneaks in and damages the internal wiring.
In a Nutshell
- Cracks harm function and weatherproofing. A cracked solar cell lets in moisture and dust. This can stop your power bank from charging properly.
- Small case cracks need thin acrylic glue. Apply it sparingly. Too much glue seeps out and creates a mess.
- Delamination is a warning sign. Do not ignore it. Peeling layers mean the panel is failing and needs attention fast.
- Replace broken parts with compatible ones. Swap out damaged USB regulators or LEDs. Use parts that match your power bank’s specs.
- Test after every repair. Place your unit in direct sunlight for one hour. Watch the charging progress to confirm it works.
- Prevention beats repair every time. Install a Battery Management System. Use a battery monitor to catch problems early.
- Know when to call a professional. Some damage is too complex for a DIY fix. A repair expert can handle tricky cases safely.
Why Solar Cell Cracking Happens on Camping Power Banks
Solar cell cracking happens for several reasons. Understanding the causes helps you prevent future damage to your camping power bank.
Physical impact is the main culprit. When you drop your power bank or sit on it accidentally, the solar panel breaks. Camping gear takes a lot of bumps during transport and outdoor use. Even small falls can create hairline cracks that spread over time.
Temperature swings cause expansion and contraction. Your power bank heats up in the sun, then cools down at night. This constant back and forth stresses the solar cells. The materials expand when hot and shrink when cold. Eventually, this repeated movement creates cracks in the fragile cell structure.
Moisture and humidity weaken the panels. Rain, dew, and humidity seep into tiny gaps in your power bank’s case. Water freezes inside during cold nights, which expands and pushes the solar cells apart. Saltwater exposure near lakes or oceans accelerates this damage significantly.
Poor manufacturing quality matters too. Some power banks use thin or brittle solar materials. These panels crack more easily than higher quality alternatives. The adhesive holding cells together can fail prematurely in budget models.
Delamination is a warning sign you cannot ignore. When layers start peeling apart, the solar cell is failing. This happens when moisture gets between the glass and backing material. Delamination spreads quickly once it starts.
Age and UV exposure degrade materials. Sunlight slowly breaks down the protective coatings on solar cells. After months of outdoor use, the panels become more fragile and prone to cracking.
Knowing these causes helps you handle your power bank more carefully during camping trips.
Signs of Cracking and Delamination to Look For
Your camping power bank shows warning signs before it completely fails. Learning to spot these signals helps you catch problems early and fix them before your trip gets ruined.
Visual cracks on the solar panel surface are the most obvious sign. Look for thin lines running across the glass or plastic cover. These cracks may look small, but they let moisture inside. Even hairline fractures compromise weatherproofing and reduce charging speed.
Peeling or bubbling on the panel surface means delamination is happening. The layers are separating from each other. You might see the edges lifting away from the main panel. This separation gets worse over time, especially in humid conditions. Do not ignore this warning sign.
Discoloration or dark spots on the solar cells indicate internal damage. These spots show where moisture has entered or where the cell material is breaking down. The power bank may still charge, but functionality drops significantly.
Reduced charging speed is a functional warning sign. Your power bank takes much longer to charge in sunlight than it used to. This happens because cracks block sunlight from reaching the solar cells properly.
Water pooling under the surface means moisture got inside. Look for droplets or condensation trapped between layers. This causes electrical shorts and battery damage.
Loose or rattling components inside suggest internal damage from impacts. Shake your power bank gently and listen for movement. Broken parts inside may not cause immediate failure, but they get worse fast.
Check your power bank monthly during camping season. Early detection saves you money and keeps your devices powered when you need them most.
Tools and Materials You Need Before Starting Repairs
Before you start fixing your camping power bank’s solar cell cracking, gather the right tools and materials. Having everything ready makes the repair faster and prevents mistakes.
Adhesives and sealants are your first priority. You need thin acrylic glue for case cracks. Apply it sparingly to control how it flows into sensitive areas. Hot glue guns work well for securing internal components during reassembly. Keep paper towels nearby to wipe away excess glue before it hardens.
Basic hand tools make the job easier. Get a small screwdriver set with various head sizes. A plastic pry tool helps you open the power bank case without damaging it. Tweezers let you handle tiny components safely inside the unit.
Replacement parts depend on what’s broken. You may need a new USB regulator if the charging port stopped working. LED replacements fix indicator light problems. Have compatible battery connectors available in case internal wiring needs attention.
Cleaning supplies prevent future damage. Isopropyl alcohol removes dust and debris from solar cells before reassembly. Lint free cloths keep moisture away from sensitive areas. Cotton swabs reach tight corners inside the case.
Testing equipment verifies your repair worked. A multimeter checks voltage output from the solar panel. A flashlight helps you inspect internal damage clearly.
Workspace setup matters too. Work on a clean, flat surface away from moisture. Organize small parts in a container so nothing gets lost. Keep a notebook to sketch how components connect before you disconnect them.
Having these items ready means you can focus on the actual repair without searching for supplies midway through the job.
Step-by-Step Guide to Repairing Cracked Solar Cells
Start by assessing the damage to your solar cell. Look for the exact location and size of the crack. Small hairline fractures need different treatment than large splits. Take photos before you begin so you remember the original condition.
Clean the cracked area thoroughly. Use a soft cloth and mild rubbing alcohol to remove dust, dirt, and debris. Let the surface dry completely for at least 15 minutes. Any moisture or particles will prevent adhesive from bonding properly.
For case cracks around the solar panel, apply thin acrylic glue sparingly to the damaged area. Use a small brush or applicator stick. Apply glue only to the crack itself, not the surrounding surface. Too much adhesive will seep into internal components and cause short circuits.
Press the cracked pieces together gently. Hold them in place for 2 to 3 minutes. Wipe away excess glue with a clean cloth immediately. Let the repair cure for the time recommended on the adhesive package, usually 24 hours.
Check if internal components like USB regulators or LED indicators are damaged. These parts may need replacement if the impact was severe. Hot glue can secure loose internal components during reassembly.
Test your repair before relying on it. Place the charged power bank in direct sunlight for 1 hour. Monitor the charging indicator to confirm the solar cells are functioning. If the power bank still charges slowly or not at all, the internal damage may be too extensive.
Document your repair process. Take photos of each step. This helps you remember what you did and provides reference for future repairs or troubleshooting.
How to Test Your Repaired Power Bank for Proper Function
Testing your repaired camping power bank ensures it works safely before your next trip. Start with a visual inspection of your repair work. Look for any glue seepage, loose connections, or areas where the adhesive didn’t hold properly.
Check the battery charge level first. Use your power bank’s built in indicator lights or connect it to a battery monitor. A healthy unit should show a full charge before testing begins.
Next, place your repaired power bank in direct sunlight for about 1 hour. Position it so the solar panel faces the sun directly. This simulates real camping conditions and lets you observe if the solar cells are generating power.
Monitor the charging progress during this time. Watch the indicator lights or battery monitor to see if the charge level increases. Stable power generation means your solar repair was successful. If the charge stays flat, the solar cells may still have internal damage.
Test the USB output ports by connecting a small device like a phone or portable speaker. Let it charge for 15 to 20 minutes. The device should show a charging indicator. Slow charging suggests internal component damage that needs attention.
Check for any heat buildup around the repaired area. The unit should feel warm but not hot to the touch. Excessive heat indicates a short circuit or failed component.
Finally, inspect the weatherproofing around your repair. Run water gently over the sealed cracks. No water should seep inside the case. If moisture enters, reapply sealant and retest.
Only use your repaired power bank for camping trips after passing all these tests successfully.
Common Mistakes to Avoid During Repair
Over applying liquid adhesive is one of the most common mistakes people make. When you use too much glue, it seeps into internal components and causes short circuits. Apply adhesive in thin, controlled amounts instead. A small bead along the crack is enough. You can always add more glue if needed, but removing excess is difficult.
Ignoring delamination warning signs is another critical error. Delamination happens when the solar cell layers separate from each other. You might notice the panel looks slightly raised or feels soft when pressed. Many people ignore these signs and continue using the power bank. This causes the damage to spread quickly. Address separation issues immediately before they worsen.
Using incompatible replacement parts creates serious problems. Not all USB regulators or LED indicators work with every power bank model. Installing the wrong component can prevent charging or damage your devices. Always verify that replacement parts match your specific power bank before installation.
Rushing through the reassembly process leads to mistakes. Take your time putting everything back together. Make sure all connections are secure and components sit properly in place. Loose connections can cause intermittent charging failures.
Skipping the testing phase is risky too. Some repairs look successful but fail during actual use. Always test your power bank in direct sunlight for at least one hour before your next camping trip. Monitor the charge level and check for any unusual heat or behavior.
Finally, avoid exposing your repaired power bank to extreme stress immediately after fixing it. Give the adhesive proper curing time. Don’t drop it, submerge it, or place heavy objects on top of it for at least 24 hours after repair.
Preventing Future Cracking and Extending Panel Lifespan
Your camping power bank’s lifespan depends on how you treat it after repair. Proper storage and maintenance prevent future damage. Keep your power bank in a cool, dry place when not in use. Extreme heat and moisture speed up degradation of internal circuits.
Use a protective case or pouch to shield your power bank from drops and impacts. This simple step prevents new cracks from forming on the solar panel. Avoid storing it in direct sunlight for extended periods, as UV rays weaken the panel materials over time.
Check your power bank regularly for signs of trouble. Look for small cracks, discoloration, or any separation between the panel and the case. Catching these early prevents major failures during your camping trips.
Install a Battery Management System (BMS) if your power bank doesn’t have one. This component protects your battery from overcharging and short circuits. A high-quality battery monitor helps you track the overall health of your unit.
Rotate your power bank’s usage with other charging devices when possible. This reduces constant stress on a single unit. Allow your power bank to cool down between charging sessions, especially during hot weather.
When camping, keep your power bank out of extreme conditions. Don’t leave it exposed to heavy rain, sand, or dust storms. Protect it from physical impacts by storing it safely in your backpack.
Before extended trips, test your power bank thoroughly. Charge it fully and verify all ports work correctly. This preparation ensures you won’t face charging problems miles away from help.
Knowing When Repair Isn’t Enough
Sometimes a cracked solar cell means your power bank has reached the end of its useful life. You need to recognize when repair efforts become wasteful or unsafe.
Extensive internal damage signals replacement time. If your power bank has multiple cracked cells, damaged circuit boards, or corroded battery contacts, professional repair may cost more than buying a new unit. Water damage combined with cracks creates serious safety risks. Batteries can malfunction or overheat when internal components are compromised.
Check if your power bank still holds a charge after repair. A unit that won’t charge fully or drains rapidly within hours indicates deeper battery problems. These issues rarely improve with simple fixes.
Delamination that spreads across the panel suggests structural failure. When layers of the solar cell separate extensively, the panel loses its weatherproofing ability. Moisture will continue entering the device, causing further deterioration.
Consider the age of your power bank too. Older units may have outdated battery technology. Replacement components might be hard to find or incompatible with your model.
Test your repair honestly before your next camping trip. If the power bank fails during testing or shows warning signs like unusual heat or swelling, stop using it immediately.
Professional repair services exist for most damage types. Contact the manufacturer or a repair specialist to get an honest assessment. They can tell you whether fixing it makes sense.
For extended camping trips, having a reliable backup power source matters. If your current unit cannot be safely repaired, investing in a replacement gives you peace of mind. You’ll camp better knowing your charging solution works dependably.
Final Thoughts
Fixing a cracked solar cell on your camping power bank is a manageable task. With the right glue and careful steps, you can restore function in most cases.
Small cracks respond well to simple repairs. Thin acrylic glue works best for sealing case damage without causing seepage problems.
Patience matters more than speed here. Rushing through repair steps often creates new problems instead of solving old ones.
Remember that not every crack needs professional help. Many campers fix minor damage themselves with basic tools and careful technique.
However, some damage goes beyond simple fixes. Multiple cracks, spreading delamination, or exposed wiring often signal deeper problems.
In these cases, trust your judgment. A power bank that won’t hold charge after repair isn’t worth risking on your next trip.
Testing before you travel saves you from disappointment later. Always verify your repair works before you rely on it outdoors.
Prevention remains your best strategy going forward. A good case, regular checks, and proper storage prevent many cracks from happening at all.
Installing a battery management system adds extra protection too. This small addition often extends your power bank’s working life significantly.
Think about how you use your power bank daily. Rotating between devices reduces strain and lowers your risk of future damage.
If repair attempts fail repeatedly, replacement might make more sense. Some situations call for a fresh start rather than continued patching.
Your camping power bank serves an important purpose outdoors. Taking care of it means fewer surprises when you need power most.
Simple maintenance habits combined with timely repairs keep your device running longer. Stay alert to warning signs and act quickly when problems appear.
With this approach, your power bank stays reliable for many more camping trips ahead.
Frequently Asked Questions
Can I repair a cracked solar cell myself or should I hire a professional?
You can repair many cracks yourself with basic tools. Small surface cracks respond well to thin acrylic glue applied sparingly. The key is controlling how much adhesive you use so it doesn’t seep into internal components.
Larger cracks or internal damage may need professional help. Contact the manufacturer or a repair specialist if you’re unsure about the extent of damage.
What’s the difference between a crack I can fix and one that means replacement time?
Single small cracks on the outer layer are fixable. Multiple cracked cells or delamination spreading across the panel suggests structural failure.
Check if your power bank still holds a charge after repair. If it doesn’t, replacement makes more sense than continued repairs.
How do I know if my repair actually worked?
Place your charged power bank in direct sunlight for one hour. Monitor the charging progress on a connected device.
If your power bank charges devices normally, the repair succeeded. Test it before your next camping trip to be certain.
What causes solar cell cracking in the first place?
Drops and impacts are the main culprits. Environmental stress from extreme heat or cold also weakens the solar cells over time.
Delamination occurs when layers of the solar cell separate internally. This happens gradually and often goes unnoticed until cracks appear.
Should I use hot glue or liquid adhesive for repairs?
Use thin acrylic glue for case cracks. Hot glue works better for securing internal components during reassembly.
Never over apply either adhesive. Too much liquid glue seeps into sensitive areas and causes more problems.

Hello, i’m Ivoria i am the face behind Tech Tracker Blog. I am passionate about my work and love to explore gadgets and share about my experience.