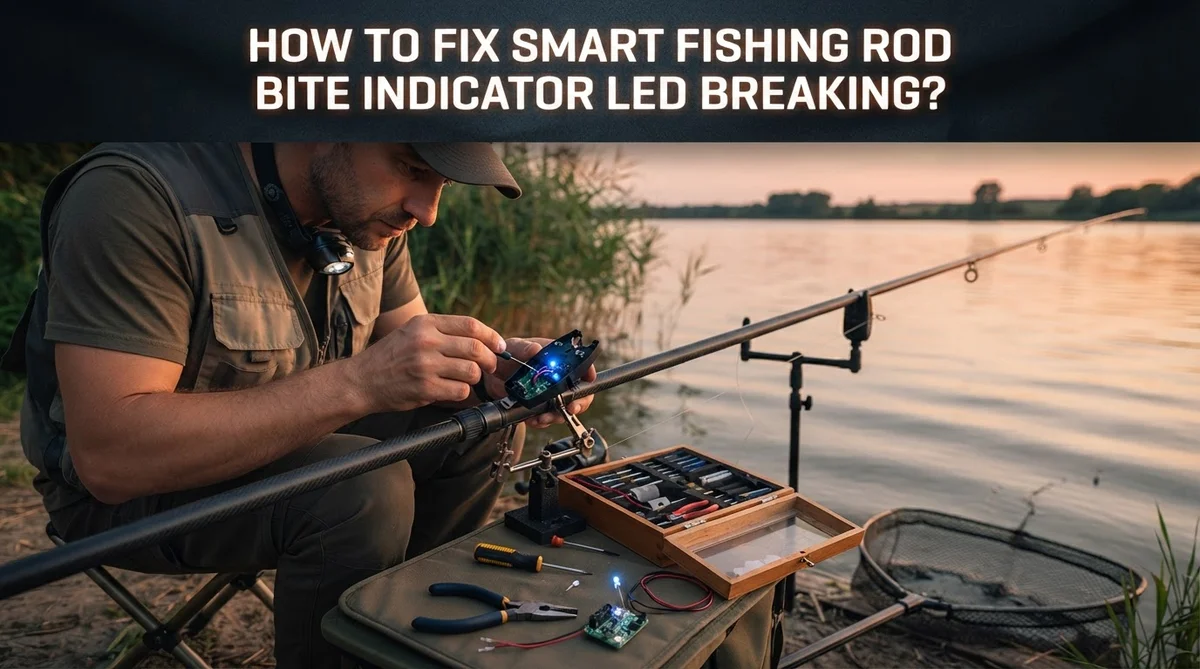
How To Fix Smart Fishing Rod Bite Indicator LED Breaking?
Your smart fishing rod bite indicator LED can be a total game changer. It flashes bright and alerts you the moment a fish bites your line. But what happens when that little light stops working?
Many anglers face this problem. The LED works fine on the counter. Then you clip it onto your rod, and it goes silent.
This issue is more common than you think. Poor line contact often causes the failure. Sometimes the wiring inside gets damaged from weather or rough handling.
The good news? You can fix this without buying a brand new indicator.
In a Nutshell
- Check the battery first. A weak or dead battery is the most common reason LEDs stop working. Swap it out and test again.
- Inspect the contact points. Dirt, rust, or moisture can block the connection. Clean these spots with a dry cloth or small brush.
- Test the LED off the rod. If it lights up here but not on the rod, the issue is likely poor contact or tension when attached.
- Look for loose wires or clips. Small internal connections can shift during transport or heavy use. Gently check and secure any loose parts.
- Verify line tension. Your indicator needs proper contact with the fishing line to trigger the LED. Adjust the clip so it grips snugly.
- Test before every trip. Always confirm your indicator works in real conditions, especially in low light. This simple step saves frustration later.
Understanding How Bite Indicator LEDs Work
A bite indicator LED works by detecting movement on your fishing line. When a fish bites, the line moves and triggers the sensor inside the device. This sensor then activates the LED light to flash and alert you to the strike.
Most bite indicators use a simple clip mechanism. You attach the device directly to your fishing rod. The clip holds the line in a specific position so any tension change gets detected immediately.
The LED itself is powered by a small battery inside the housing. When the sensor detects line movement, it completes an electrical circuit. This circuit sends power to the LED, causing it to light up and flash. The brightness varies depending on the quality of the LED and battery strength.
Sound and light work together in most modern systems. The LED provides a visual alert while a buzzer or beep gives you an audio warning. This dual alert system helps you catch strikes in any lighting condition, especially during night fishing or ice fishing sessions.
The contact points are critical to proper function. These metal or conductive surfaces must touch your fishing line correctly. If the line sits too loose or too tight, the sensor won’t detect movement properly. Poor contact is one of the most common reasons LEDs fail to work when attached to the rod.
Battery condition directly affects LED brightness. A weak battery produces a dim light that’s hard to see. A dead battery produces no light at all.
The housing protects all internal components from water and debris. Cracks or damage to the plastic casing can allow moisture inside. This moisture then corrodes the battery and electrical connections, preventing the LED from functioning.
Common Causes of LED Failure on Fishing Rods
Water damage is one of the biggest culprits behind LED failure on fishing rods. Your bite indicator sits exposed to rain, splashes, and humidity all day long. Moisture seeps into the housing and corrodes the internal circuit board and battery terminals.
Corrosion appears as a white or green crusty buildup on metal contacts. This buildup blocks electrical current from flowing properly. Even a tiny amount of corrosion can prevent your LED from lighting up at all.
Poor battery quality causes many LEDs to fail prematurely. Cheap batteries drain faster and lose their charge in cold water conditions. They also leak more easily, which damages the circuit board inside.
Loose internal components create intermittent failures. Vibration from casting and reeling can shake wires and connections loose over time. Your LED might work sometimes but fail when you need it most.
Physical damage to the lens reduces light output significantly. Cracks or cloudiness in the plastic covering dim the LED brightness. Scratches accumulate from rod contact and rough handling in your tackle box.
Battery contact points wear down with repeated use. Each time you insert or remove the battery, the metal springs lose their tension. Weak contact means inconsistent electrical connection to power the LED.
Extreme temperature swings damage internal components. Cold water causes batteries to perform poorly. Heat exposure during storage can warp plastic housings and degrade the LED itself.
Faulty solder joints on the circuit board fail under stress. Manufacturing defects create weak electrical connections that break during normal fishing use. These invisible flaws often appear only after several trips on the water.
Step-by-Step Guide to Diagnosing the Problem
Start by examining your bite indicator in bright daylight. Remove it from the rod and hold it in your hand. Press the test button or activate it according to the manufacturer’s instructions. Does the LED light up? If yes, move to the next step. If no, the problem likely involves the battery or internal circuitry.
Next, check the battery compartment. Open it carefully and remove the battery. Look at the battery contacts inside. Are they clean and shiny, or do they show white, green, or black crusty buildup? Corrosion prevents electricity from flowing properly. If you see corrosion, that’s your culprit.
Inspect the battery itself. Is it the correct type? Does it have power? Replace it with a fresh one to rule out battery failure as the cause.
Now test the LED again while holding it in your hand. Does it flash or light up now? If the LED works when removed from the rod but fails when clipped on, the problem involves line tension or the clip mechanism.
Check the clip that holds the indicator to your rod. Is it loose? Does it grip the line firmly? A weak grip prevents proper contact with the fishing line, which stops the LED from activating when a fish bites.
Finally, examine the lens cover. Look for cracks, cloudiness, or damage. A scratched lens reduces light output significantly, making the LED appear broken even when it functions correctly.
Document your findings. Note whether the LED works off the rod, the battery condition, and the clip’s grip strength. This information helps you determine the exact fix needed.
How To Fix a Broken or Malfunctioning LED Indicator
Your LED bite indicator stops working for specific reasons. Understanding these causes helps you fix the problem quickly and get back on the water.
Water and moisture are the main enemies of LED systems. Water seeps into the battery compartment and corrodes the metal contacts inside. You’ll see a white or greenish crusty coating on these contact points. This corrosion blocks the electrical connection, so the LED won’t light up even with a fresh battery installed.
Battery issues rank second in causing LED failures. Old batteries lose their charge and can’t power the LED properly. Some batteries leak acid inside the compartment, damaging the circuit board permanently. Poor quality batteries fail faster than name brand options.
Physical damage to your indicator creates another set of problems. A cracked lens reduces light output significantly. Dropping the indicator on hard surfaces can loosen internal wires and components. These loose parts create intermittent failures where the LED works sometimes but not always.
Loose clip connections prevent proper line tension contact. When the clip doesn’t grip your fishing line firmly, the indicator can’t detect fish strikes. The tension sensor won’t activate even when a fish bites.
Solder joint failures occur on the circuit board inside. Repeated temperature changes cause metal joints to crack. Vibration from casting and fighting fish weakens these connections over time.
Worn battery contacts develop from repeated battery replacements. Each time you swap batteries, you risk damaging the metal contact springs. Eventually these springs stop making solid electrical contact.
Identifying which cause affects your indicator helps you choose the right fix. Test your LED in different conditions to narrow down the problem source.
Testing Your Indicator Before Heading Out
Testing your bite indicator before fishing saves frustration on the water. Start this process at home in a calm environment where you can focus on each step.
First, remove the indicator from your rod and hold it in your hand. Press the test button or activate the alarm function according to your device’s manual. Watch for both the LED light and listen for any sound. The light should flash brightly and the sound should be clear. If nothing happens, your battery may be dead or the device has a deeper issue.
Next, check the battery compartment carefully. Open it and inspect the battery for corrosion or damage. Look for white or green crusty buildup on the metal contacts. If you see corrosion, clean the contacts gently with a dry cloth. Replace the battery with a fresh one and test again.
Now attach the indicator to your rod using the clip. Position it so the line makes direct contact with the sensor point. This contact is absolutely critical for proper function. Gently tug on your line to simulate a fish bite. The indicator should respond immediately.
Test in different lighting conditions if possible. Bright daylight makes dim LEDs hard to see, so check how visible your LED is in low light. This matters especially for evening or night fishing sessions.
Finally, test your indicator in actual fishing conditions before your trip. Use the same rod setup and line you’ll fish with. This real world test catches problems you might miss at home. A working indicator at home sometimes fails under actual fishing stress due to line tension or temperature changes.
Mistakes That Lead to Repeated LED Breakage
Most LED bite indicators fail because anglers make preventable mistakes during use and storage. Understanding these errors helps you keep your indicator working season after season.
Improper line contact ranks as the top mistake. Your indicator needs consistent pressure against the fishing line to detect strikes. Many people clip the alarm too loosely or position it incorrectly on the rod. When the line doesn’t press firmly against the sensor, the LED never activates even when fish bite.
Ignoring moisture protection causes repeated failures. Anglers leave their indicators attached to rods overnight or during rain without considering water damage. Moisture seeps into battery compartments and corrodes internal circuits. Store your indicator in a dry place after every fishing session.
Neglecting battery maintenance creates another common problem. People leave dead batteries inside for weeks, which causes acid leakage that destroys contacts and circuits. Replace batteries immediately after fishing ends. Never store your indicator with old or weak batteries still installed.
Forcing the clip onto your rod too hard damages internal components. Excessive pressure can crack circuit boards or loosen solder joints inside. Attach your indicator with firm but gentle pressure. The clip should hold securely without requiring force.
Exposing indicators to extreme temperature changes shortens their lifespan significantly. Moving your indicator from a cold truck to warm indoor storage causes condensation inside the unit. Let your indicator reach room temperature gradually before opening the battery compartment.
Dropping or bumping your indicator against hard surfaces breaks the LED lens and internal wiring. Handle your indicator carefully when moving it between rods or storing it. A small protective case prevents accidental damage during transport.
Troubleshooting Persistent LED Issues
When your smart fishing rod bite indicator LED keeps breaking, you need a systematic approach to find the real problem. Persistent LED issues happen for specific reasons, and understanding them helps you fix the problem correctly.
Start by examining the power source first. Remove the battery and look for corrosion or discoloration inside the compartment. Clean any debris with a dry cloth. Battery contacts wear down over time, especially if you change batteries frequently. Gently bend the metal contacts slightly to improve connection if they look flat or worn.
Next, inspect the circuit board inside your indicator. Look for loose solder joints where components connect to the board. These joints can crack from vibration or temperature changes during storage. If you see gray or black marks on the board, moisture has damaged the electronics. This requires complete replacement of the internal components.
Check the LED lens itself for cracks or cloudiness. A damaged lens prevents light from shining through properly. Even small cracks allow water to seep inside and destroy the circuit board over time.
Test your indicator in different conditions before fishing. Hold it in your hand first, then attach it to your rod. Notice if the LED flashes consistently or flickers. Flickering suggests a loose connection or failing battery.
Consider your storage habits as well. Extreme temperature swings between your car and home can damage internal components. Store your indicator in a cool, dry place inside a protective case.
Keep a backup indicator ready for your fishing trips. This prevents lost fishing time while you repair your primary unit. Rotate between indicators to extend the lifespan of each one.
Maintenance Tips to Prevent Future Breakage
Your smart fishing rod bite indicator needs regular care to stay reliable. Simple maintenance habits prevent most LED failures before they start.
Clean your indicator after every fishing trip. Saltwater, freshwater, and mud all damage electronics over time. Use a soft cloth to wipe the exterior gently. Pay special attention to the clip area where line contact happens. Remove any debris stuck in crevices.
Store your indicator in a dry location. Moisture creeps into battery compartments and corrodes circuit boards. Keep it away from direct sunlight and extreme heat. A small plastic case or dry bag works perfectly for storage between trips.
Check your battery contacts monthly. Corrosion builds up even when you don’t use your indicator. If contacts look dull or discolored, clean them with a pencil eraser. Replace old batteries before they leak inside the unit.
Test your indicator every few weeks, even during off season. This catches problems early when they’re easy to fix. Attach it to your rod and verify the LED lights up clearly.
Avoid storing your indicator with the battery inside during long breaks. Remove batteries for storage periods longer than two weeks. This prevents leakage that destroys internal components.
Handle your indicator gently during use. Avoid dropping it or forcing the clip onto your rod. A loose fit is better than one that strains the internal wiring.
Keep your indicator away from temperature swings. Don’t leave it in a hot car then take it to cold water immediately. Let it adjust to temperature changes gradually.
Store a backup indicator in your tackle box. This ensures you always have a working unit ready for your fishing trips.
Final Thoughts
Fixing a broken LED bite indicator does not need to feel like a hard task. Most problems come from simple issues like loose contacts, moisture damage, or rough handling.
Once you know the common causes, you can fix them fast. You can also stop them from happening again.
Regular care makes the biggest difference. Clean your indicator after each trip. Store it somewhere dry. Check the battery contacts often.
These small habits protect the LED and the circuit board inside. They also help your indicator last through many fishing seasons.
Testing before you fish saves you from frustration later. Always check your indicator at home first. Confirm the LED lights up and the sound works properly.
This step takes only a few minutes. But it can save your entire fishing trip.
If your LED keeps breaking, go back to the basics. Check the power source. Inspect the wiring. Look at the lens for cracks.
Most fixes are simple once you spot the real problem. You do not always need a new indicator. Sometimes a small repair solves everything.
Smart fishing depends on reliable gear. A working LED indicator helps you catch bites you might otherwise miss, especially at night or during ice fishing.
Treat your indicator with care, and it will serve you well for a long time. Handle it gently. Store it properly. Test it often.
With the right habits, you can avoid most LED failures. Your indicator will stay ready every time you head out to fish.
Simple steps lead to fewer breakdowns and more successful fishing trips.
Frequently Asked Questions
Why does my LED bite indicator only work when I remove it from the rod?
This happens because the LED loses proper contact with your fishing line. When the indicator clips onto your rod, the line tension must press firmly against the sensor. If the clip is loose or the sensor arm doesn’t make solid contact, the LED won’t activate during a bite.
Check that your clip grips the rod tightly. Make sure the sensor arm touches your line with consistent pressure. Test the indicator by gently pulling the line to see if the LED flashes. If it doesn’t respond, adjust the clip position slightly.
What causes the LED lens to crack or become cloudy?
Physical impact is the main culprit. Dropping your indicator, bumping it against hard surfaces, or forcing the clip onto your rod damages the lens. Temperature changes and moisture exposure also cause cloudiness over time.
Handle your indicator gently during use and storage. Avoid dropping it or applying excessive force when attaching it to your rod. Store it in a dry place away from extreme heat or cold.
How often should I test my bite indicator before fishing?
Test it every time before you head out. This takes just a few minutes and saves you from disappointment on the water. Gently tug your line to trigger the LED and listen for any sound alerts if your model has them.
Can I fix a broken LED myself?
Simple fixes work for many issues. Check your battery first and replace it if needed. Clean the battery contacts to remove corrosion. Inspect the LED lens for cracks and the clip for loose parts. If these steps don’t help, the internal circuit board may need replacement, which requires more technical skill.

Hello, i’m Ivoria i am the face behind Tech Tracker Blog. I am passionate about my work and love to explore gadgets and share about my experience.