How To Fix Submarine Drone Ballast Tank Valve Sticking?
Does your submarine drone refuse to dive properly? A sticky ballast tank valve is often the hidden culprit.
This small part controls how water enters and exits your drone’s ballast tank. When it sticks, your drone struggles to submerge or surface on command.
The good news? You can fix this problem yourself in most cases.
A stuck solenoid valve is the most common reason for ballast tank filling failure. It sounds technical, but the fix is usually simple.
This guide walks you through the exact steps to diagnose and repair a sticking valve. You will learn how to clean the valve properly and apply the right amount of lubrication.
In a Nutshell
- Clean the valve first. Most sticking issues come from dirt or debris buildup. A thorough cleaning solves the problem in many cases.
- Add one drop of oil. Use minimal lubrication on the valve. Too much oil causes more harm than good.
- Check the hull interface. Look at the recommended idle ballast level. This tells you if your valve works correctly.
- Test valve responsiveness. Verify the valve moves smoothly before you assume it’s broken. Many drones just need simple adjustments.
- Seal everything properly. After cleaning or repairs, check all seals stay tight. A loose seal creates new problems fast.
- Replace the pump only if needed. If cleaning and oiling do not work, pump replacement becomes your next step. Don’t skip straight to this option.
Understanding Ballast Tank Valves and Why They Stick
Ballast tank valves are small but critical components in your submarine drone. They regulate water flow into and out of the ballast tank, which controls your drone’s buoyancy and depth control.
Why valves get stuck comes down to a few common causes. Saltwater corrosion builds up mineral deposits inside the valve body. Sediment and debris from the water supply accumulate on valve seats. The solenoid mechanism that opens and closes the valve can seize when salt crystals form around moving parts. Temperature changes cause metal expansion and contraction, which can bind mechanical components.
Your ballast system relies on this valve working smoothly. When it sticks, water cannot fill or drain properly. Your drone loses buoyancy control and refuses to respond to dive commands. The problem gets worse over time if you ignore it because deposits continue to harden.
Understanding valve types helps you diagnose issues faster. Most submarine drones use solenoid valves that respond to electrical signals. These have internal plungers that move to open or close water passages. Some systems use manual ball valves as backups. Compressed air systems push water out, while water pump systems actively move water in both directions.
The stuck valve problem is almost always fixable without replacing expensive components. Salt deposits respond well to cleaning. Light corrosion dissolves with the right approach. Even seized solenoids often free up with proper maintenance techniques.
Your drone’s hull interface displays ballast tank status. You can check recommended idle levels and monitor valve responsiveness through this system. This information tells you exactly what is happening inside your ballast system.
Most sticking issues happen because valves lack regular maintenance. Submarine drones used in saltwater environments need more frequent attention. Freshwater systems still accumulate debris over time. Catching problems early means simple cleaning fixes everything.
Signs Your Submarine Drone Has a Sticking Valve
Your submarine drone shows clear warning signs when the ballast tank valve starts sticking. Learning to spot these signs early helps you fix the problem before it gets worse.
Slow or incomplete diving is the first red flag. Your drone should sink smoothly and reach its target depth without hesitation. If it descends unevenly or stops partway down, the valve is likely not opening fully. Water cannot enter the ballast tank properly when the valve restricts flow.
Watch for unusual noises coming from the ballast system. A grinding or clicking sound means the solenoid valve is struggling to move. The valve mechanism is fighting against corrosion or debris buildup inside. Normal operation should be nearly silent.
Check the ballast tank status on your hull interface display. The readings should show your drone at the idle ballast level you set. If the display shows incorrect levels or won’t update, the valve may not be responding to commands. The system cannot report accurate data when the valve fails to move.
Manual valve testing reveals responsiveness problems. Try commanding the valve to open and close through your control system. A working valve responds immediately. A sticky valve responds slowly or not at all. You might hear the solenoid attempt to engage but the valve physically won’t move.
Notice if your drone lists to one side or tilts at odd angles. Uneven ballast distribution happens when one valve sticks while others work normally. The drone cannot maintain level trim when water cannot flow equally into all ballast chambers.
Finally, pay attention to repeated ballast errors in your system logs. Your drone records valve commands and results. Frequent failures to reach target ballast levels indicate a developing valve problem.
Catching these signs early means simple cleaning often solves the issue before you need expensive repairs or replacements.
Diagnostic Checks Before You Start Repairs
Before you grab tools and start taking apart your submarine drone, run a few simple checks first. These diagnostic steps save you time and help you understand exactly what’s wrong with your ballast tank valve.
Start by checking your hull interface display. This screen shows your current ballast level and idle position. Look at the readings to confirm your drone isn’t sitting at the correct idle depth. If the numbers look wrong, your valve may be stuck in an open or closed position.
Next, listen carefully to your ballast system. Turn on your drone and command the valve to open and close. A healthy valve makes a soft clicking sound. A grinding noise or complete silence tells you the solenoid isn’t responding properly.
Test manual valve responsiveness manually if possible. Some submarine drones have a manual override on the ballast valve. Try moving it by hand to feel if it moves freely or feels stuck and resistant. Resistance indicates internal corrosion or debris buildup.
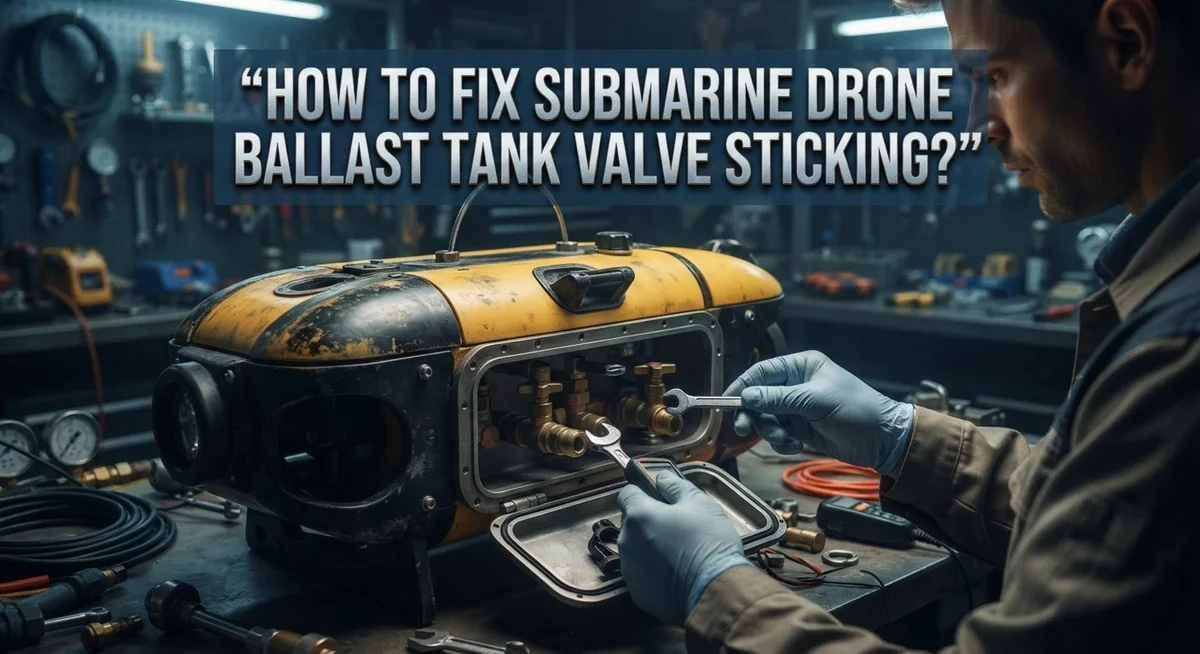
Check the valve’s physical position through your drone’s access panel. Look for any visible signs of corrosion, salt deposits, or debris around the valve housing. White crusty buildup or discoloration means saltwater has been eating away at the metal.
Command your drone to dive and watch what happens. A properly working valve should fill your ballast tanks smoothly. If filling takes longer than usual or stops partway through, your valve is partially stuck.
Finally, inspect the pump intake and discharge lines leading to the valve. Make sure nothing is blocking water flow to the system. Sometimes the problem isn’t the valve itself but a clogged line preventing proper operation.
These diagnostic checks take just five to ten minutes but give you clear information about whether you need simple cleaning or more serious repairs.
Step-by-Step Guide to Cleaning and Lubricating the Valve
Start by gathering your tools. You will need soft brushes, lint-free cloths, and a small container for parts. Have your drone’s manual nearby for reference. Disconnect power completely before touching any components. This prevents accidental activation of the solenoid valve.
Remove the valve from your submarine drone carefully. Most valves mount with two or three fasteners. Take photos as you disassemble so reassembly becomes easier. Place small parts in a labeled container to avoid losing anything.
Inspect the valve for visible debris. Sediment, salt residue, and mineral deposits commonly cause sticking. Use a soft brush to remove loose particles gently. Work over a clean surface to catch any fragments.
Rinse the valve with distilled water. Tap water contains minerals that can worsen sticking. Let water flow through all passages and openings. Dry the valve completely with lint-free cloths. Any remaining moisture can cause corrosion.
Examine the valve seat and plunger closely. These surfaces must be smooth and clean. If you see pitting or scratches, the valve may need replacement. Light deposits respond well to gentle brushing.
Apply lubrication sparingly. Use only one small drop of appropriate oil on the plunger. Too much oil attracts dirt and causes more sticking. The oil should coat the moving parts without pooling.
Test the valve manually before reinstalling. Move the plunger by hand several times. It should move smoothly without resistance. If stiffness remains, repeat the cleaning process.
Check all seals and gaskets. Replace any that appear cracked or flattened. Proper sealing prevents water from entering the valve mechanism.
Reinstall the valve carefully. Align all connections properly and tighten fasteners evenly. Reconnect power and test your ballast system. Command several dive and surface cycles to verify smooth operation. Most sticking issues resolve completely after thorough cleaning and minimal lubrication.
Verifying Proper Sealing After Maintenance
After you clean and lubricate your ballast tank valve, checking the seal is critical. A loose seal causes leaks that make your drone sink uncontrollably or fail to maintain depth.
Start by examining all gaskets and O rings around the valve assembly. Look for cracks, flattening, or permanent deformation. These signs mean the seal cannot hold pressure anymore. Replace damaged gaskets before reinstalling the valve.
Next, apply a thin layer of grease to the gasket surfaces. This helps create a watertight connection when you reassemble the valve. Use only the amount needed. Excess grease traps debris and causes future sticking.
Reinstall the valve slowly and carefully. Tighten the bolts in a cross pattern, not in a circle. This ensures even pressure distribution across the seal. Hand tighten first, then use your wrench for a final quarter turn.
Test the seal immediately after installation. Command your drone to fill the ballast tank halfway. Watch for water drips around the valve connection. Any moisture means the seal failed. Remove the valve and check the gasket again.
Run your drone through a full dive cycle. Monitor your ballast tank pressure readings on the hull interface. Pressure should remain stable during the dive. If pressure drops, water is leaking into your system.
Listen for unusual sounds near the valve. Hissing or bubbling indicates air or water escaping. This means your seal is not holding properly.
Check the idle ballast level after 10 minutes of operation. It should match your system’s recommended setting. Deviation suggests a slow leak developing.
Perform this verification process every time you service the valve. Proper sealing prevents major damage to your submarine drone’s internal systems. A small leak today becomes a flooded drone tomorrow.
When to Consider Pump Replacement
A stuck ballast tank valve often signals that your pump may need replacement. However, you should only consider this step after ruling out simpler fixes. Most sticking issues come from valve debris or lack of lubrication, not pump failure.
Start by checking if cleaning and oiling resolved your problem. Run your submarine drone through several dive cycles. Watch for consistent filling and draining. If the valve still responds slowly or incompletely, the pump could be the culprit.
Listen for unusual sounds from your ballast system. A healthy pump makes steady, predictable noises. Strange grinding, squealing, or sputtering suggests internal pump damage. These sounds indicate wear that cleaning alone cannot fix.
Check your system’s pressure readings if your drone has a gauge. Low pressure during operation often means the pump is losing efficiency. High pressure with slow filling also points to pump problems rather than valve sticking.
Examine your pump’s intake and discharge lines for leaks. Small cracks or loose connections reduce system pressure. This creates symptoms that look like pump failure when the pump itself works fine. Tighten all connections before replacing the pump.
Consider your drone’s age and maintenance history. Older pumps naturally wear out over time. If your system has gone years without service, replacement becomes more likely. New pumps provide better reliability than repeatedly repairing old ones.
Think about system alternatives too. Water pump based ballast systems offer different advantages than compressed air systems. Some operators find alternative systems more dependable long term.
Before you purchase a replacement pump, document everything. Record your dive test results, pressure readings, and any unusual sounds. This information helps you select the right replacement and prevents future problems. A new pump should restore normal filling speeds and system responsiveness.
Common Mistakes to Avoid During Valve Maintenance
Maintaining your submarine drone’s ballast tank valve requires careful attention to detail. Many operators make mistakes that actually make the sticking problem worse instead of better.
Over-oiling is the most common error. People think more lubrication helps the valve work smoothly, but excessive oil creates a sticky residue. This residue traps debris and minerals inside the valve. Use only a single drop of oil. That tiny amount is enough to reduce friction without causing buildup.
Another frequent mistake involves ignoring seal integrity after cleaning. You remove the valve, clean it thoroughly, and reinstall it without checking the gaskets and O rings. These seals can crack or compress during removal. A compromised seal lets water leak into your ballast system. Always inspect seals before reinstalling the valve.
Neglecting to verify valve position is equally problematic. Some operators assume the valve works after cleaning, but they never actually test it. You need to command your drone to perform a dive cycle and watch the ballast tanks fill. Listen for unusual sounds. Check the idle ballast level after operation. This verification catches problems early.
Many people also skip the diagnostics step entirely. They jump straight to pump replacement without confirming the valve is actually stuck. A stuck solenoid valve and a failing pump create different symptoms. Check the valve’s responsiveness through your drone’s hull interface first. This saves you from replacing expensive components unnecessarily.
Rushing the reinstallation process causes additional damage. Force fitting the valve can bend internal components or misalign the plunger. Install it slowly and carefully. Take your time ensuring everything sits properly.
Finally, operators often forget to document their maintenance work. Keep records of when you serviced the valve, what you found, and what you did. This history helps you spot patterns and predict future problems before they cause system failures during critical missions.
Final Thoughts
A stuck ballast tank valve feels like a big problem. But most fixes are simple and quick. You just need patience and the right steps.
Cleaning and lubrication solve most sticking issues. You rarely need to replace your pump right away. Start with the basics before you assume the worst.
Remember to check your valve before touching your pump. Many drone owners skip this step and spend money they did not need to spend. A clean valve often works fine again.
Use minimal oil when you lubricate the valve. One drop is enough to fix most sticking problems. Too much oil creates new issues instead of solving old ones.
Always test your valve after any maintenance work. Run your drone through a dive cycle and watch how it performs. This simple check saves you from bigger problems later.
Seals matter just as much as the valve itself. A clean valve with a bad seal still causes trouble. Check both parts every time you do maintenance.
Water pump systems offer a good alternative if you keep having valve issues. They work differently than compressed air systems and may suit your drone better. Think about your specific needs before you switch.
Keep a record of every repair you make. This history helps you spot patterns in your drone’s behavior. It also helps you decide when a part truly needs replacement.
Your submarine drone depends on a working ballast system. Small maintenance steps keep it running smoothly for a long time. Do not wait until small problems become big failures.
Take care of your valve, and it takes care of your dives. Simple habits like cleaning, checking seals, and light oiling go a long way. Your drone will thank you with reliable performance every time you take it underwater.
Frequently Asked Questions
Why does my ballast tank valve get stuck in the first place?
Stuck solenoid valves happen because debris and mineral buildup collect inside the valve over time. Salt water, sediment, and corrosion create a sticky residue that prevents the valve from moving freely. The valve needs to open and close smoothly, but this buildup blocks its motion. Your drone’s ballast system relies on this valve to fill and empty tanks properly.
How much oil should I use when lubricating the valve?
Use only a single drop of oil on the valve. This is the critical point that most operators miss. Too much oil causes more problems than it solves, trapping additional debris and creating a gummy paste inside. A tiny amount helps the valve move freely without attracting contaminants.
What should I check before I assume my pump is broken?
Always inspect your valve first. Most sticking issues come from the valve, not the pump. Check the valve’s position to see if it responds to commands. Listen for any sounds from your ballast system. If the valve moves after cleaning and oiling, your pump is probably fine.
Can I use a different ballast system if valve problems keep happening?
Yes, water pump based systems work well as an alternative to compressed air ballast systems. If you experience repeated valve sticking despite proper maintenance, switching systems might solve your problem permanently. This gives you a backup option when traditional valves become unreliable.
What happens if I ignore seal integrity after cleaning?
Broken seals cause leaks and system failure. Water enters places it shouldn’t, damaging internal components. Always verify your seals after any maintenance work. A small leak today becomes a major problem during your next dive.

Hello, i’m Ivoria i am the face behind Tech Tracker Blog. I am passionate about my work and love to explore gadgets and share about my experience.