How To Fix E-Bike Radar Taillight Lens Condensation?
Have you ever pulled out your e-bike after a rainy ride and noticed a foggy taillight lens? You are not alone. Moisture loves to sneak inside radar taillights, especially after heavy rain or sudden temperature changes.
This fogging can dim your light output. It also makes your radar taillight harder for drivers to spot on the road. That is a safety risk nobody wants.
The good news? You can fix this problem without taking your taillight apart. Simple tools like a hair dryer or a shop vacuum can pull that trapped moisture right out.
In a Nutshell
- Moisture builds up inside the lens after rain or heavy humidity. This is a common issue with sealed light units, including your e-bike radar taillight.
- Heat works first. Use a hair dryer on low heat to warm the lens gently. This helps evaporate the trapped moisture without opening the unit.
- A shop vacuum helps with stubborn cases. It pulls moisture out through small gaps in the seal, so you get a clear lens again.
- No disassembly needed. Both methods work from the outside. Opening the taillight yourself can cause damage and void your warranty.
- Act quickly. Condensation does not go away on its own. Waiting too long can make the fogging worse and harder to clear.
- Watch for return fog. If moisture keeps coming back, your taillight’s seal may be failing. This means you may need a longer term fix or replacement.
Why Condensation Forms Inside Your Radar Taillight Lens
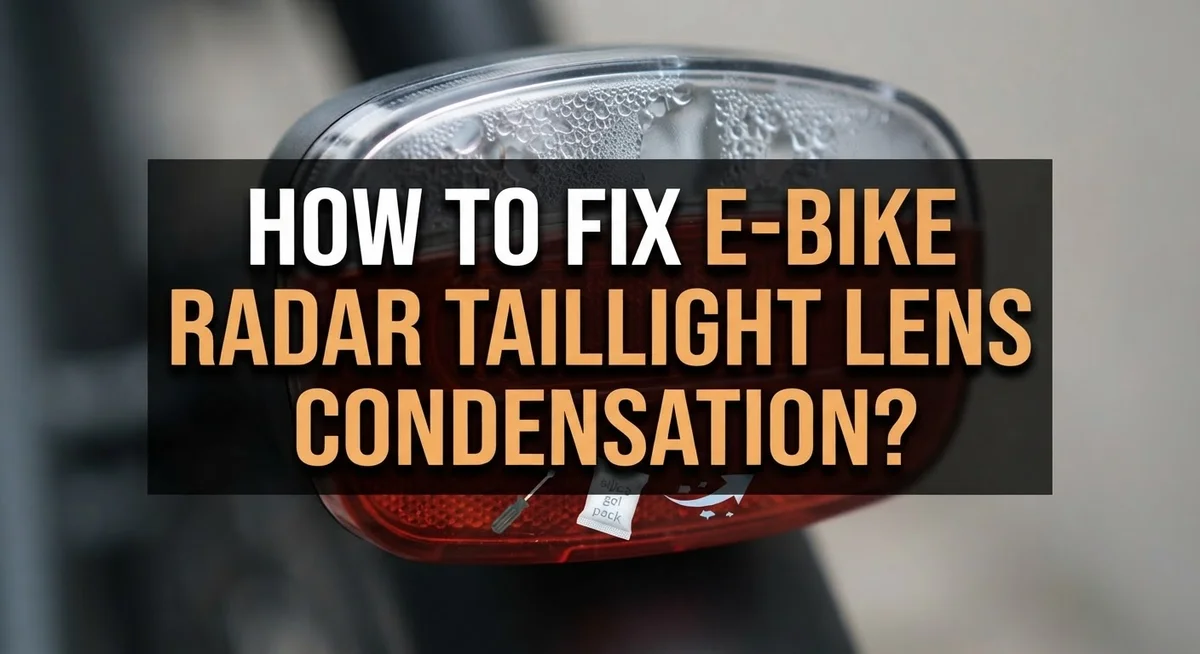
Condensation forms inside your radar taillight lens due to temperature differences between the warm interior and cold exterior air. When you ride in rain or humid conditions, moisture enters the sealed light assembly through tiny gaps or micro-cracks in the seal.
Here’s what happens: Water vapor gets trapped inside the lens cavity. As temperatures drop after your ride, this vapor cools and turns into liquid droplets on the inside surface. The lens fogs up, reducing your light’s visibility and effectiveness.
Sealed light assemblies are especially prone to this issue. They trap air inside with nowhere for moisture to escape. Over time, even small amounts of water accumulate and create that annoying foggy appearance.
Why it matters: Condensation dims your taillight’s brightness. Other riders and drivers see less of your light, which reduces your visibility and safety on the road. A foggy lens also looks like your light is malfunctioning, even though it works fine underneath.
The problem worsens if you ignore it. Moisture sitting inside can eventually damage internal components or create permanent hazing on the lens surface. Acting quickly prevents long term damage.
The seal factor: Most condensation appears after heavy rain or extended wet conditions. If fog returns frequently even during dry weather, your taillight’s seal may be compromised. Small cracks or worn gaskets allow moisture to enter regularly.
Understanding why condensation forms helps you recognize when it’s a temporary issue versus a sign of seal failure. Both situations have solutions, but knowing the difference helps you choose the right fix for your specific situation.
Signs Your Taillight Has a Moisture Problem
Condensation inside your e-bike radar taillight lens shows up in several clear ways. The most obvious sign is visible fogging or clouding on the inside of the lens. You will notice the mist appears right after wet rides or humid conditions.
Your taillight’s brightness may seem dimmer than normal. This happens because water droplets scatter light instead of letting it pass through clearly. If you ride at dusk or night, this reduced brightness becomes a real safety concern.
Look for water droplets clinging to the inner lens surface. Sometimes you see small beads of moisture. Other times the entire interior looks like a steamed bathroom mirror. Both situations mean condensation is present and affecting performance.
The lens may appear clear one moment and foggy the next. Temperature changes cause this. When you bring your warm bike indoors, condensation forms quickly on cold lenses.
Pay attention to timing patterns. Does fogging happen after every rainy ride? Does it clear up on its own after a few hours? Or does it stay put and refuse to disappear? Persistent condensation that does not clear up signals a deeper moisture problem.
Check the lens regularly, especially during wet seasons. Catching condensation early makes fixing it easier. You might notice the problem worsens over time if left untreated.
The key sign to watch for is moisture that returns repeatedly. If you clear the lens and condensation comes back within days or weeks, your taillight’s seal integrity may be compromised. This tells you the problem goes beyond simple temporary fogging.
Step-by-Step: Using Heat to Clear Lens Condensation
The heat method is your first line of defense against foggy taillight lenses. This approach works from the outside without requiring any disassembly.
Start with a hair dryer on the lowest heat setting. Hold it about six inches away from the lens. Move it slowly across the entire lens surface for two to three minutes. The gentle warmth causes the water vapor inside to evaporate naturally.
Keep the dryer moving to avoid concentrating heat in one spot. You want consistent, mild warmth rather than intense heat. Watch the lens closely as you work. You should see the fog begin to clear within a few minutes.
Patience is essential here. Rushing the process or using high heat can damage the lens or internal components. Low heat works just as effectively and takes only a bit longer.
After you finish, let the taillight cool completely before riding. This prevents new condensation from forming immediately. The cooling process helps seal any moisture that remains.
Check your results after thirty minutes. If the lens stays clear, the heat method solved your problem. If fog returns quickly, the issue may be more serious.
The heat method works best for light condensation that just appeared. For stubborn cases where moisture has been sitting longer, you might need to repeat the process. Do this once daily for up to three days if necessary.
This non invasive approach protects your taillight’s warranty and internal electronics. It’s also the fastest way to get back on the road with a clear, functioning light. Most riders see results within their first attempt using this simple technique.
Step-by-Step: Using a Shop Vacuum to Extract Moisture
A shop vacuum offers a direct way to pull moisture out from inside your taillight lens. This method works well when heat alone hasn’t cleared stubborn condensation that keeps returning.
Here’s how to use a shop vacuum effectively:
Start by setting your shop vacuum to a low suction level. High suction can damage delicate internal components or the lens itself. Position the vacuum hose opening near the taillight lens, but do not press it directly against the plastic.
Hold the hose about one to two inches away from the lens surface. Move it slowly around the entire lens perimeter. This creates gentle suction that draws moisture vapor out through any small gaps or vents in the light assembly.
Work in circular motions for two to three minutes. You may notice the condensation gradually disappearing as moisture gets pulled away. Patience matters here. Rushing the process reduces effectiveness.
After vacuuming, follow these steps:
Let your taillight sit undisturbed for at least thirty minutes. This allows any remaining moisture to evaporate naturally. Check the lens to see if condensation has cleared completely.
If fog returns within hours, this signals a potential seal failure. Your taillight may need professional inspection or replacement to prevent ongoing moisture problems.
For best results, combine the vacuum method with gentle external heat. Apply low heat from a hair dryer for five minutes, then use the vacuum. This two step approach removes more moisture than either method alone.
Never attempt to disassemble your radar taillight to access internal moisture. Most e bike lights have sealed designs, and opening them can void warranties and cause permanent damage to electronic components.
Choosing the Right Method for Your Situation
Choosing between heat and vacuum methods depends on your specific situation. Light condensation that just appeared responds well to the heat method. This approach works quickly and requires minimal equipment you likely have at home.
Use the heat method first if you noticed fog right after riding in rain or wet conditions. The moisture hasn’t had time to settle deeply inside the lens. Your hair dryer can evaporate this fresh moisture efficiently. This method is also best if you want to avoid any risk of opening your taillight.
Switch to the shop vacuum method if heat alone doesn’t clear the condensation after two attempts. Stubborn moisture that lingers suggests water has accumulated inside the lens cavity. The vacuum pulls moisture out directly rather than just evaporating it from the surface.
Consider combining both methods for persistent cases. Start with heat to warm the lens and loosen moisture. Follow up with the shop vacuum at low suction to extract what the heat mobilized. This two step approach often succeeds where single methods fail.
Your riding environment matters too. If you frequently ride in heavy rain or humid conditions, expect condensation to return more often. Repeated moisture problems point to a potential seal issue rather than a temporary fix situation.
Time availability affects your choice as well. Heat takes about thirty minutes total. The shop vacuum method requires similar patience but feels more active. Pick whichever approach fits your schedule and comfort level.
Test your chosen method once before relying on it. This helps you understand how long results last and whether you need professional service.
Preventing Future Condensation Buildup
Preventing future condensation buildup keeps your e-bike taillight working properly. The key is understanding how moisture enters your light in the first place.
Water gets inside sealed taillight assemblies through tiny gaps, worn seals, or cracks you might not see. After each wet ride, moisture can accumulate inside the lens. Address this before condensation becomes a recurring problem.
Check your taillight seal regularly. Look for visible cracks, loose components, or areas where the lens meets the housing. A compromised seal lets water in repeatedly. If you spot damage, the seal may need replacement to stop the cycle.
Store your e-bike in a dry location whenever possible. Garages, sheds, or indoor spaces reduce moisture exposure between rides. Avoid leaving your bike outside overnight in humid conditions. Even parked bikes can collect moisture if exposed to dew or rain.
After riding in heavy rain or wet conditions, dry your taillight with a soft cloth. Gently wipe the lens and the area where it connects to the housing. This simple step removes surface moisture before it seals inside.
Consider applying a protective coating to the lens area. Some riders use clear sealant products designed for outdoor equipment. These create an additional barrier against moisture penetration.
Check your taillight battery connections too. Corrosion around battery contacts can indicate moisture problems. Clean connections with a dry cloth regularly.
Inspect your taillight every month during wet seasons. Early detection prevents condensation from becoming trapped inside. If you notice recurring fog despite these steps, your seal likely needs professional attention or replacement. Addressing seal issues stops the problem at its source rather than treating condensation after it forms.
Mistakes That Make Condensation Worse
Rushing to fix condensation often backfires. Many riders make mistakes that actually make the problem worse instead of better.
Delaying action is the biggest mistake. Condensation doesn’t disappear on its own. The longer moisture sits inside your lens, the harder it becomes to remove. Water can eventually damage internal components or create permanent cloudiness. Start treatment within hours of noticing fog, not days later.
Attempting to disassemble your taillight unnecessarily creates new problems. Opening the sealed assembly can void your warranty and introduce more moisture during the process. It also risks damaging delicate components inside. External methods like heat and vacuum work without opening anything.
Using excessive heat damages your lens. Applying a hair dryer on high heat for too long can warp plastic or harm internal electronics. Keep heat moderate and move the dryer constantly. Never hold it in one spot.
Ignoring seal failures wastes your effort. If condensation returns within hours after you clear it, your seal is compromised. Continuing to treat it without addressing the seal means the problem repeats endlessly. Inspect for cracks or worn edges around your lens.
Mixing incompatible methods at once causes confusion. Don’t vacuum and apply heat simultaneously. This creates conflicting moisture movement. Try one method first, wait, then switch if needed.
Skipping the waiting period ruins results. After vacuuming or heating, your taillight needs time to fully dry. Riding immediately reintroduces moisture. Wait at least thirty minutes before using your bike again.
Forgetting to check your taillight regularly allows small issues to become big ones. Monthly inspections catch seal problems early. This simple habit prevents most condensation troubles before they start affecting your safety and visibility.
When Persistent Condensation Signals a Seal Failure
Persistent condensation that keeps returning signals something more serious than a temporary moisture problem. Your taillight seal is likely failing. When water repeatedly appears inside your lens despite your efforts to dry it, the protective barrier around your light assembly has broken down.
A failing seal allows moisture to enter continuously. Rain, humidity, and temperature changes push water through tiny cracks or gaps you cannot see. The seal may have degraded from age, impact damage, or normal wear. Once compromised, no amount of vacuuming or heating provides lasting results.
You need to assess the damage carefully. Look at your taillight housing for visible cracks, loose components, or worn rubber gaskets around the lens. Check if water drips from the light when you shake it gently. These signs confirm seal failure rather than a simple condensation issue.
Seal failure requires different action than standard condensation removal. External methods like heat and vacuums become temporary fixes only. The moisture returns because water keeps entering through the broken seal. You are treating the symptom, not the cause.
Consider your options realistically. Some riders replace the entire taillight assembly when seals fail. Others contact the manufacturer about warranty coverage or repair options. A few attempt to reseal the light using appropriate gasket materials, though this requires careful work.
Do not ignore persistent condensation. It indicates your taillight protection has failed. Continuing to use a light with a broken seal risks water damage to internal electronics and battery connections. Address seal failure promptly to maintain your e-bike’s safety features and visibility on the road.
Final Thoughts
Fixing condensation in your e-bike radar taillight lens is simple once you know the right steps. You don’t need to disassemble anything in most cases.
A hair dryer works well as your first attempt. It warms the lens gently and helps moisture evaporate without causing damage.
If heat alone doesn’t solve the problem, try a shop vacuum. This method pulls moisture out through small gaps, and patience makes all the difference here.
Both methods share one thing in common: they work from the outside. You avoid opening the light housing, which protects your warranty and keeps internal components safe.
Acting quickly matters more than which method you choose first. Condensation left untreated tends to spread and cause bigger problems over time.
Think of these fixes as tools in your maintenance routine. Regular care prevents small issues from becoming expensive replacements.
Sometimes condensation returns even after treatment. This usually points to a seal problem rather than a fixable moisture issue.
When this happens repeatedly, check your taillight housing closely. Look for cracks or loose parts that let water inside again.
Your riding safety depends on a clear, working taillight. Drivers behind you need to see your signals clearly, especially at night or in bad weather.
Taking these steps seriously protects your investment too. A working radar taillight helps you ride confidently in various conditions.
Remember that both heat and vacuum methods require some trial. What works quickly for one rider might take longer for another.
Stay consistent with your approach, and don’t rush the drying process afterward. Your effort now saves you bigger headaches later.
With the right techniques and regular attention, you can keep your taillight lens clear and functioning properly for many rides ahead.
Frequently Asked Questions
Can I fix condensation without opening my taillight?
Yes, you can fix it without disassembly. Both the hair dryer method and shop vacuum approach work from the outside. Opening your taillight may void your warranty or damage internal components. Start with external methods first before considering any disassembly.
The heat method takes patience but produces good results. A shop vacuum also works well for stubborn moisture. Most riders find one of these two approaches solves the problem completely.
How long does it take to remove condensation?
The time varies depending on how much moisture is inside. Heat treatment typically requires 10 to 20 minutes of consistent application. Shop vacuum methods may take less time, though stubborn cases need repeated attempts.
Patience is essential. Rushing the process or using excessive heat can damage your lens. After treatment, allow your taillight to cool naturally before riding.
Will condensation come back after I fix it?
This depends on your taillight’s seal integrity. If the seal remains intact, condensation usually stays gone. However, if moisture returns repeatedly, your seal may be failing.
A failing seal lets water enter continuously, which means you need different solutions. Check your taillight housing for cracks or loose parts. Persistent problems indicate you may need professional service or replacement.
What causes condensation to form inside the lens?
Temperature changes and moisture exposure create condensation. When your warm taillight meets cold air or rain, moisture accumulates inside. Sealed light assemblies trap this moisture, making it visible on the lens.
Riding in wet conditions or heavy rain increases condensation risk. Quick action prevents moisture from settling permanently inside your taillight.

Hello, i’m Ivoria i am the face behind Tech Tracker Blog. I am passionate about my work and love to explore gadgets and share about my experience.