How To Fix Electronic Pressure Cooker Float Valve Sticking?
Your electronic pressure cooker suddenly won’t seal. You check the lid twice. The culprit? A stuck float valve.
This small pin plays a big role. It controls pressure buildup and release inside your cooker. When it sticks, your appliance can’t pressurize or vent properly.
Don’t worry. This is a common problem, especially in units over three years old. Spills and food residue often cause the valve to jam in place.
In a Nutshell
- Check the float valve first. A stuck valve stops your cooker from building pressure or venting steam properly.
- Try a gentle reset. Push the valve down with your finger to see if it drops back into place.
- Use a small tool if needed. A nail or a punch tool can slide through the valve’s hole to free it up.
- Cool things down. Place a cold towel or ice pack on the lid for 10 to 15 minutes if the valve feels warm and stuck.
- Look for common culprits. Age and spilled food are the biggest reasons valves get stuck, especially in units older than three years.
- Set the valve to venting. This helps you test if the sticking issue is fixed before you cook again.
- Avoid forcing parts. Never push hard on a jammed valve. Patience works better than force here.
- Lower the lid slowly. This small step helps reset the valve and confirms it moves freely.
What Is a Float Valve and How Does It Work?
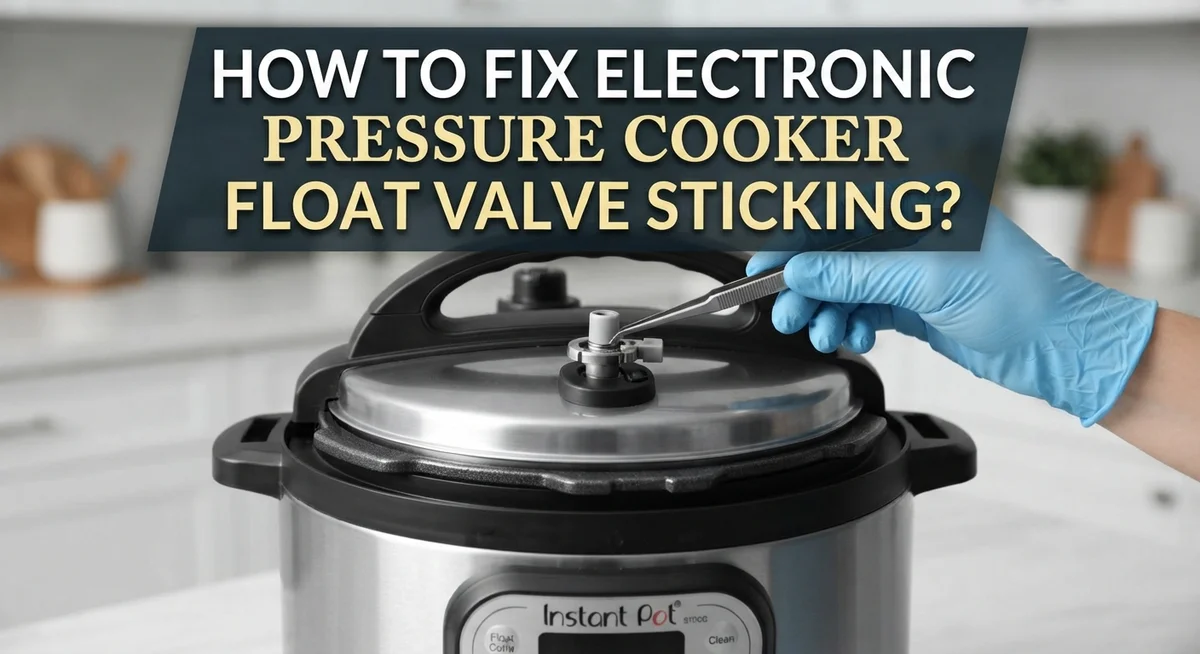
A float valve is a small metal pin located on top of your pressure cooker’s lid. This pin moves up and down to control pressure inside the cooker. The float valve serves two critical jobs: it seals the cooker when pressure builds, and it releases steam when cooking finishes.
Here’s how it works in simple terms. When you start cooking, heat rises inside the pot. Steam builds up and pushes the float valve upward. Once the valve reaches a certain height, it creates an airtight seal. This seal traps steam inside, which raises the pressure and cooks food faster.
When cooking time ends, you release heat. The pressure drops, and the float valve falls back down. This downward movement opens a vent hole in the lid. Steam escapes through this hole, and pressure returns to normal.
The valve must move freely to do its job properly. If it gets stuck in the up position, your cooker won’t vent steam. If it stays down, pressure won’t build at all. Either way, your cooker won’t work correctly.
The float valve is typically made from stainless steel or silicone. It sits inside a small chamber on the lid’s top. You can see it when you look at your cooker from above. It usually looks like a small cylinder or pin sticking up slightly.
Understanding this mechanism helps you spot problems quickly. When your cooker acts strange, the float valve is often the culprit. Knowing what it does makes troubleshooting much easier. You’ll recognize normal movement versus a stuck valve right away.
Signs Your Float Valve Is Stuck
Your pressure cooker sends you clear signals when the float valve gets stuck. Learning to recognize these signs helps you catch the problem early.
The most obvious sign is no pressure buildup at all. You start cooking, but the cooker never reaches pressure. The display shows zero pressure, and steam doesn’t build inside the pot. This happens because the stuck valve blocks air from sealing inside the chamber.
Another common signal is steam leaking from the lid. You notice hissing or visible steam escaping around the edges during cooking. The lid feels loose even though you sealed it properly. This means the float valve cannot create a proper seal.
Some cookers show a stuck or raised float valve position. Look at the top of your lid. The small metal pin should drop down when the cooker cools. If it stays raised or won’t move, something is wrong.
You might also notice the cooker won’t vent properly. After cooking ends, the valve should release steam when you flip it to venting mode. If nothing happens, the valve is likely stuck in place.
Unusual sounds can signal trouble too. Listen for grinding or clicking noises when you press the valve. These sounds suggest internal sticking or damage.
Pay attention to age and recent spills. Pressure cookers older than three years often develop valve problems. If you recently spilled liquid on the hot cooker, the valve may have gotten wet and stuck.
Check your cooker’s temperature as well. A warm or hot lid combined with a stuck valve suggests the valve got stuck during or right after cooking. Cool conditions plus a stuck valve might mean debris or dried food is blocking movement.
Common Causes of Float Valve Sticking
Food particles and mineral buildup are the main culprits behind a stuck float valve. When you cook starchy foods like rice or beans, tiny pieces can splash onto the lid. These particles dry and harden around the valve opening. Over time, they create a sticky barrier that prevents the valve from moving freely.
Mineral deposits form when you use hard water in your cooker. Calcium and magnesium build up on metal parts, including the float valve. This white or tan crusty layer makes the valve stiff and difficult to move. Hard water is especially problematic in areas with high mineral content.
Age and wear affect how smoothly your valve operates. Units older than three years often develop sticking issues. The metal components can corrode slightly, and the seal may lose its flexibility. Regular use causes normal wear that eventually impacts performance.
Spilled liquids on the cooker while it’s hot create another common problem. If soup or sauce splashes on the lid during cooking, it can dry and cement the valve in place. The heat accelerates this process, making the substance bond tightly to the metal.
Temperature changes can also cause sticking. When your cooker cools too quickly, condensation forms on the lid. This moisture mixes with any food residue and creates a sticky paste around the valve.
Dust and debris settle on the lid between uses. These particles combine with cooking steam and residue to form a gummy substance. Regular cleaning prevents this buildup from becoming a serious problem.
Understanding these causes helps you prevent future sticking issues. Most problems develop gradually, so catching them early makes fixes much easier.
Step-by-Step Guide to Fixing a Stuck Float Valve
When your float valve sticks, you have several practical solutions to try. Start by checking if the valve is truly stuck or just positioned oddly. Look at the lid carefully and see if the float sits higher than normal.
The first method involves repositioning the valve manually. Gently tap the lid from underneath near the float valve location. This simple action often breaks the seal that caused sticking. Use light taps only. Never force the valve or hit it hard, as you could damage the lid permanently.
If tapping doesn’t work, try using a small tool to help. A nail or punch tool can slide through the hole in the float valve to nudge it back into place. Insert the tool slowly and carefully. Push the valve downward with steady, gentle pressure. You should feel it drop when it releases.
Temperature plays a big role in sticking. Cool the lid completely before attempting any fixes. Place a cold towel or ice pack on top for 10 to 15 minutes. The cooler temperature helps loosen mineral deposits and food residue that may be holding the valve in place. This method works especially well for newer sticking problems.
After repositioning, set the valve to venting mode. This helps you test if the issue is truly fixed. Run your cooker through a quick cycle without food inside to confirm the valve moves freely.
Remember to lower the lid slowly during any reset procedures. Quick or forceful movements can cause additional problems. If the valve remains stuck after these steps, the internal mechanism may need professional service or replacement. Document what you tried so a technician can help more effectively.
Manual Override Methods for Emergency Situations
When your float valve sticks and you need to cook immediately, manual override methods can help you proceed safely. These techniques work best for low pressure cooking situations where you need a temporary solution.
The most effective manual override involves blocking the valve hole with a heat safe object. Use a silicone handle, wooden spoon, or similar utensil to gently cover the float valve opening. This prevents steam from escaping through the valve while you cook at low simmer temperatures. Never use this method for high pressure cooking, as it creates dangerous pressure conditions.
Before attempting any override, make sure your cooker is completely cool. Wait at least 10 to 15 minutes after the last use. A cold cooker is safer to work with and gives you better control over the process.
Position your override tool carefully. The object should sit flush against the lid without forcing it into place. Forcing any component risks damaging your cooker permanently. If the tool doesn’t fit smoothly, stop and try repositioning the float valve first using the standard methods.
Set your cooker to the venting position before adding your override tool. This allows you to monitor steam release throughout cooking. Keep the heat setting low and watch your cooker constantly during operation.
Remember that manual override is temporary only. You should fix the stuck valve properly as soon as possible. These methods help you avoid wasting food and time during emergencies, but they do not solve the underlying problem.
Always prioritize safety over convenience. If your cooker feels unstable or the override tool shifts during cooking, stop immediately and let everything cool down.
Cleaning and Maintenance Tips to Prevent Sticking
Regular cleaning keeps your float valve working smoothly. Start by removing the lid from your cooker after each use. Rinse the float valve area with warm water immediately after cooking.
Use a soft brush or cloth to gently wipe around the valve stem. Avoid harsh scrubbing that could damage the rubber seal. Pay special attention to the small hole where the valve sits. Food particles hide in this spot easily.
For mineral buildup, soak the lid in white vinegar for 30 minutes. This breaks down hard water deposits that cause sticking. Rinse thoroughly with clean water afterward. Dry the lid completely before storing.
Check the silicone seal around the float valve monthly. Look for cracks, discoloration, or hardening. A damaged seal leads to sticking problems. Replace it if you notice wear.
Store your cooker with the lid upside down on a clean surface. This prevents dust from settling on the valve. Keep the cooker in a dry location away from humidity.
Before each use, manually drop the float valve several times. This ensures it moves freely. Listen for a soft clicking sound that indicates smooth movement.
Clean the sealing ring and gasket separately every two weeks. Wash them with mild soap and warm water. Let them air dry completely. Never force them back into place while damp.
Consistent maintenance prevents most sticking issues before they start. Set a reminder to clean your cooker’s lid components weekly. This simple habit extends your cooker’s lifespan significantly. You’ll avoid frustrating stuck valves and enjoy reliable cooking performance every time.
Mistakes to Avoid When Troubleshooting
When you troubleshoot a stuck float valve, certain mistakes can make the problem worse. Here are the key errors to avoid.
Don’t apply excessive force. Many people try to push or pull the valve aggressively when it won’t move. This damages the valve stem and the surrounding components. Gentle pressure works better than rough handling.
Avoid skipping the cooling step. If your lid feels warm, don’t immediately start troubleshooting. Wait 10 to 15 minutes and use a cold towel or ice pack to cool it down. Heat causes metal parts to expand, making the valve stick more. Cooling reduces friction and makes repositioning easier.
Don’t forget to set the valve to venting position. Before you attempt any fixes, move the valve all the way to the venting side. This simple step prevents accidental pressure buildup during your repair work.
Never operate the cooker with a stuck valve. Some people try to cook anyway, hoping the valve will unstick on its own. This risks dangerous pressure problems. Always fix the issue first.
Avoid using sharp or pointed tools. Using a needle or thin wire can scratch the valve or create tiny blockages. A small nail or punch tool works safely without damaging the delicate parts.
Don’t ignore repeated sticking. If your valve sticks multiple times in a month, something deeper is wrong. Mineral buildup, worn seals, or internal damage may need professional attention. Address patterns early before they become safety concerns.
Taking these precautions keeps your cooker safe and prevents additional damage during repairs.
When to Seek Further Troubleshooting or Support
Sometimes your float valve sticking requires more help than basic fixes. You should seek professional support when the valve remains stuck after cooling and gentle repositioning attempts.
Contact the manufacturer’s customer service if your cooker is still under warranty. They can send replacement parts or arrange repairs at no cost. Have your model number ready when you call. Describe exactly what happens when you try to move the valve.
Visit a local appliance repair shop if your warranty has expired. Technicians can safely disassemble the lid and inspect the valve mechanism. They check for internal damage you cannot see from the outside. Some damage requires professional tools to fix properly.
Join online user communities dedicated to pressure cooker owners. These groups share experiences with stuck valves and real solutions. Members often post photos showing their specific problems and fixes. You might find someone with your exact model who solved the issue.
Watch instructional videos from the manufacturer’s official channel. These videos show proper troubleshooting steps with clear visuals. Official sources explain safety procedures better than general repair sites. They also show when a problem needs professional attention.
Consider replacement if your cooker is very old and repairs cost too much. A cooker older than five years with a stuck valve may have other wear issues. Replacement parts become harder to find for older models. New cookers have improved valve designs that stick less often.
Document your troubleshooting steps before contacting support. Write down what you tried, when you tried it, and what happened. Take photos of the stuck valve from different angles. This information helps technicians understand your situation faster and suggest the best solution for your specific cooker model.
Final Thoughts
A stuck float valve feels like a big problem. But most fixes are simple and quick.
You now know how to spot the issue. You also know how to fix it safely at home.
The key is patience. Rushing the process often makes things worse. Cool the lid first. Then check the valve calmly.
Small steps make a huge difference. Dropping the valve back into place solves many cases instantly. A nail or punch tool helps when the valve feels jammed.
Manual override methods work too. Blocking the valve hole with a silicone handle gives you control during low simmer sessions.
Remember that age causes wear over time. Cookers older than three years often show more sticking issues. This is normal and expected.
Spilled food is another common cause. Hot spills on the cooker can gum up the valve mechanism quickly.
Always check that the float valve drops fully before you start cooking. This one habit prevents many future headaches.
Never force a stuck part. Forcing components can damage the valve or the lid itself.
If simple fixes don’t work, don’t panic. Set the valve to venting position and try again slowly. Lower the lid gently during any reset attempt.
Your pressure cooker is a helpful tool. A sticking float valve doesn’t mean it’s broken forever.
With the right approach, you can get back to cooking fast. Trust these steps and stay calm during the process.
Most float valve problems have easy solutions. You now have the knowledge to handle them with confidence.
Frequently Asked Questions
Why does my float valve get stuck in the first place?
Float valves stick for a few main reasons. Age and wear happen naturally over time, especially in cookers older than three years. When you spill food or liquid on the cooker while it’s hot, those substances can dry and harden around the valve. Mineral deposits from water can also build up inside the valve opening.
What happens if I use my cooker with a stuck float valve?
Your cooker won’t pressurize properly. The stuck valve prevents air from sealing inside the pot, so steam escapes instead of building pressure. This means your food cooks at normal temperatures rather than the high heat that pressure cooking provides. Never operate your cooker in this condition.
How do I know if my float valve is actually stuck?
Check if the valve moves freely by hand. Push it gently up and down. A stuck valve won’t drop back down smoothly or feels stiff when you touch it. You might also notice your cooker won’t reach pressure during cooking. Set the valve to venting position first before you test it.
Can I cook with a manual override if the valve won’t move?
Yes, you can use a workaround for temporary cooking. Block the valve hole with a silicone handle or wooden utensil during low simmer. This prevents steam from escaping through that opening. However, this is only a temporary solution. You should still fix the stuck valve properly afterward to restore normal function.
What’s the safest way to unstick the valve myself?
Cool your lid first with ice or a cold towel for ten to fifteen minutes. Once it’s cool, use a nail or punch tool to slide through the hole in the float valve. Gently reposition the valve by dropping it back into place. Never force it. If it won’t budge, stop and let it cool more.

Hello, i’m Ivoria i am the face behind Tech Tracker Blog. I am passionate about my work and love to explore gadgets and share about my experience.