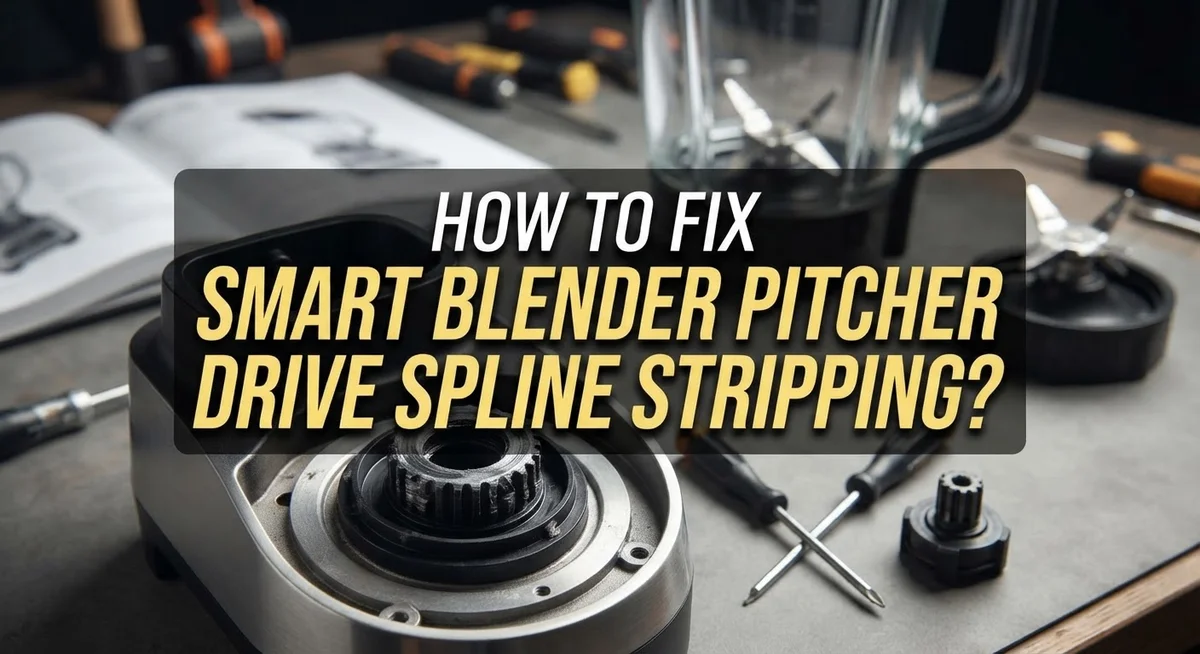
How To Fix Smart Blender Pitcher Drive Spline Stripping?
Your smart blender suddenly hums but the blades refuse to spin. You check the power. You check the assembly. Everything looks fine, yet nothing happens.
This frustrating issue often points to one specific culprit. The drive spline inside your blender pitcher may have stripped.
Over time, the small plastic teeth on the drive coupling wear down. They can even break off completely. This tiny part connects your blender base to the pitcher blades.
In a Nutshell
- The main cause is a stripped drive coupling. The small plastic teeth on this part wear down over time and stop gripping the blade base.
- Check for power first. Make sure your blender is plugged in and the pitcher sits correctly on the base before you assume the coupling is broken.
- Look for two possible causes. It could be a stripped spline or simply a jammed blade. Both stop the blades from spinning, so check each one carefully.
- Fixing it requires disassembly. You will need to remove the pitcher, inspect the coupling closely, and swap in a new one that matches your exact model.
- Compatibility matters most. Always confirm your pitcher model before buying a replacement part, since receiver designs differ between models.
- Reassemble with care. Line up the new coupling properly with the receiver so power transfers smoothly to the blades again.
Understanding the Drive Coupling and Spline System
The drive coupling sits between your pitcher and the blender base. It acts as a connector that transfers rotational power from the motor to your blades. Think of it like a bridge that lets energy flow from one side to the other.
This coupling contains small plastic teeth. These teeth grip onto matching grooves inside the pitcher receiver. When you turn on your blender, these teeth spin and pull the pitcher’s internal mechanism with them. Over time, friction and repeated use wear these teeth down until they can no longer grip properly.
The spline system works similarly to gears. The pitcher’s receiver has grooves, and the coupling’s teeth fit into those grooves. When teeth strip away, the connection becomes loose or breaks entirely. Your motor still runs, but nothing happens to the blades because power cannot transfer.
Understanding this system helps you diagnose problems faster. If your blender hums but blades don’t move, a stripped coupling is likely the issue. The motor works fine. The pitcher sits correctly in place. But the teeth no longer grip the receiver’s grooves.
Different pitcher models have different receiver designs. The grooves vary in depth, width, and spacing. This means a replacement coupling from one pitcher model may not fit another model properly. You must verify your exact pitcher model before ordering a replacement.
The good news is that this part is replaceable. You do not need to buy an entirely new blender. Simply removing the pitcher, inspecting the coupling, and swapping it with a compatible part fixes the problem. Proper reassembly ensures your blender works smoothly again.
Signs Your Pitcher Drive Spline Is Stripped
Your blender makes noise but nothing happens inside the pitcher. The motor runs, yet the blades stay completely still. This is the most obvious sign of drive spline damage.
Listen for a humming sound without any blade movement. The motor engages normally, but power simply does not reach the blades. This happens because the stripped teeth cannot grip and transfer the rotational force.
Check if the pitcher spins freely when you twist it by hand. A healthy coupling resists this motion. If the pitcher rotates easily without any resistance, the spline teeth have likely worn away completely.
Look for grinding or clicking noises when you start the blender. These sounds indicate the remaining teeth are catching and slipping. The coupling tries to grip but fails repeatedly, creating that distinctive noise.
Examine the pitcher base closely for visible damage. Remove the pitcher and inspect the drive coupling directly. You may see teeth that appear flattened, cracked, or completely missing from the plastic coupling.
Test your blender with a different pitcher if you have one available. If the replacement pitcher works perfectly, your original coupling is definitely stripped. This confirms the problem lies with the drive spline and not elsewhere in your blender.
Feel the pitcher when it is installed. It should sit snugly without wobbling. Excessive movement or loose fitting suggests the teeth no longer hold the coupling securely in place.
Pay attention to how long the problem persists. If humming and non movement happen consistently every time you blend, the damage is permanent and requires replacement. Occasional slipping might indicate early wear, but constant failure means the spline is fully stripped and needs immediate attention.
Tools and Parts You’ll Need Before Starting
Before you start fixing your smart blender pitcher, gather the right tools and parts. Having everything ready makes the job faster and safer.
Basic tools you will need include a Phillips head screwdriver and a flathead screwdriver. These help you remove fasteners holding the pitcher base to the blender unit. A small flashlight or headlamp is helpful for seeing inside tight spaces. Keep a clean cloth nearby to wipe away any debris or old lubricant.
Safety items matter too. Wear safety glasses to protect your eyes from small plastic pieces. Gloves keep your hands clean and protected from sharp edges on the coupling. Unplug your blender before starting any work.
Replacement parts depend on your model. You will need the correct drive coupling or pitcher assembly for your specific blender. Check your blender’s manual or the manufacturer’s website to find your exact model number. Write this down before you begin.
Optional but useful items include a small container to hold screws during disassembly. This prevents losing pieces. A work surface with good lighting helps you see what you are doing clearly. A small brush cleans out dust from the coupling area.
Preparation saves time. Read your blender’s manual completely before starting. Take photos of the pitcher assembly before you take it apart. This helps you remember how everything fits back together.
Double check compatibility. Different pitcher models have different receiver designs inside the base. Using the wrong replacement pitcher wastes time and money. Verify your model matches the replacement part exactly before purchasing or ordering anything.
Step-by-Step Guide to Diagnosing and Fixing the Stripped Coupling
Start by unplugging your blender from the wall outlet. This step keeps you safe while you work on the pitcher assembly.
Next, remove the pitcher from the blender base by twisting it counterclockwise. Most smart blenders use this simple twist and lock design. Set the pitcher aside on a clean, flat surface.
Look at the bottom of the pitcher where it connects to the base. You will see the drive coupling, which looks like a plastic connector with small teeth. Inspect these teeth carefully for signs of wear, cracks, or missing pieces.
Rotate the coupling by hand to check if it moves smoothly. A stripped coupling will feel loose or stuck, depending on how much damage occurred.
Now examine the receiver socket on the blender base. This is where the coupling sits. Look for debris, dust, or damage inside this socket. Clean it gently with a dry cloth if you find buildup.
Take a photo of the damaged coupling with your phone. This helps you identify the exact replacement part later. Note your pitcher model number, which appears on a label at the base or side.
Check the blender base for any cracks or damage around the receiver area. Sometimes the base itself gets damaged, which affects how the new coupling will fit.
Test the base without the pitcher by turning on the blender briefly. You should hear the motor running smoothly. If the motor sounds wrong, the problem might be deeper than just the coupling.
Document everything you find during inspection. Write down what you see, hear, and feel. This information helps when you order the replacement coupling or contact customer support for your specific model.
Ensuring Proper Reassembly and Receiver Alignment
Before you reassemble your pitcher, take time to understand the receiver alignment process. This step prevents future damage and ensures your blender works correctly.
The receiver is the socket on your blender base that holds the drive coupling. Proper alignment matters because misalignment causes premature wear on replacement parts. When the pitcher sits at an angle, the coupling teeth don’t mesh evenly with the motor shaft.
Start by cleaning both the pitcher base and the blender receiver. Remove any debris, old plastic fragments, or dried liquid. Use a soft cloth to wipe the interior of the receiver socket on the base. This cleaning step takes just a minute but prevents installation problems.
Next, inspect the receiver opening itself. Look for cracks, chips, or deformation around the edges. A damaged receiver means your replacement coupling will strip again quickly. If you spot damage, the receiver may need professional replacement.
When you insert the new pitcher, align it straight before twisting. Don’t force it at an angle. The coupling should slide into the receiver smoothly without resistance. Listen for a soft click as it seats properly.
Twist the pitcher clockwise until it stops naturally. Don’t overtighten because excessive force damages the new coupling. The pitcher should feel secure but not locked in place.
Before running your blender, manually rotate the pitcher by hand. It should turn freely without grinding or clicking sounds. This quick test confirms proper alignment before you blend anything.
Run your blender empty for five seconds to verify smooth operation. Watch for any unusual vibration or noise. Proper reassembly and alignment protect your investment and extend your blender’s lifespan significantly.
Tips to Prevent Future Spline Stripping
Preventing future spline stripping keeps your smart blender working reliably. The good news is that simple habits make a huge difference in protecting your pitcher’s drive coupling.
Avoid overloading your blender with too much food or liquid. Heavy batches force the motor to work harder and put extra stress on the plastic teeth. Fill your pitcher to the recommended line. Thick ingredients like nut butters or frozen fruit demand more power. Blend these in smaller portions instead of one large batch.
Never force the pitcher onto the base. The coupling should slide into place smoothly. If you feel resistance, stop and check the alignment. Forcing it can crack teeth before you even turn on the power. Take two seconds to verify the pitcher sits straight before twisting it clockwise.
Run the blender at lower speeds when possible. High speed settings create more friction and wear on the coupling teeth. Start at medium speed and increase only if needed for your recipe.
Clean the pitcher and receiver regularly. Dried food particles can prevent proper seating. This forces the coupling to work at odd angles, causing uneven wear. Wipe both parts dry before reassembling.
Let your blender cool between uses if you blend multiple batches. Heat weakens plastic over time. A five minute break between blending sessions extends the life of your coupling.
Check your pitcher monthly for loose connections. A pitcher that wobbles slightly indicates early coupling wear. Catching this early prevents complete stripping. Gently twist the pitcher to confirm it feels snug against the base.
These preventive steps reduce wear significantly and keep your blender running smoothly for years.
Common Mistakes to Avoid During Repair
When you repair your smart blender pitcher, mistakes during the process can make the problem worse. Understanding what to avoid saves you time and money.
Don’t skip the diagnosis step. Many people assume the coupling is stripped when the real problem is a jammed blade. Before you order replacement parts, rotate the pitcher by hand to feel if it moves freely. A stuck blade feels different from a stripped coupling. Take time to confirm the actual issue first.
Avoid using the wrong replacement pitcher. Each blender model has a different receiver design on the base. The drive coupling teeth must match your specific blender. Installing an incompatible pitcher wastes your money because it won’t fit properly. Always verify your exact model number before purchasing a replacement.
Don’t force the pitcher onto the base during reassembly. The coupling should slide into the receiver smoothly without resistance. Forcing it can damage the new coupling teeth immediately. Gentle pressure is all you need when twisting the pitcher clockwise.
Never skip the manual rotation test. After reassembly, always rotate the pitcher by hand before turning on the blender. This catches alignment problems before they cause damage. Your hand will feel if something is wrong.
Don’t ignore cracks on the blender base around the receiver area. A damaged receiver socket prevents proper coupling contact. If you see cracks, the base itself may need replacement.
Finally, avoid running your blender immediately after repair. Let the components settle for a few minutes. Run it empty for five seconds first to verify smooth operation. These simple precautions prevent costly mistakes and ensure your repair works correctly.
Troubleshooting When the Fix Doesn’t Work
Sometimes your smart blender pitcher still won’t work even after you’ve replaced the drive coupling. This frustration happens more often than you’d think. Let’s explore what might be going wrong.
First, check if you installed the new coupling correctly. The coupling sits inside the pitcher base and must align perfectly with the receiver on your blender base. If it’s slightly off center, the teeth won’t mesh properly. Remove the pitcher and try again, making sure everything clicks into place smoothly.
Next, inspect the blender base receiver itself. Stripped receivers are less common than stripped couplings, but they do happen. Look for worn plastic teeth or cracks around the receiver opening. If the receiver looks damaged, the new coupling won’t grip properly no matter how well you install it. This means the problem lies with your blender base, not the pitcher.
Test your blade rotation manually before powering on. Twist the pitcher clockwise by hand. It should turn smoothly without grinding sounds or resistance. Grinding noises suggest either a misaligned coupling or internal blade damage.
Check if your blades are actually spinning. Sometimes people assume the coupling is the problem when jammed fruit or ice blocks the blade mechanism. Remove the pitcher and look inside for stuck debris.
Finally, verify you bought the correct replacement pitcher for your specific blender model. Wrong models have incompatible receivers that won’t work with your base. Double check your blender’s model number before assuming the fix failed.
If none of these steps work, your blender base may need professional service or replacement.
Final Thoughts
Fixing a stripped drive spline is a simple job once you understand the cause. Your blender’s plastic coupling wears down over time. This wear stops the blades from turning even when everything looks fine.
The good news is that this fix does not require special tools or advanced skills. You just need patience and the right replacement part.
Take time to diagnose the problem correctly before you start any repair. Check if the coupling teeth are actually stripped. Rule out a jammed blade first since this mimics the same symptom.
Buying the correct replacement pitcher matters more than anything else. Every blender model has its own receiver design. A mismatched part will not fit properly, no matter how hard you try.
Careful reassembly makes the difference between a lasting fix and a repeat problem. Align the coupling with the receiver gently. Never force parts together during this step.
Testing your work before regular use saves you time later. Rotate the pitcher by hand first. This quick check confirms the new coupling engages properly with the base.
Smart blenders serve you well when you treat them right. Small mechanical parts like the drive coupling do wear out eventually. This happens with regular use over months or years.
Understanding this repair process gives you confidence for future issues. You now know how to spot the problem, find the right part, and put everything back together correctly.
Your blender can keep working for years with proper care and timely repairs. The key is acting quickly when you notice the blades struggling to turn. A small fix today prevents bigger problems tomorrow.
Frequently Asked Questions
Why won’t my blender blades spin even though the pitcher is attached?
Your blades won’t spin when the drive coupling has worn teeth. This small plastic piece connects your pitcher to the motor. When it strips, power reaches the base but the pitcher doesn’t turn. Check if the blades move when you rotate the pitcher by hand. If they spin freely by hand but not with power, the coupling is likely the problem. Another cause could be jammed blades stuck in the pitcher itself.
How do I know if my drive coupling is actually stripped?
Remove the pitcher from the base and look at the small plastic teeth on the coupling. Stripped teeth appear worn, flattened, or completely missing. Compare both sides of the coupling carefully. If some teeth are gone but others remain, that’s partial stripping. You can also test by hand rotating the pitcher on the base. If it spins loosely without resistance, the coupling has failed.
Can I buy just a replacement pitcher without replacing the whole blender?
Yes, you can replace the pitcher separately. However, the receiver design on your blender base must match your new pitcher. Different blender models use different receiver shapes and sizes. Always check your blender’s model number before ordering a replacement pitcher. Installing an incompatible pitcher will create the same spinning problem.
What causes drive spline stripping in the first place?
Constant use wears down the plastic teeth naturally over time. Forcing a stuck pitcher onto the base speeds up this damage. Blending thick or frozen ingredients puts extra strain on the coupling. Regular wear eventually strips the teeth completely.
Do I need special tools to replace the coupling?
No special tools are required. You simply disassemble the pitcher, inspect the coupling, and swap it with a new one. The repair takes just a few minutes with basic hand movements.

Hello, i’m Ivoria i am the face behind Tech Tracker Blog. I am passionate about my work and love to explore gadgets and share about my experience.