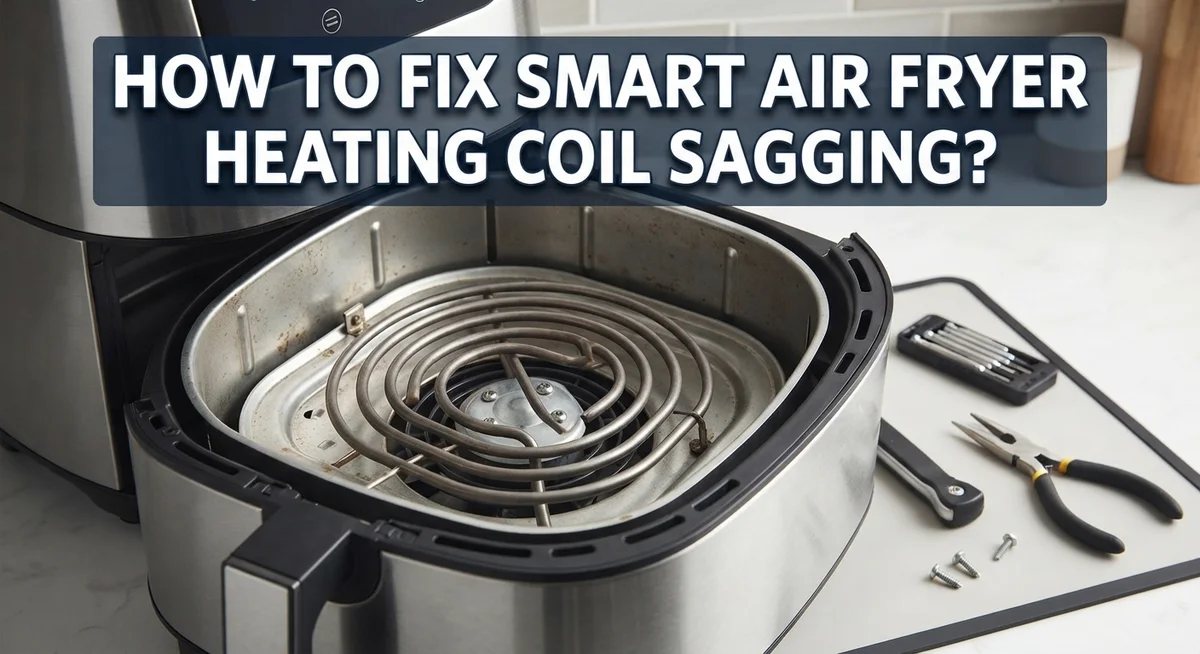
How To Fix Smart Air Fryer Heating Coil Sagging?
Is your air fryer cooking food unevenly these days? A sagging heating coil might be the reason.
Over time, heat stress and buildup can cause the coil to droop. This affects how your food cooks and can even shorten your appliance’s life.
The good news? You don’t need to toss your air fryer just yet. Many sagging coil issues come from simple problems like grease buildup or loose wiring. These are fixable at home with a few basic tools.
In this guide, we will show you how to spot the signs of coil sagging. You will learn safe steps to inspect and clean the coil. We will also share an easy homemade cleaning solution that works well on stubborn grime.
In a Nutshell
- Unplug the air fryer first. Let it cool for 10 to 15 minutes before you touch anything inside.
- Remove the basket and tray. This gives you clear access to check the heating coil.
- Inspect the coil closely. Look for cracks, breaks, or spots where it sags more than usual.
- Clean it with a gentle mix. Combine baking soda, white vinegar, and dish soap into a watery paste. Use a soft brush to apply it.
- Check the wiring connections too. Loose or disconnected wires often cause coil problems.
- Avoid harsh brushes and skipping cleanups. These common mistakes lead to more damage over time.
What Causes Heating Coil Sagging in Smart Air Fryers
Heating coils sag in smart air fryers for several clear reasons. Heat stress is the primary culprit. Your coil expands and contracts every time you use the appliance. Over months of repeated heating cycles, this constant movement weakens the metal’s structure.
Buildup accumulation plays a huge role too. Grease, crumbs, and food particles collect on and around the coil. This extra weight pulls the coil downward over time. The buildup also traps heat, making the coil work harder than it should.
Poor maintenance speeds up sagging significantly. When you skip regular cleanings, debris packs tighter around the heating element. This added pressure causes the coil to droop faster than normal air fryers experience.
Wiring issues can contribute as well. If connections loosen inside your air fryer, the coil may lose proper support. A loose wire means the coil hangs at an angle instead of staying level and secure.
Age and manufacturing factors matter too. Older air fryers have older coils that naturally weaken. Some units simply use thinner metal that sags more easily than higher quality alternatives.
Moisture exposure causes rust and weakness. If water gets inside your air fryer during cleaning, it can corrode the coil. Rust eats away at the metal, making it brittle and prone to sagging.
Overuse without breaks accelerates all these problems. Running your air fryer constantly without cooling periods puts extreme stress on the heating element. The coil never gets a chance to rest and recover.
Understanding these causes helps you prevent sagging before it starts. Regular cleaning and proper usage habits keep your heating coil strong and level for years.
Signs Your Air Fryer Coil Needs Attention
Your air fryer shows several clear signs when the heating coil needs immediate attention. Recognizing these warnings helps you fix problems before they get worse.
Uneven cooking is the most obvious sign. If your food cooks faster on one side than the other, the coil likely sags. This happens because sagging disrupts heat distribution across the cooking chamber.
Look for visible discoloration on the coil itself. A darkened or blackened coil suggests heat stress and buildup accumulation. This discoloration reduces the coil’s ability to heat properly.
Longer cooking times indicate trouble too. When your air fryer takes significantly longer to cook food than before, the sagging coil cannot reach proper temperatures. Your meals might come out undercooked or with poor texture.
Pay attention to unusual noises coming from your air fryer. Clicking, buzzing, or popping sounds often mean the coil has shifted position. These noises suggest the coil touches other metal parts inside the unit.
Check if your air fryer takes forever to preheat. A sagging coil heats slowly because it cannot maintain consistent electrical contact. Preheat times that stretch beyond normal indicate this issue.
Burnt food smells without actual burning is another warning sign. A struggling coil creates hot spots and cold zones. This causes some areas to burn while others stay raw.
Feel the exterior of your unplugged air fryer. Excessive heat on the outside means the coil works harder than normal. This extra effort signals sagging or buildup problems.
Regular inspections catch these signs early. Check your coil monthly to spot problems before they worsen. Early detection saves you time and frustration.
Safety Precautions Before You Begin
Before you start working on your air fryer’s heating coil, safety comes first. Taking a few simple precautions protects both you and your appliance from damage or injury.
Unplug your air fryer immediately. This step is non negotiable. You must cut all power before touching any internal parts. Wait 10 to 15 minutes after unplugging so the heating coil cools completely. Hot coils cause serious burns.
Let the unit cool down fully. Even after unplugging, residual heat remains inside. Touch the exterior gently with your hand to check if it feels warm. If it does, wait longer before proceeding.
Wear appropriate protective gear. Use kitchen gloves to protect your hands from sharp edges or rough surfaces inside the air fryer. Safety glasses help if debris falls during inspection or cleaning.
Work in a well lit space. Good lighting lets you see the coil clearly and spot any damage. Poor visibility leads to missed problems or accidental damage during the repair process.
Keep water away from electrical components. Even though you will use a damp cloth for cleaning, avoid spraying water directly into the unit. Moisture near wiring or the heating element creates electrical hazards.
Clear your work area. Remove clutter around your workspace. You need room to safely remove and inspect the basket, tray, and coil without knocking things over.
Have a flashlight ready. The interior of an air fryer can be dark. A flashlight helps you examine the coil closely and check wiring connections properly. This simple tool makes inspection much easier and safer.
Step-by-Step Guide to Fixing a Sagging Heating Coil
Start by unplugging your air fryer and waiting 10 to 15 minutes for it to cool completely. This gives the heating coil time to lose its residual heat safely.
Next, remove the basket and tray from your air fryer. These removable parts give you clear access to the heating coil area. Set them aside on a clean, flat surface.
Inspect the coil carefully with a flashlight or good lighting. Look for visible cracks, breaks, or areas where the coil hangs lower than it should. Check if any wiring connections have come loose or disconnected from the coil.
Gently clean the coil using a soft brush and a damp cloth. Mix a cleaning solution with half a cup of baking soda, half a cup of white vinegar, and one tablespoon of dish soap into a watery paste. Apply this paste carefully to buildup areas around the coil.
Avoid using harsh brushes or abrasive materials. These tools can damage the coil further and create safety hazards. Work slowly and methodically around the entire coil surface.
Pay special attention to the tracks and grooves where the coil sits. Grease and crumb buildup often accumulates in these spaces and contributes to sagging.
After cleaning, let everything air dry completely before reassembling. Check all wiring connections one more time to ensure they are secure and properly seated.
Reconnect the basket and tray once everything is dry. Plug your air fryer back in and run a test cycle without food to verify the coil heats evenly. Listen for any unusual sounds that might indicate remaining issues.
DIY Cleaning Solution for Coil Buildup
Buildup on your heating coil causes sagging and reduces cooking performance. A simple cleaning solution removes this accumulation without damaging the coil.
Start by preparing your cleaning paste. Mix half a cup of baking soda with half a cup of white vinegar. Add one tablespoon of dish soap to the mixture. Stir until you get a watery paste consistency.
Baking soda works as a gentle abrasive that lifts stuck particles. White vinegar dissolves mineral deposits and grease buildup. Dish soap helps break down oily residue that clings to the coil surface.
Before applying the solution, ensure your air fryer is unplugged and completely cool. Remove the basket and tray to access the heating coil clearly. Use a flashlight to inspect the coil for visible damage or cracks.
Apply the paste directly to buildup areas using a soft brush. Work gently in circular motions along the coil surface. Pay special attention to the tracks and grooves where debris accumulates most. These areas trap grease and crumbs that cause coils to sag over time.
Let the paste sit for five to ten minutes. This waiting period allows the solution to break down stubborn deposits. Wipe away the paste with a damp cloth, working carefully around all coil sections.
Rinse your cloth and wipe the coil again with plain water. Remove all paste residue completely. Allow everything to air dry thoroughly before reassembling your air fryer.
This cleaning approach prevents harsh damage while removing problematic buildup. Regular use of this solution keeps your coil functioning properly and maintains even heating throughout your cooking.
Common Mistakes to Avoid During Repair
When fixing your air fryer’s heating coil, certain mistakes can make the problem worse. Understanding what to avoid protects your appliance and keeps you safe.
Never use harsh brushes or steel wool on your heating coil. These materials scratch and damage the coil’s surface. Scratched coils develop weak spots that fail faster. Stick with soft brushes or old toothbrushes instead.
Don’t skip the cleaning step before attempting any repair. Many people assume sagging means the coil is broken. Often, grease and crumb buildup causes the sagging appearance. Clean first, then assess if actual repair work is needed.
Avoid checking the coil while your air fryer is still warm. Residual heat lingers even after unplugging. Wait the full 10 to 15 minutes for safe handling.
Don’t ignore the wiring connections underneath or behind the coil. Loose wires sometimes cause heating problems that look like sagging. Gently verify all connections are secure before concluding the coil itself failed.
Never apply liquid cleaning solutions directly by spraying or pouring. Water near electrical components creates hazards. Use a damp cloth instead, squeezing out excess water first.
Don’t force the coil back into position if it’s bent or damaged. Forcing it can break wiring or create safety risks. If the coil is genuinely broken, replacement is safer than forcing repairs.
Avoid cleaning with vinegar alone on certain coil types. Some coils react poorly to acidic solutions. The baking soda and vinegar paste works better because the soda buffers the acidity.
Finally, don’t skip regular maintenance between repairs. Cleaning your air fryer weekly prevents serious buildup. Prevention stops most sagging problems before they start.
Troubleshooting Persistent Heating Issues
When your air fryer’s heating coil sags, persistent heating issues follow. The coil may not reach proper temperatures. Food cooks unevenly or takes much longer than normal. You might notice cold spots on your meal.
Sagging happens because heat stress weakens the coil support over time. Grease and crumb buildup adds weight to the coil. This extra weight pulls it downward. The coil loses contact with heating elements. Your air fryer struggles to maintain consistent heat.
Start by checking if debris causes the problem. Unplug your air fryer completely. Wait 10 to 15 minutes for cooling. Remove the basket and tray carefully. Look inside with a flashlight. You’ll see if grease or food particles sit on the coil.
Clean gently using only soft brushes and damp cloths. Never use steel wool or rough scrubbers. These damage the coil permanently. Pay close attention to the tracks where the coil rests. Buildup in these areas prevents proper coil positioning.
After cleaning, check the wiring connections. Loose wires reduce heating power significantly. Reconnect any disconnected wires carefully. Let everything dry completely before reassembling.
If cleaning doesn’t fix the issue, inspect for actual damage. Look for cracks or breaks in the coil itself. Bent or broken coils need professional replacement. Contact the manufacturer for replacement parts.
Regular maintenance prevents most sagging problems. Clean your air fryer after every 5 to 10 uses. Empty the crumb tray regularly. This simple habit extends your coil’s lifespan. Your air fryer will heat evenly and cook food properly. Consistent maintenance saves money on repairs later.
Maintenance Tips to Prevent Future Sagging
Regular maintenance stops heating coil sagging before it starts. The key is consistency and attention to small details that most people overlook.
Clean your air fryer every 5 to 10 uses. This simple habit prevents grease and crumb buildup from accumulating on the coil. Buildup adds weight and pulls the coil downward over time. A quick wipe takes just a few minutes but saves you from major repairs later.
Check your coil weekly during the first month of use. Look for any visible sagging or tilting. Early detection means you can address small issues before they become big problems.
Keep the basket and tray clean. Debris falls onto the heating element when these parts get dirty. Use a soft brush to remove particles from the basket tracks and tray corners where crumbs hide.
Ensure proper ventilation around your air fryer. Heat stress weakens coil supports faster when your unit runs too hot. Leave space on all sides and never cover the vents.
Store your air fryer in a dry location. Moisture combined with heat causes rust and corrosion on metal supports. A cool, dry cabinet or shelf works best.
Inspect wiring connections every month. Loose wires reduce support for the coil and allow sagging to happen. Gently push connections to make sure they stay tight.
Don’t wait for problems to appear. Preventive maintenance costs almost nothing compared to replacement parts. Your heating coil will last years longer when you stay consistent with these simple steps.
Final Thoughts
A sagging heating coil does not mean your air fryer is done for good. Most cases get fixed with simple cleaning and careful inspection.
Start with the basics. Unplug your unit and let it cool. Then check the coil for buildup or visible damage.
Clean gently with a soft brush and the baking soda vinegar paste. This removes grease without harming the coil surface.
Wiring connections deserve equal attention. A loose connection often causes the same symptoms as physical sagging.
If the coil shows cracks or breaks, cleaning alone won’t help. You will need a replacement part from your manufacturer.
Think of heating elements like light bulbs. They work well for a long time, then simply wear out. This is normal and expected.
Uneven cooking results point to coil problems on one side. Check both heating elements carefully before assuming the worst.
Regular care makes the biggest difference here. A few minutes of cleaning each week saves you from bigger repairs later.
Prevention truly beats repair in every case. Sagging coils develop slowly through neglect and buildup over time.
Your air fryer works hard every time you use it. Give it the same care you give other kitchen appliances.
Small habits protect your investment well. Clean baskets, dry storage, and monthly wiring checks go a long way.
Fixing a sagging coil takes patience, not complicated tools. Follow each step in order and don’t rush the process.
With proper care, your air fryer keeps cooking evenly for years. That is the real goal behind every maintenance task you do.
Frequently Asked Questions
What causes a heating coil to sag in the first place?
Heat stress weakens the metal support over time. Grease and crumb buildup adds extra weight to the coil. When debris accumulates, the coil bends downward instead of staying straight.
Temperature changes also play a role. Your coil expands when hot and contracts when cool. Repeated cycles loosen the mounting brackets gradually.
Can I fix a sagging coil myself without replacing it?
Yes, you can try fixing it at home. Start by unplugging your air fryer for 10 to 15 minutes. Remove the basket and tray to access the coil area.
Clean the coil gently with a soft brush and damp cloth. Make a paste using baking soda, white vinegar, and dish soap. Apply this paste to stuck debris and let it sit briefly.
Check all wiring connections to ensure nothing disconnected. Tighten any loose brackets you find. If the coil shows cracks or breaks, cleaning alone won’t help.
How do I know if my coil is actually damaged versus just dirty?
Inspect the coil carefully after cleaning. Look for visible cracks, breaks, or burn marks on the metal. A dirty coil appears gray or brown. A damaged coil shows physical separation or dark burn spots.
Test your air fryer by running it empty for a few minutes. Listen for unusual sounds. Watch if heating feels uneven on different sides of the basket.
What’s the best way to prevent sagging from happening again?
Clean your air fryer every 5 to 10 uses. This stops grease and crumbs from building up weight. Keep the basket and tray clean so debris doesn’t fall onto the heating element.
Check wiring connections monthly. Ensure proper ventilation around your unit. Store your air fryer in a dry location away from moisture.
Small habits protect your investment well. Regular care makes the biggest difference here.

Hello, i’m Ivoria i am the face behind Tech Tracker Blog. I am passionate about my work and love to explore gadgets and share about my experience.