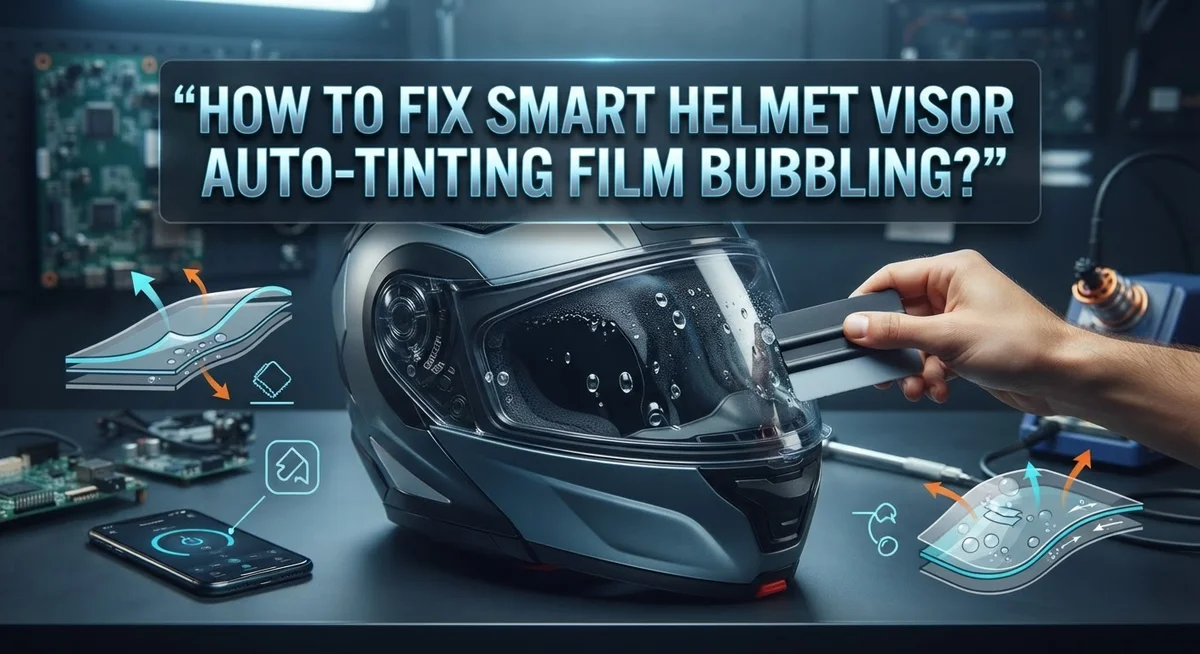
How To Fix Smart Helmet Visor Auto-Tinting Film Bubbling?
Your smart helmet visor should protect your eyes, not annoy you with weird bubbles. If you spot little air pockets forming under your auto-tinting film, you are not alone. This is a common problem that many riders face, even with high quality gear.
Bubbling usually happens when air or moisture gets trapped under the film. Sometimes it is a simple application mistake. Other times, it points to a deeper adhesion issue.
The good news? You can often fix this problem yourself. You do not always need a full visor replacement.
In a Nutshell
- Trapped air or moisture is the main cause of bubbles forming under auto-tinting film.
- Poor application technique during DIY tinting often leads to early bubbling problems.
- Weak surface prep before applying the film can stop it from sticking properly.
- Rough handling while removing or reinstalling your visor can loosen the film edges.
- Film quality differs between brands, so some visors bubble faster than others.
- Early bubbling on a fairly new visor often means there was a manufacturing or application defect.
Understanding Auto-Tinting Film and Why Bubbling Happens
Auto-tinting film uses a special layer that darkens when exposed to light. This layer sits between two protective sheets of material. The film bonds to your visor through adhesive, creating a clear seal that should last for years.
Bubbles form when something goes wrong with this bond. Air pockets get trapped between the film and the visor surface. Moisture can also sneak under the film during or after installation. Both situations break the seal and create those annoying bumps you see.
The adhesive itself needs perfect conditions to work. Any dust, dirt, or fingerprints on the visor before application will prevent the film from sticking evenly. Even tiny particles create weak spots where air can hide underneath.
Temperature and humidity matter too. If you apply or store your helmet in very hot or very cold conditions, the adhesive behaves differently. Extreme weather can cause the film to expand or contract unevenly, pulling away from the visor surface.
Improper application technique is a major culprit. Rushing the process, not using proper tools, or pressing the film down incorrectly leaves air trapped inside. Professional installers use squeegees and special techniques to push air out as they apply the film.
Even handling your helmet roughly can cause problems. Dropping it, storing it in tight spaces, or removing and reinstalling the visor puts stress on the film edges. This stress can loosen the adhesive bond over time.
The quality of the film itself varies between manufacturers. Some films have stronger adhesives or better materials. Cheaper options may bubble faster because they use lower quality components.
Understanding these causes helps you prevent bubbling in the future and fix current problems more effectively.
Diagnosing the Root Cause of Your Visor Bubbling
When your smart helmet visor starts bubbling, you need to figure out what caused it. This helps you decide whether to repair or replace the visor. Start by examining when the bubbling began. Did it appear right after you installed the film yourself? Or did it show up weeks later on a new helmet?
Look closely at the bubble locations. Bubbles near the edges suggest poor application or weak edge sealing. Bubbles scattered across the center usually mean trapped air or moisture got stuck during installation. Check if the bubbles feel soft or hard when you gently press them. Soft bubbles often contain trapped air. Hard bubbles might indicate moisture underneath the film.
Next, think about your helmet’s history. Did you remove and reinstall the visor recently? Rough handling can loosen the film bond and create new bubbles. Have you exposed your helmet to extreme temperature changes? Heat and cold can cause the film to expand and contract, breaking the adhesive seal.
Consider the film age too. Brand new visors with bubbles suggest a manufacturing or application defect. Older visors that suddenly bubble might have experienced normal wear and tear.
Check your application technique if you installed the film yourself. Did you properly clean the visor surface before application? Did you use the right tools to smooth out air pockets? Did you apply even pressure across the entire surface?
Understanding these details matters. They tell you whether professional replacement makes more sense than attempting a DIY fix. Document everything you observe. Take photos of the bubbles and their locations. This information helps you communicate the problem clearly if you seek professional help or file a warranty claim with the manufacturer.
Tools and Materials Needed Before You Start
Before you start fixing your smart helmet visor, gather the right tools and materials. Having everything ready makes the repair process faster and more effective.
You will need a heat source to soften the film. A heat gun works best for this job. Keep it on a low setting to avoid damaging the visor material. Some people use a hair dryer as an alternative, though it heats more slowly.
Get a soft squeegee or plastic scraper. This tool helps push out trapped air and moisture without tearing the film. Avoid metal scrapers since they can scratch or puncture the auto-tinting layer.
Prepare cleaning supplies before you begin. You need isopropyl alcohol or a specialized film cleaner. Grab lint free cloths or microfiber towels to wipe the visor surface. Dust and debris underneath the film cause many bubbling problems.
Moisture removal is critical. Have paper towels on hand for drying. Some people use a small vacuum with a soft brush attachment to remove trapped moisture from bubble edges.
Consider getting a spray bottle filled with distilled water. This helps reactivate adhesive during the smoothing process. Regular tap water can leave mineral deposits on your visor.
Wear protective gloves to keep oils from your hands off the film. This prevents new adhesion problems while you work.
Finally, prepare a clean, flat workspace. You need room to lay your helmet safely without accidentally knocking it over. Good lighting helps you see small bubbles clearly.
Having these materials ready prevents frustration and interruptions during your repair work. Start with everything organized before removing your visor.
Step-by-Step Guide to Removing and Re-Applying the Film
The actual removal and re-application process requires patience and attention to detail. Start by heating your visor gently with a heat source. Move it slowly across the bubbled areas to soften the adhesive underneath. This warmth helps the film become flexible without damaging it.
Once the film is warm, carefully lift one edge of the bubble using your plastic scraper. Work slowly and avoid tearing the film. If the bubble contains trapped air, you can sometimes release it by lifting gently. If moisture is trapped inside, you’ve found your real problem.
Peel back the film section containing the bubble. Do this gradually while applying gentle heat. The goal is to expose the visor surface without removing the entire film layer. Stop if the film begins to tear or if you reach a point where removal becomes difficult.
Clean the exposed visor surface thoroughly. Use your cleaning solution to remove any dust, debris, or old adhesive residue. Dry the area completely with paper towels. Any moisture left behind will cause bubbling to return.
Now comes the re-application step. Spray distilled water lightly on the cleaned visor surface. This helps the film slide into position. Carefully press the film back down using your squeegee. Work from the center outward to push out any new air pockets.
Use firm, steady pressure as you smooth the film. Work methodically across the entire section. Allow the adhesive to set for several hours before wearing your helmet. If bubbles return quickly, the visor likely has a manufacturing defect. Professional replacement becomes your better option at that point.
Pro Tips for a Bubble-Free, Long-Lasting Finish
When you’re working on fixing your smart helmet visor, success depends on proper technique and attention to detail. Here are the strategies that make the biggest difference.
First, work in a clean environment. Dust and debris cause most re application failures. Wipe down your entire workspace with a lint free cloth before you start. This single step prevents particles from getting trapped under the film again.
Second, control your temperature carefully. Heat the film just enough to make it pliable. Too much heat damages the auto tinting properties. Too little heat makes the film difficult to work with. Test the temperature on a small area first.
Third, use the right pressure when smoothing. Many people press too hard and damage the film. Apply firm, steady pressure instead. Work from the center outward in one direction. This technique pushes air and moisture toward the edges.
Fourth, take your time with the edges. Edges are where bubbles return most often. Spend extra time pressing the perimeter firmly. Make sure the film bonds completely around the entire border.
Fifth, let the adhesive set properly. Don’t use your helmet immediately after repair. Give the film at least 24 hours to cure fully. This waiting period matters more than people realize.
Finally, monitor your results. Check the repaired area after a few days. Small bubbles sometimes return as the adhesive continues settling. Catch these early by pressing them out again while the film remains flexible.
Following these practices gives you the best chance of a lasting repair. Most bubbling problems return because people rush the process or skip preparation steps. Patience and precision make all the difference with auto tinting film work.
Common Mistakes That Cause Recurring Bubbling
Most people make the same errors that cause bubbles to return. Understanding these mistakes helps you avoid repeating them.
Skipping surface preparation is the biggest culprit. Many users rush through cleaning the visor before applying film. Dust, oils, and residue prevent the adhesive from bonding properly. Even tiny particles create weak spots where air gets trapped. You must clean thoroughly with appropriate solutions and let the surface dry completely.
Applying film in unsuitable conditions causes major problems. High humidity environments introduce moisture that sits between the film and visor. Temperature matters too. Cold conditions make adhesive sluggish and prevent proper bonding. Hot conditions cause the film to expand unevenly. Most failures happen when people install film during wrong weather or in damp rooms.
Poor technique during application leads to recurring issues. Pushing too hard with your squeegee forces air deeper into the film instead of outward. Using inconsistent pressure creates uneven adhesion. Working too quickly prevents the adhesive from settling. Stretching the film unevenly during application causes tension that later releases as bubbles.
Handling the visor incorrectly after installation matters greatly. Removing and reinstalling your visor multiple times flexes the film and breaks the seal. Exposing the helmet to extreme temperature swings too soon stresses the adhesive before it fully cures.
Many people also ignore their helmet’s history. If your visor experienced impacts or stress, the surface may have microscopic damage. Film won’t adhere well to compromised surfaces. Older visors sometimes develop a waxy coating over time that blocks adhesion.
Recognizing these patterns prevents future bubbling. Document what went wrong initially. This information determines whether repair makes sense or complete replacement becomes necessary.
Troubleshooting Persistent or Worsening Bubbles
When bubbles persist or get worse after your initial repair attempt, you’re dealing with a deeper adhesion problem. This usually means air or moisture is trapped beneath the film layer, and simple smoothing won’t solve it.
Start by identifying the bubble pattern. If bubbles spread across the visor rather than staying in one spot, moisture is likely the culprit. If they cluster in specific areas, you probably have an application technique issue. This distinction matters because your next steps depend on what caused the problem.
Check whether the film is lifting at the edges. Lifted edges allow new air and moisture to enter, causing bubbles to expand. Press down firmly on all edges and corners. If they won’t stay sealed, the adhesive has failed and partial repair won’t work.
Consider the visor’s age and condition. Auto-tinting film performs best on clean, smooth surfaces. Older visors develop micro scratches and residue buildup that prevent proper adhesion. You might be fighting against surface conditions rather than a fixable bubble issue.
At this point, you have two realistic options. First, attempt a complete film removal and reapplication using better technique and surface prep. Second, accept that a professional replacement or new visor is more practical than continued repairs.
Document exactly what went wrong. Note the bubble location, when it appeared, and what conditions existed during application. This information helps you understand whether the problem stems from your technique, the film quality, or the visor itself. Persistent bubbling often signals that DIY repair has reached its limit, and investing in a replacement makes more sense than repeated failed attempts.
Maintaining Your Auto-Tinting Visor After the Fix
After you fix your smart helmet visor bubbling, proper care keeps the film intact and prevents new problems from forming. Your maintenance routine should start immediately after the repair completes.
Store your helmet correctly to protect the newly applied film. Keep it in a cool, dry place away from direct sunlight. Heat causes the adhesive to soften, which can restart bubbling. Humidity also damages the bond between film and visor, so avoid damp storage areas.
Handle your helmet gently during the first week after repair. The adhesive needs time to cure fully. Avoid removing and reinstalling the visor repeatedly during this period. Each time you touch the edges, you risk introducing air or moisture underneath.
Clean your visor with care when needed. Use only soft cloths and mild soap with lukewarm water. Never use harsh chemicals or abrasive materials that scratch the film. Aggressive scrubbing can lift edges and create new bubbles.
Check your visor regularly for any signs of bubbling returning. Inspect the edges and corners where problems typically start first. Catching issues early lets you address them before they spread across the entire surface.
Avoid extreme temperature changes when possible. Moving your helmet from freezing conditions into warm spaces rapidly stresses the film adhesive. Let your helmet gradually adjust to temperature changes instead.
Document how your visor performs over the coming weeks. Note any environmental conditions that seem to affect the film. This information helps you understand what works best for your specific helmet and climate. Consistent observation reveals patterns that prevent future bubbling problems from developing again.
Final Thoughts
Fixing bubbles on your smart helmet visor takes patience and the right approach. You now know what causes bubbling and how to stop it from coming back.
Small bubbles often respond well to careful reheating and pressing. Larger bubbles or widespread lifting usually need a fresh film application.
Your safety matters more than saving a few dollars. A visor with heavy bubbling can distort your view of the road. This creates real risks when you ride.
Take time to assess the damage honestly. Ask yourself if this is a simple fix or a sign of bigger problems. Sometimes replacement makes more sense than repeated repairs.
Quality materials make a real difference in how long your fix lasts. Cheap film often bubbles again within weeks. Investing in better film or professional application saves you frustration later.
Remember that prevention beats repair every time. Clean surfaces, proper technique, and good storage habits keep bubbles from forming in the first place.
Your riding conditions also play a role in film performance. Riders in humid or extreme climates may need to check their visors more often.
Don’t rush the repair process. Taking your time with cleaning, application, and curing gives you better results than working quickly.
If you tried fixing bubbles yourself and they keep coming back, it might be time to consult a professional. Some adhesion problems run deeper than surface fixes can solve.
Trust your instincts about your equipment. You know your helmet best. If something feels wrong or looks unsafe, address it before your next ride.
A clear, bubble free visor keeps you safe and focused on the road ahead.
Frequently Asked Questions
Why does my auto-tinting film bubble so quickly after installation?
Bubbles appear when air or moisture gets trapped between the film and visor surface. This happens most often due to improper surface preparation before applying the film. If you didn’t clean the visor thoroughly, dust particles create tiny air pockets. Temperature changes during or after application can also cause the film to expand and contract unevenly, pushing air into bubbles.
Can I fix bubbles myself or do I need professional help?
Small bubbles sometimes respond to careful reheating with a heat gun and gentle pressing. You heat the area slowly, then press the bubble flat as the film softens. However, if bubbles return quickly or spread across the visor, the film has an adhesion problem. At that point, professional replacement usually works better than DIY repair.
What’s the difference between a manufacturing defect and an application error?
Manufacturing defects show up as bubbles within days of purchase on a brand new helmet. Application errors appear after you install aftermarket tint film yourself. Check your helmet’s warranty and when bubbling started. If your helmet is new and bubbles appeared immediately, contact the manufacturer. If you applied the film yourself, review what went wrong during installation.
How do I prevent bubbles from coming back after repair?
Store your helmet indoors away from extreme heat or cold. Handle it gently for the first week after repair. Clean the visor carefully with a soft cloth and avoid harsh chemicals. Check regularly for new bubbles forming. Avoid rapid temperature changes, like moving from cold storage to direct sunlight.

Hello, i’m Ivoria i am the face behind Tech Tracker Blog. I am passionate about my work and love to explore gadgets and share about my experience.