How To Fix Smart Vacuum Sealer Heat Strip Teflon Tearing?
Your smart vacuum sealer stopped working right when you needed it most. The bags won’t seal. You notice the Teflon strip looks torn or worn out.
This is actually a very common problem. Most vacuum sealers rely on a thin Teflon strip to create that perfect seal. Over time, heat and pressure cause this strip to tear or wear down.
The good news? You don’t need to buy a new machine. This fix is simple and affordable. Many people finish this repair in about five minutes.
In a Nutshell
- Check the heat bar first. Make sure it’s not buckled or broken before you blame the Teflon tape. This step saves you time and effort.
- Replacing the Teflon strip is simple. Most fixes take about 5 minutes from start to finish. You don’t need special tools or skills.
- Align the strip carefully. Hold both ends of the new strip and line it up straight with the heat bar. Stick down one end first, then smooth it with your finger.
- Some machines need extra steps. You might have to remove the full heat bar assembly. Others let you lift the strip directly without disassembly.
- Clean your sealer regularly. Wipe the sealing area with a damp cloth after each use. Skip harsh or abrasive cleaners that damage the coating.
- Prevent future tears. Freeze liquids before sealing them. Also check gaskets and thermal fuses if problems continue.
Understanding Why Teflon Strips Tear on Heat Bars
Teflon strips tear on heat bars for several specific reasons. Understanding these causes helps you fix the problem correctly and avoid repeating the same mistake.
Heat from repeated use breaks down Teflon coating over time. Each time you seal a bag, the strip gets hot and cools down again. This constant heating and cooling cycle weakens the material. After months or years of use, the coating starts to crack and peel away from the underlying bar.
Food residue and moisture damage the strip. When liquids seep onto the heat bar during sealing, they create problems. The moisture can get trapped under the Teflon layer. This causes the coating to separate and tear. Salt and acidic foods make this worse because they corrode the material faster.
Misalignment during installation causes uneven wear. If the replacement strip isn’t lined up straight with the heat bar, one side takes more pressure than the other. This uneven stress creates weak spots that tear quickly. The strip also rubs against the bag holder, which accelerates damage.
Using abrasive cleaners destroys the protective layer. Rough cloths or harsh chemicals scratch and damage the Teflon coating. Once the coating has scratches, it peels away more easily during normal use.
Buckled or broken heat bars underneath create extra pressure. Sometimes the problem isn’t the Teflon strip itself. If the heat bar underneath is bent or damaged, it pushes unevenly against the strip. This causes tears even on a brand new Teflon layer.
Debris trapped between components prevents proper sealing. Crumbs and food particles block heat transfer and create friction. This friction wears through the Teflon faster than normal operation would.
Diagnosing the Real Problem Before You Repair Anything
Before you replace anything, you need to know what’s actually broken. Many people assume the Teflon tape is the problem when something else caused the failure. Taking 10 minutes to diagnose saves you from wasting time on the wrong fix.
Start by opening your vacuum sealer and looking at the heat bar closely. Run your finger along it gently to feel if it’s bent, warped, or cracked. A buckled heat bar creates uneven pressure on the Teflon strip, which causes premature tearing. If the bar itself is damaged, replacing only the tape won’t solve your problem.
Next, check if the heat bar is actually producing heat. Turn on your machine and carefully hold your hand near (not touching) the sealing strip for a few seconds. You should feel warmth. If you feel nothing, the issue might be a broken thermal fuse or a wiring problem, not the Teflon.
Look for food residue, moisture, or debris stuck to the heat bar or surrounding areas. Clean the sealing area with a damp cloth and let it dry completely. Sometimes buildup prevents proper heat transfer and makes the machine seem broken when it just needs cleaning.
Inspect the Teflon strip itself under good lighting. Look for obvious tears, peeling edges, or bare spots where the coating has worn away. Small cracks mean replacement time. However, if the strip looks fine but your seals aren’t working, check the heat bar alignment and thermal connections first.
Only after you’ve ruled out these other causes should you proceed with replacing the Teflon tape. This diagnostic step prevents frustration and ensures your fix actually works.
Tools and Materials Needed for the Fix
To fix a smart vacuum sealer with torn Teflon tape, you need specific items on hand. Gather these tools before you start the repair process.
Replacement Teflon tape is your main material. Purchase a strip designed for your sealer model. Measure your current heat bar length to ensure you get the correct size. Most replacement strips come in standard widths and lengths.
A damp cloth helps you clean the heat bar area. Use lukewarm water only. This removes old adhesive, food particles, and residue that prevent proper tape adhesion. Let the surface dry completely before applying new tape.
Tweezers or small pliers help you position the replacement strip accurately. These tools let you hold the tape at both ends and align it straight without your fingers touching the adhesive side.
A ruler or measuring tape ensures your new strip lines up perfectly with the heat bar. Misalignment causes uneven wear and premature tearing. Measure twice before sticking down the tape.
A multimeter is useful if you suspect heat bar issues. Test whether the heat bar produces electrical current. This helps you confirm the Teflon tape is actually the problem and not a broken heating element.
Rubbing alcohol works well for removing stubborn residue. Apply it sparingly on a cloth, never directly on the heat bar. This prevents moisture damage while cleaning effectively.
A small flashlight or headlamp illuminates the sealing area clearly. Good lighting helps you spot damage you might miss otherwise and ensures proper tape alignment.
Keep these items organized in one location. Having everything ready prevents frustration during the repair. Most items are common household supplies you probably already own.
Step-by-Step: Removing the Damaged Teflon Strip
Before you install a new Teflon strip, you must remove the damaged one carefully. This step determines whether your repair succeeds or fails.
Start by unplugging your vacuum sealer completely. Safety comes first when working with electrical appliances. Wait a few minutes for the heat bar to cool down fully.
Open the sealing chamber and locate the damaged Teflon strip. Look closely at how it’s attached to the heat bar. Some machines use adhesive backing, while others have mechanical clips or channels that hold the strip in place.
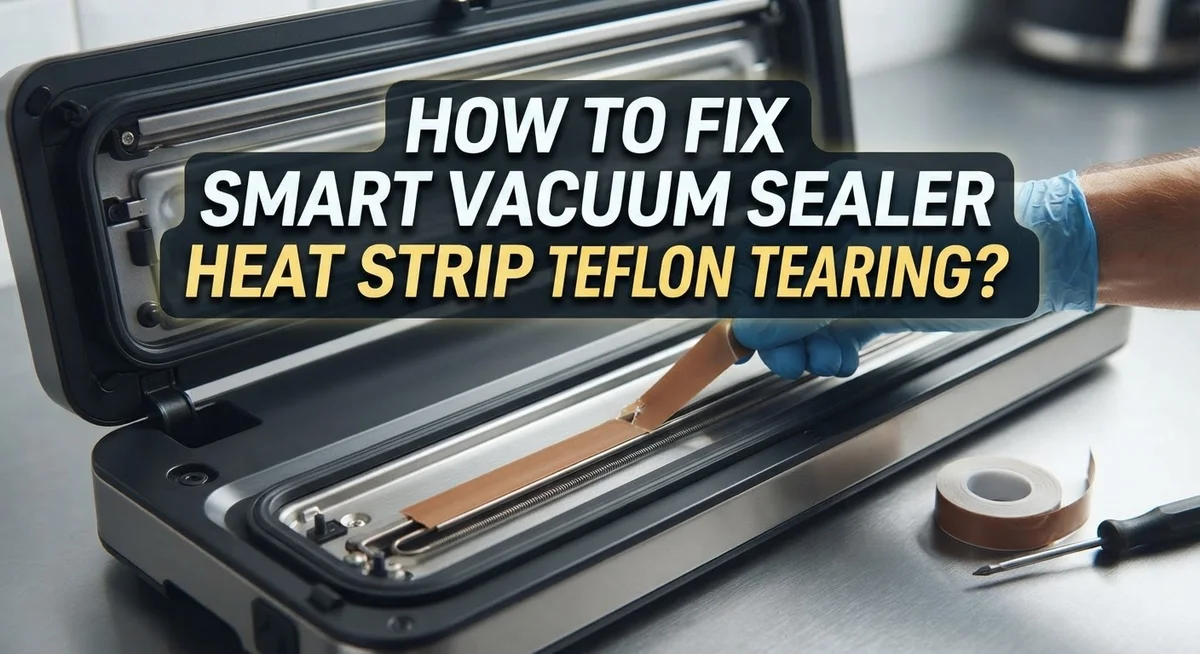
If your model uses adhesive backing, gently lift one corner of the strip with your fingernail or a plastic tool. Work slowly and avoid metal tools that might scratch the heat bar surface. Pull the strip away at a shallow angle rather than straight up. This prevents damage to the underlying metal.
For strips held by clips or channels, identify the fastening points first. Remove any screws or clips according to your machine’s design. Take photos before you start so you remember the exact configuration.
Once you’ve loosened the strip, peel it away completely from the heat bar. You may find old adhesive residue left behind. Let this dry completely before proceeding.
Inspect the exposed heat bar for damage. Look for buckles, cracks, or discoloration that suggests the bar itself has failed. A damaged heat bar requires professional repair or replacement of the entire machine.
Clean the heat bar surface with a damp cloth and let it dry thoroughly. Remove any food particles or mineral deposits. This preparation ensures your new Teflon strip bonds properly and functions correctly.
Step-by-Step: Installing the New Teflon Strip Correctly
Now that you’ve removed the old Teflon strip, installing the new one correctly is straightforward. The key is alignment and smooth adhesion.
Start by holding the replacement strip at both ends with your fingers. Check that it sits perfectly straight and centered over the heat bar. Misalignment is the most common installation mistake, so take a moment to verify the positioning before you stick anything down.
Peel back the adhesive backing slightly. Press one end of the strip onto the heat bar first. Hold it firmly for a few seconds so it bonds properly. This anchors your strip and prevents shifting.
Now comes the critical part. Use your finger or a clean cloth to run along the entire length of the strip. Apply steady, even pressure as you move from the anchored end toward the opposite side. This removes air bubbles and ensures full contact with the heat bar surface.
Work slowly and deliberately. Rush this step and you’ll trap air pockets that cause future sealing failures.
Some vacuum sealer models require you to remove the entire heat bar assembly before installation. Check your manual or look for clips holding the bar in place. If your model allows direct access, you can install the strip without full disassembly.
Once the strip is fully adhered, let it sit for a few minutes before using your machine. This gives the adhesive time to set completely. Plug your sealer back in and test it with a practice seal on scrap material first.
If the new strip doesn’t heat up or sealing still fails, you may have a deeper electrical issue. A multimeter can help diagnose heat bar problems, but that’s beyond simple tape replacement.
Testing the Heat Bar After Repair
Testing your heat bar after repair is essential. You want to confirm the new Teflon strip works properly before sealing important items.
Start by plugging in your vacuum sealer and allowing it to warm up for 30 seconds. Most machines have a power indicator light that turns on when heating begins. Wait for this light to stabilize, which signals the heat bar has reached operating temperature.
Take a piece of scrap plastic bag and place it gently near the heat bar. Do not touch the bar directly with your fingers. The plastic should feel warm or slightly hot when the machine is ready. If you feel no heat at all, the problem may be deeper than just the Teflon strip.
Perform a test seal on a thin plastic bag with no contents inside. Close the sealing chamber slowly and hold it for 3 to 5 seconds. Remove the bag and inspect the sealed edge. A successful seal should show a clean, continuous line with no gaps or weak spots.
Check if the seal is tight and permanent. Try to pull the bag apart at the sealed edge. A proper seal resists pulling without tearing the plastic itself.
If the seal fails or feels weak, unplug the machine immediately. The heat bar may be buckled or broken underneath. You might need a multimeter to test for electrical current reaching the heat bar. If current flows but no heat appears, the heating element itself has failed.
Successful test results mean your repair is complete. You can now use your vacuum sealer normally on actual food items. Always allow proper cooling time between seals to prevent overheating.
Preventing Future Teflon Tearing and Extending Sealer Life
Preventing future Teflon tearing starts with simple daily habits. Clean your sealing area after each use with a damp cloth. This removes food residue, moisture, and debris that build up on the heat bar. Never use abrasive scrubbers or harsh chemicals. These damage the Teflon coating and speed up deterioration.
Moisture is a major enemy of Teflon strips. Freeze any liquids before sealing them. Cold items reduce steam release and protect the strip from heat stress. Pat dry any wet foods with paper towels first. This one step prevents most damage.
Check your gaskets regularly. Worn gaskets let steam escape sideways, causing uneven heat distribution. Replace them if they look cracked or flattened. Inspect your thermal fuse too. A failing fuse creates irregular heating that damages new Teflon strips quickly.
Store your vacuum sealer in a dry location. Humidity in garages or basements speeds up Teflon degradation. Keep the machine away from direct sunlight and heat sources.
Use proper sealing technique every time. Don’t force bags into the chamber or fold them awkwardly. Uneven contact with the heat bar concentrates pressure on one spot, causing tears.
Replace your Teflon strip before it completely fails. Small tears get worse fast. Early replacement costs less than buying a new machine.
Keep your heat bar straight and level. A bent heat bar creates pressure points that tear new strips immediately. If your machine has been dropped or bumped, inspect the heat bar carefully before installing replacement tape.
These habits extend your sealer’s life for years. Most machines work reliably when you maintain them properly.
Troubleshooting Common Post-Repair Issues
After you repair your vacuum sealer’s Teflon strip, problems can still happen. Knowing how to troubleshoot these issues keeps your machine working properly.
Weak seals after replacement indicate the new strip wasn’t installed correctly. The strip may be misaligned or not fully adhered to the heat bar. Remove the sealer’s power cord immediately. Inspect the strip for wrinkles or air bubbles. Press the strip down firmly along its entire length. Wait several minutes before testing again.
Heat bar not reaching temperature means you may have a deeper electrical problem. The thermal fuse could be broken. A multimeter can test if electricity flows through the fuse properly. If the fuse failed, it needs replacement. This is different from a Teflon strip issue.
Sealing only on one side suggests the heat bar is buckled or bent. Look at the bar from the side to check for warping. A bent heat bar cannot be straightened and requires full replacement.
Residue buildup on the new strip happens quickly if you don’t clean properly. Debris blocks heat transfer and weakens seals. Clean the sealing area with a damp cloth after each use. Never use abrasive scrubbers that scratch the Teflon coating.
Leaking bags during sealing means the strip temperature is too low or the pressure is insufficient. Check if your machine has adjustable settings. Some models have a heat dial you can increase slightly.
Persistent failure after troubleshooting indicates a problem beyond the Teflon strip. The heating element itself may be damaged. At this point, professional repair or machine replacement becomes necessary. Document what you’ve already tried to help a technician diagnose the real issue.
Final Thoughts
Fixing a torn Teflon strip is a simple job. You don’t need special tools or advanced skills to do this.
Most repairs take just five minutes from start to finish. This makes it one of the easiest fixes for your vacuum sealer.
Before you buy a replacement strip, always check the heat bar first. A buckled or broken heat bar needs different repairs than a torn strip.
Replacing the Teflon tape saves you money. You avoid spending on a brand new machine when a small part is the real issue.
Even older machines can work like new again. Many people fix decades old sealers with a simple strip replacement.
Good habits keep your sealer running longer. Clean the sealing area after every use with a soft, damp cloth.
Avoid abrasive scrubbers or harsh chemicals. These damage the Teflon coating and cause tears sooner than expected.
Freezing liquids before sealing also protects your heat strip. This simple step prevents moisture damage that weakens the Teflon over time.
Regular care and quick repairs work together. They keep your vacuum sealer working well for many more years.
Don’t ignore small tears when you first notice them. Small problems become bigger issues if you wait too long.
Testing your seal after any repair confirms your fix worked. This gives you confidence before you use the machine for real food storage.
Simple maintenance and fast fixes save you time and money. Your vacuum sealer can serve you well for a long time.
With the right approach, most Teflon tearing problems have easy solutions. You now have the knowledge to handle this common issue with confidence.
Frequently Asked Questions
How do I know if my Teflon tape is actually torn?
The most obvious sign is visible damage on the heat strip itself. Look for peeling, fraying, or obvious gaps in the coating. You might also notice your bags aren’t sealing properly, even after multiple attempts.
Run your finger gently across the heat bar (when unplugged). A torn Teflon strip feels rough or sticky. Compare it to a new strip if you can. Another test: seal a practice bag with water inside. If it leaks, your Teflon is likely damaged.
Can I repair a torn Teflon strip or do I need a full replacement?
You cannot repair a torn strip. Teflon tape cannot be patched or glued back together effectively. The coating will continue to degrade, and temporary fixes fail quickly.
Full replacement is your best option. The process takes about five minutes. You simply remove the old strip and apply a new one. This costs far less than buying a new machine.
What if my heat bar is bent or buckled instead?
A bent heat bar is a different problem from torn Teflon. If the bar is visibly warped or crooked, replacing the tape alone won’t fix your sealing issues.
Check this by looking at the bar from the side. It should be perfectly straight. A buckled bar requires heat bar assembly replacement, which is more involved than a tape swap. You may need professional help or a replacement assembly for your specific machine model.
How often should I replace my Teflon strip?
This depends on how often you use your sealer. Regular users might replace it every 6 to 12 months. Heavy users may need a new strip every 3 to 4 months.
Don’t wait for complete failure. Replace the strip when you notice the first signs of wear or reduced sealing strength. This prevents damage to your bags and keeps your machine working reliably.

Hello, i’m Ivoria i am the face behind Tech Tracker Blog. I am passionate about my work and love to explore gadgets and share about my experience.