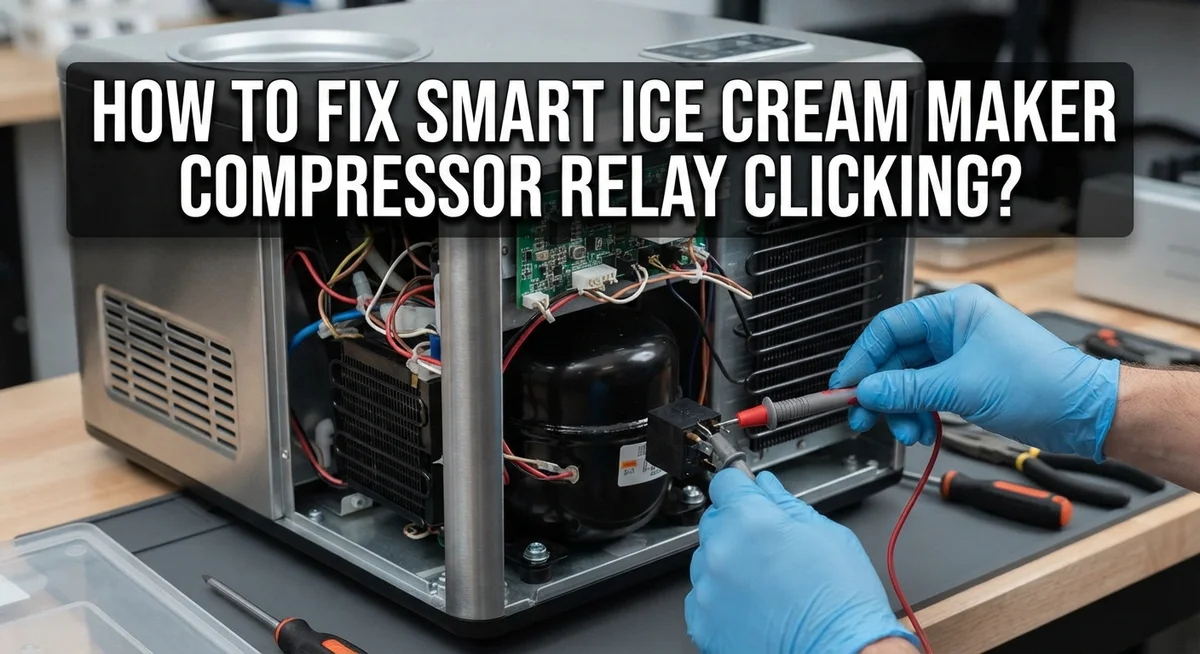
How To Fix Smart Ice Cream Maker Compressor Relay Clicking?
Does your smart ice cream maker make a strange clicking sound instead of cooling? That noise usually means one thing. Your compressor relay has a problem.
This clicking happens when the PTC start relay fails to send power correctly. As a result, the compressor cannot start. Your machine loses its cooling power, and your ice cream dreams melt away.
Power outages and electrical surges often cause this issue. They damage the relay’s internal parts, leading to that annoying click instead of a smooth hum.
In a Nutshell
- Clicking sounds mean the PTC start relay is not sending power to the compressor. This stops the cooling process completely.
- Always test the relay with a multimeter before you replace it. A quick continuity check saves you time and money.
- Check the compressor terminals too. If the compressor itself has no continuity, a new relay will not fix your machine.
- Power surges are a common cause of this failure. If you had a recent outage, this is likely the reason for the noise.
- Do not just swap the relay again and again. If clicking continues, you probably have a deeper issue with the capacitor or thermostat.
- Give yourself about 30 minutes for a basic diagnosis. This is usually enough time to find the root cause.
- If the compressor terminals show no continuity, you may need a professional. This often points to a bigger mechanical failure inside the unit.
Understanding the Compressor Relay Clicking Sound
A clicking sound from your ice cream maker’s compressor relay tells you something specific is wrong. This noise happens repeatedly, often in quick bursts, and means the relay cannot complete its electrical circuit properly.
The PTC start relay sits between your power supply and the compressor motor. When it works correctly, it sends electricity to start the motor and then steps back out of the way. A faulty relay gets stuck or fails to engage, creating that distinctive clicking pattern you hear.
Why does this clicking happen? The relay tries to start the compressor but cannot complete the task. Each attempt triggers a click sound. Then it resets and tries again, repeating the cycle. Your ice cream maker stops cooling because the compressor never actually turns on.
Power outages and electrical surges damage relays frequently. These events send unexpected voltage through your unit, burning out the relay’s internal components. Once damaged, the relay loses its ability to function.
You might also notice the clicking happens only when you first turn on the machine. Or it could continue throughout operation. Both scenarios point to the same problem: relay failure.
What happens inside the relay? The relay contains a small electromagnet and switch contacts. When electricity flows through the electromagnet, it pulls the contacts together to complete the circuit. A faulty relay has burned contacts, broken wiring, or a weak electromagnet that cannot pull the switch closed properly.
Understanding this clicking sound helps you act quickly. You know the problem is electrical, not mechanical. This means you can test components with basic tools like a multimeter. Most people can complete this diagnosis in about 30 minutes without special skills or expensive equipment.
What Causes the Relay to Click or Fail
The relay clicking sound tells you the compressor start relay is struggling. Inside this small component sits an electromagnet and metal contacts that work together to send power to your compressor motor.
Why does the relay click instead of working smoothly? The electromagnet tries to pull the switch contacts closed, but something blocks the connection. This creates a rapid clicking pattern you hear. The relay attempts this action repeatedly, but the compressor never actually starts.
Several factors cause this clicking problem. Electrical surges from power outages damage the relay’s internal contacts and electromagnet coil. These surges create tiny burn marks inside the relay that prevent proper electrical flow. Even a brief power interruption can weaken the relay enough to cause clicking.
Age also plays a role in relay failure. Over time, the metal contacts inside the relay wear down and corrode. This corrosion acts like a barrier between the contacts, stopping electricity from flowing through properly.
Moisture and humidity inside your ice cream maker can accelerate this damage. Water vapor causes oxidation on the relay contacts, making the clicking worse over time.
The compressor terminals themselves might also fail. When these terminals lose continuity, the relay clicks because it cannot complete the circuit to the motor. This is why testing both the relay and the terminals matters.
Temperature stress contributes too. Your compressor relay works hard during hot weather. The heat weakens the electromagnet’s ability to hold the contacts closed firmly.
Understanding these causes helps you diagnose the real problem. A simple clicking sound might mean just the relay needs replacement, or it could signal a deeper issue with your compressor terminals or capacitor system.
Tools You Need for Diagnosis and Repair
You need just a few basic tools to diagnose and fix your ice cream maker’s clicking relay problem. Most of these items are common household items or inexpensive tools you may already own.
A multimeter is your most important tool. This device measures electrical continuity and voltage. You use it to test whether the relay is working properly. A basic multimeter costs very little and works for many household electrical projects. Set it to the continuity or ohms setting to check if electricity flows through the relay contacts.
You will need a screwdriver set with both Phillips and flathead options. Different ice cream maker models use different screw types to secure the relay and access panels. Having both types prevents frustration when you open up your machine.
A flashlight or headlamp helps you see inside the machine clearly. Relay compartments are often dark and cramped. Good lighting lets you spot burn marks or visible damage on the relay itself.
Wear safety gloves when handling electrical components. Even unplugged machines can hold residual charge. Gloves protect your hands from sharp edges inside the machine too.
Keep a notepad and pen nearby to document what you find. Write down multimeter readings and observations. This helps you remember results and spot patterns.
A soft brush or compressed air removes dust and debris from relay contacts. Clean contacts test more accurately than dirty ones.
Needle nose pliers help you remove the relay carefully without damaging surrounding wires. The relay typically has two or three wire connections that slip off easily.
These tools give you everything needed for proper diagnosis before any replacement work.
Step-by-Step Guide to Testing the Relay
Testing your relay with a multimeter is the most important step. This tool tells you exactly whether the relay is working or dead. Start by unplugging your ice cream maker from the wall outlet completely. Safety comes first when working with electrical parts.
Locate the relay on your compressor. It usually sits near the motor and has two or three wire connections. Take a photo with your phone before you disconnect anything. This helps you remember where each wire goes.
Gently remove the relay by pulling the wires free. Some relays slide out of a socket. Others have wires you must carefully disconnect. Write down which wire was in each position.
Set your multimeter to the continuity setting. This setting beeps when electricity can flow through something. Touch the multimeter probes to the relay’s two main terminals. A healthy relay shows continuity with a beep. No beep means the relay is faulty.
Now test the compressor terminals themselves. The relay might be fine, but the compressor could have internal damage. Look for continuity between the compressor motor terminals. Document your findings on your notepad.
Check for visible burn marks or discoloration on the relay surface. Black or brown spots indicate heat damage from electrical stress. Smell the relay carefully too. A burnt smell confirms the relay failed.
If your tests show the relay is bad, you have found your problem. If tests show the relay is good, the issue lies elsewhere. Perhaps your thermostat is stuck or a capacitor is failing. This testing process eliminates confusion and saves you time and money on unnecessary replacements.
How to Inspect and Test Compressor Terminals
Start by locating your compressor terminals. These metal connection points sit on or near the relay itself. You’ll see them clearly once you remove the relay from the unit.
Inspect the terminals visually first. Look for corrosion, rust, or white powdery buildup on the metal surfaces. These deposits block electrical flow and cause clicking problems. Use your soft brush or compressed air to gently clean away any debris. Never use water or liquid cleaners on electrical components.
Check if the terminals feel loose or wiggle when you touch them gently. Loose connections prevent current from reaching the compressor motor. Tighten any loose terminal connections carefully with your screwdriver.
Now test for continuity using your multimeter. Set the device to continuity mode. Touch one probe to each terminal connection point. A good terminal shows continuity and makes a beeping sound. No beep means the terminal is damaged internally.
Test the wire connections leading to the terminals as well. Damaged wires can look fine on the outside but fail inside. The multimeter reveals breaks that your eyes cannot see.
Document everything you find in your notepad. Write down which terminals show continuity and which ones fail. This information helps you understand if the relay itself is the problem or if terminal damage caused the relay to fail.
Compare your results carefully. If terminals test fine but the relay clicks, the relay needs replacement. If terminals fail the continuity test, the compressor itself may need attention. This distinction matters because it tells you whether you’re fixing a simple relay issue or facing a larger compressor problem.
Replacing the Faulty Relay Safely
Before you replace the relay, turn off the ice cream maker completely. Unplug it from the wall outlet. Wait five minutes to allow any remaining electrical charge to drain from the system safely.
Locate the relay on your compressor. Take a photo with your phone so you remember exactly where it sits. This helps you reinstall the new relay in the correct position.
Gently disconnect the wires attached to the relay. Some relays push straight out, while others require you to squeeze a small tab first. Pull slowly and steadily. Never yank or twist the wires, as this can damage the connection points.
Before you discard the old relay, write down its model number. You will need this information to purchase the correct replacement. The number appears on a label stuck to the relay body.
Inspect the relay socket where the old relay sat. Look for any burn marks, melted plastic, or black discoloration inside the socket itself. These signs suggest an electrical problem beyond just the relay. If you see damage, the socket may need professional repair.
Clean the relay socket gently with a soft brush or compressed air. Remove any dust or debris that accumulated inside. Dirty contacts prevent the new relay from working properly.
Check the wires leading to the relay socket. Look for any cracks in the insulation or exposed copper. Damaged wires must be repaired before installing a new relay.
Now you are ready to insert the new relay. Align it carefully with the socket openings. Push it straight in until you hear a small click. The relay should sit flush against the socket with no gaps.
Reconnect the wires to the new relay terminals. Push them on firmly until they click into place. Tug gently on each wire to confirm it holds tight.
Common Mistakes to Avoid During Repair
Many people make critical errors when fixing a clicking compressor relay. Understanding these mistakes helps you avoid expensive damage and wasted time.
The biggest mistake is replacing the relay without testing it first. Many owners assume the relay is broken based on the clicking sound alone. However, clicking can mean other parts are failing too. Your thermostat might be stuck. Your capacitor could be weak. The compressor itself might have internal problems. If you replace the relay without diagnosis, you’ll waste money and the clicking will return.
Another common error is ignoring the compressor terminals completely. People focus only on the relay and skip terminal inspection. Corroded or loose terminals cause the same clicking symptoms as a bad relay. You must test both the relay and the terminals before ordering replacements.
Replacing the relay multiple times without finding the root cause is another trap. This happens when people don’t check the thermostat or capacitor function. A faulty thermostat sends wrong signals to the relay, making it click repeatedly. A weak capacitor cannot give the compressor enough power to start. Fixing the relay alone won’t solve these problems.
Some people also skip the visual inspection step. Burn marks and discoloration tell you exactly what failed. Black spots mean electrical damage. Melted plastic means heat damage. These clues guide your next steps.
Finally, rushing through testing leads to mistakes. Take time to set your multimeter correctly. Record your findings in writing. Compare results carefully before deciding what needs replacement. Proper diagnosis prevents frustration and keeps repair costs down.
Troubleshooting When the Compressor Still Won’t Start
When your compressor relay clicks but the compressor still won’t start, you need to dig deeper. The clicking noise tells you the relay tried to engage, but something blocked the compressor from turning on.
First, check your thermostat. The thermostat controls when your ice cream maker should cool. If it’s broken, it won’t send the signal to start the compressor. Test the thermostat by setting it to the coldest setting and listening for a clicking sound from the relay. If you hear nothing, the thermostat may be your real problem.
Next, inspect the capacitor near your compressor. The capacitor stores electrical energy and helps start the motor. A weak or failed capacitor prevents the compressor from spinning even if the relay works perfectly. Look for any bulging or leaking on the capacitor surface. These signs mean it needs replacement.
Test your power supply next. Use a multimeter to check the voltage at the compressor terminals. You should see the correct voltage reading when the thermostat calls for cooling. Low voltage means your ice cream maker’s power system has an issue.
Check the compressor itself for mechanical problems. Sometimes the compressor gets stuck or locked up internally. This causes the relay to click as it tries to start a motor that cannot move. In this case, the relay isn’t broken at all.
Finally, verify all electrical connections are tight. Loose wires reduce power flow and prevent starting. Wiggle each connection gently and tighten any loose terminals. This simple step often solves starting problems that seem much more complicated than they really are.
Final Thoughts
Fixing a clicking compressor relay does not need to feel impossible. Most problems trace back to a faulty relay or a hidden electrical issue. With patience and the right tools, you can solve this yourself.
Start every repair with proper testing. Skipping the multimeter check leads to wasted time and money. Testing first saves you from replacing parts you don’t actually need.
Remember that clicking often points to more than just the relay. Power outages and surges damage electrical components in your ice cream maker. Check your thermostat and capacitor too.
If you replace the relay once and the clicking continues, stop and look deeper. Multiple relay replacements without fixing the root cause waste your effort. The real problem might sit in your compressor or wiring.
Take your time during each step of this process. Rushing through inspection causes missed damage signs. Thirty minutes of careful diagnosis beats hours of frustration later.
Your compressor terminals deserve equal attention as the relay itself. Many owners fix the relay but forget to test terminal continuity. This oversight leads to repeat failures down the road.
Keep your tools ready and your workspace clean. A soft brush, compressed air, and a reliable multimeter handle most repairs. These simple items solve the majority of clicking issues.
If your ice cream maker still won’t cool after these steps, consider calling a professional. Some compressor problems need specialized repair knowledge. Knowing when to stop DIY work protects your appliance from further damage.
Trust the testing process every time. Careful diagnosis today prevents bigger headaches tomorrow. Your ice cream maker will thank you with smooth, reliable performance for years ahead.
Frequently Asked Questions
Why is my ice cream maker compressor relay clicking?
A clicking noise means your PTC compressor start relay is likely faulty. This small component tells your compressor when to turn on and off. When it fails, you hear repeated clicking sounds instead of normal operation. Electrical surges and power outages often damage relays. The relay may have internal burn marks or broken contacts that prevent proper function.
Can I test the relay myself before replacing it?
Yes, you can test it with a multimeter if you have basic electrical knowledge. First, unplug your ice cream maker completely. Locate the relay near your compressor. Set your multimeter to continuity mode and touch the probes to the relay terminals. A working relay shows continuity. If you see no continuity, the relay is bad. This test takes about 10 minutes and prevents unnecessary replacements.
What if the compressor still won’t start after I replace the relay?
Don’t assume the relay was the only problem. Check your thermostat next. A broken thermostat stops the relay from receiving the signal to start. Also inspect the capacitor near your compressor for visible damage or bulging. Test your power supply to confirm electricity reaches the unit. Sometimes the compressor itself gets stuck internally. Verify all electrical connections are tight and secure.
Should I replace the relay myself or call a professional?
Experienced DIYers can replace it safely with proper tools and testing. You need a multimeter and basic mechanical skills. If you feel uncomfortable working with electrical components, hire a professional. Professionals can also identify if something deeper caused the relay failure, saving you from repeated replacements.

Hello, i’m Ivoria i am the face behind Tech Tracker Blog. I am passionate about my work and love to explore gadgets and share about my experience.