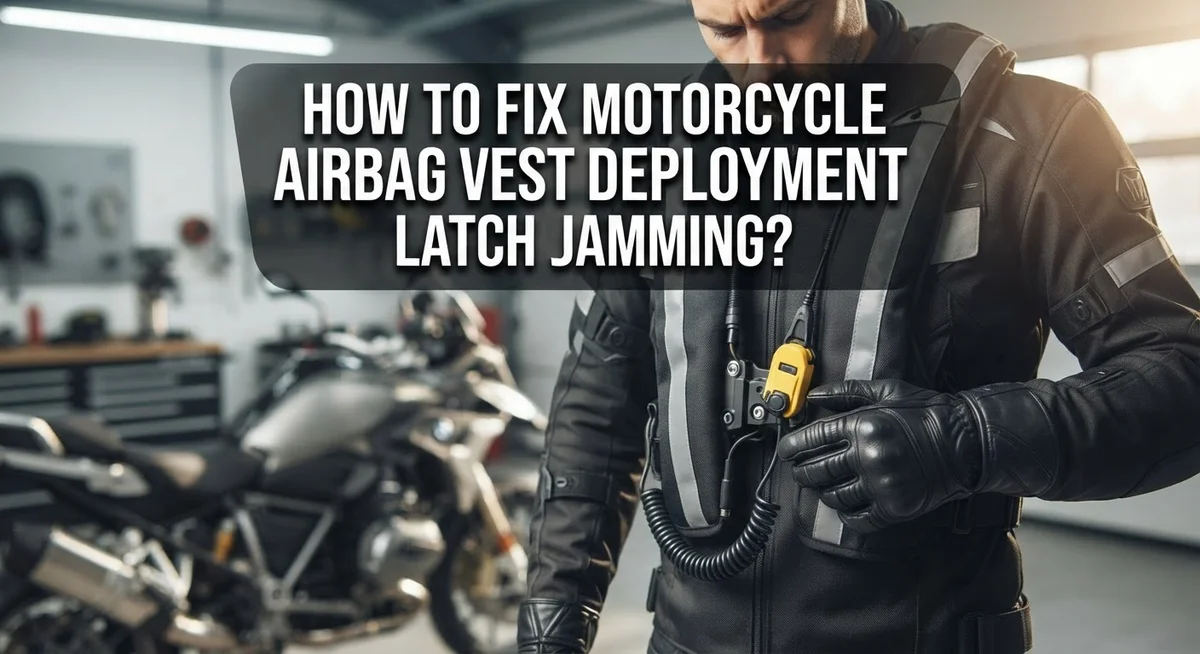
How To Fix Motorcycle Airbag Vest Deployment Latch Jamming?
Your motorcycle airbag vest keeps you safe on every ride. But what happens when the deployment latch jams? This small problem can turn into a big safety concern fast.
A jammed latch often shows up after a deployment or during a routine gear check. You might notice the tether stuck, the shell misaligned, or the cartridge slot refusing to close. It’s frustrating, but it’s fixable.
Most riders panic when this happens. The good news is that latch jamming is usually a simple mechanical issue. It rarely means your vest is beyond repair.
In a Nutshell
- Check the latch type first. Your vest uses either a tethered mechanical system or an electronic algorithm based system. Knowing this helps you fix it correctly.
- Replace the CO2 cartridge fully. Never reuse a spent cartridge. A full replacement keeps your vest ready for the next ride.
- Re-attach the tether carefully. This step often gets rushed. A loose or twisted tether causes future jamming.
- Inspect the outer shell closely. Look for cracks, tears, or loose stitching. Structural damage means the vest needs professional review, not a DIY fix.
- Contact the manufacturer if needed. Many brands, like Alpinestars, replace or rearm vests for free after a malfunction. This saves you money and hassle.
- Reassemble everything before wearing it again. Test the latch gently to confirm it clicks and holds properly.
Understanding How Airbag Vest Deployment Latches Work
Your motorcycle airbag vest uses one of two main deployment systems. Understanding which type you have makes repairs much easier.
Tethered deployment systems work mechanically. A cord connects your vest to your motorcycle or riding gear. When you crash, the tether pulls tight and triggers the CO2 cartridge. This releases pressurized gas that inflates the airbag chambers. The latch holds everything in place until deployment happens.
Algorithm based systems use electronic sensors instead. These sensors detect sudden impacts or rapid deceleration. The vest’s computer processes this data in milliseconds. If it confirms a crash, the system activates the CO2 cartridge automatically. No physical tether is needed for this type.
Both systems rely on a deployment latch. This latch keeps the CO2 cartridge sealed and ready. When triggered, the latch releases and allows gas to flow into the airbag chambers. A jammed latch prevents this gas release, which stops proper inflation.
The latch mechanism includes a spring loaded pin. This pin holds the cartridge securely during normal riding. When deployment occurs, a small explosive charge forces the pin to retract. This opens the gas pathway.
Jamming happens when debris, dust, or corrosion builds up around the pin. Sometimes the spring weakens over time. Improper reassembly after previous maintenance can also cause jamming.
Understanding your specific system type matters greatly. Check your vest’s manual or manufacturer label to identify which deployment method you have. This information guides your repair approach. Tethered vests need tether inspection, while electronic vests require sensor checks. Knowing this prevents wasted time during troubleshooting.
Signs Your Deployment Latch Is Jammed
Your deployment latch sends clear warning signs before it completely fails. Learning to spot these signals helps you catch problems early and avoid safety issues during rides.
Listen for grinding or clicking sounds when you manually test the deployment mechanism. A healthy latch produces smooth, quiet clicks. Grinding noises mean debris is stuck inside the mechanism or the spring loaded pin is binding against the housing.
Check if the latch feels stiff or resistant when you press it. Normal deployment latches move freely with minimal pressure. If you feel grinding resistance or the latch seems stuck halfway through its motion, jamming has likely begun.
Look for visible corrosion or white powder around the latch area. Salt air, moisture, and humidity cause oxidation on metal components. This buildup restricts the pin movement and prevents full engagement or disengagement.
Test the tether attachment point carefully. The release tether should move smoothly without kinks or twists. If the tether feels loose or the attachment point looks bent, the latch cannot deploy properly.
Inspect the outer shell near the latch for cracks or damage. Impact damage can misalign the internal mechanism even if the shell looks fine from a distance. Run your fingers along the edges to feel for hairline fractures.
Pay attention to any vest deployments that feel incomplete or partial. The airbag should inflate fully in one smooth motion. Hesitation or slow inflation suggests latch problems are developing.
Check your vest regularly between rides. Monthly inspections catch jamming early when fixes are simpler. Store your gear in a dry location away from salt spray and extreme temperatures to prevent corrosion from starting.
What You Need Before Starting the Repair
Before you start fixing a jammed deployment latch, gather the right tools and materials. You’ll need basic items to complete this repair safely and effectively.
A replacement CO2 cartridge is essential. The original cartridge loses pressure after deployment or during troubleshooting, so you must have a fresh one ready. Check your vest’s manual to find the correct cartridge size and type for your specific model.
Get a small brush or old toothbrush to clean debris around the latch area. Dust, dirt, and corrosion often cause jamming, so cleaning is your first step. A soft cloth works well for wiping away loose particles without scratching components.
You’ll need a small flathead screwdriver or hex key. Most vests have screws or bolts holding the cartridge chamber in place. Keep these fasteners organized so you don’t lose them during disassembly.
Have your vest’s user manual nearby. This guide shows exactly where components sit and how they connect. Different manufacturers design their systems differently, so the manual prevents mistakes.
A well lit workspace matters greatly. Good lighting lets you see the latch mechanism clearly and spot damage you might otherwise miss. A work table or clean floor keeps small parts from rolling away.
Wear safety glasses during this repair. Tiny springs or compressed components could pop unexpectedly. Protect your eyes from potential injury.
Keep paper towels handy for spills or debris cleanup. Some cartridges may have residual gas or moisture inside.
Finally, have your manufacturer’s contact information ready. If you encounter problems beyond simple jamming, you’ll want to reach out to them quickly. They often provide free repairs for mechanical failures under warranty coverage.
Step-by-Step Guide to Fixing a Jammed Latch
Start by laying your vest on a clean, flat surface in good lighting. This setup helps you see the latch mechanism clearly and prevents losing small parts during the repair.
Locate the deployment latch on your vest. Most vests have the latch positioned near the shoulder or chest area. Check your manual if you’re unsure about the exact location. Gently press the latch to test how it moves. A jammed latch will feel stuck or grind when you apply pressure.
Clean the latch area thoroughly. Use your small brush or old toothbrush to remove dust, dirt, and debris around the pin and spring mechanism. Work slowly and carefully. Brush away from the latch opening to prevent pushing debris deeper inside. Wipe the area with a dry paper towel afterward.
Inspect for corrosion. Look for white, green, or brown discoloration around the metal parts. If you see corrosion, use a dry cloth to gently rub it away. Do not use water or liquids during this step, as moisture can worsen the problem.
Test the latch again. Press it slowly after cleaning. It should feel smoother than before. If it still jams or feels stuck, the internal spring or pin may need professional attention.
Replace the CO2 cartridge next. Most deployment systems require a full cartridge replacement after any deployment or repair attempt. Follow your manual’s specific instructions for cartridge removal and installation. Ensure the new cartridge sits firmly in place.
Reattach the release tether if it came loose during cleaning. The tether must move freely without kinks or twists. Test the entire mechanism one final time before wearing your vest again.
Inspecting the Outer Shell and Vest Components for Damage
Your motorcycle airbag vest’s outer shell protects the internal mechanisms. Damage to this shell often causes latch jamming. You need to inspect it carefully before attempting repairs.
Start by examining the entire outer surface around the latch area. Look for cracks, dents, or splits in the material. Even small cracks can allow dirt and moisture inside. These contaminants then jam the latch mechanism. Run your fingers gently over the shell to feel for rough edges or sharp breaks.
Check the seams where different shell sections connect. Damaged seams let water seep into the deployment system. This moisture causes rust and corrosion on metal parts. Pay special attention to areas near the latch housing. The connection points are vulnerable spots.
Inspect the shell material itself for brittleness or discoloration. Extreme heat or sun exposure can weaken the outer layer. A weakened shell may crack when you press the latch. This secondary damage compounds your original jamming problem.
Look for impact marks or compression areas on the vest. These suggest the shell absorbed force from falls or accidents. Internal components may have shifted out of alignment. A shifted latch assembly will jam when you try to deploy.
Check if any shell pieces are loose or rattling. Loose fragments can fall into the latch mechanism. This debris then blocks smooth operation. Gently press different areas of the shell to feel for movement.
Document any damage you find with photos. This information helps you decide whether professional repair is necessary. Severe shell damage often means the entire vest needs replacement. Minor surface cracks may only require cartridge replacement and reassembly. Your vest’s integrity depends on a solid outer shell, so take this inspection seriously.
Common Mistakes to Avoid During Latch Repair
Many people make mistakes when fixing a jammed deployment latch. Understanding these errors helps you avoid expensive damage to your vest.
The biggest mistake is skipping cartridge replacement entirely. Some riders think they can just clean the latch and reuse the old cartridge. This never works. Once a CO2 cartridge deploys, it empties completely. You must install a fresh cartridge for the system to function again. Using an expired or partially used cartridge leaves your vest non functional in an actual crash.
Another common error involves improper tether reattachment. The release tether connects your vest to your motorcycle or jacket. If you reattach it incorrectly, the latch won’t trigger during deployment. Check your manual for the exact attachment method. Verify the tether has full range of motion before reassembling everything.
Ignoring shell damage is equally problematic. Riders often focus only on the latch itself and miss cracks in the outer shell. Structural damage compromises the entire airbag system. A cracked shell can allow the cartridge to misfire or deploy unevenly. Always inspect the complete shell before declaring the repair finished.
Rushing the cleaning process causes problems too. People use harsh brushes or excessive force around delicate latch components. This can bend pins or break internal springs. Use gentle pressure with a soft brush instead.
Finally, many riders fail to test the latch after repair. Press it slowly several times to confirm smooth operation. The latch should click firmly without grinding sounds or resistance. If something feels wrong, stop and review your work before riding.
Troubleshooting Persistent Jamming Issues
Persistent jamming issues require a different approach than simple cleaning. When your latch keeps sticking even after thorough cleaning, the problem usually runs deeper than surface debris.
Start by checking if the latch mechanism itself has internal damage. Press the latch slowly and listen for grinding sounds. These noises indicate worn parts inside the mechanism. If you hear grinding, internal components likely need replacement rather than repair.
Next, examine the CO2 cartridge housing carefully. A damaged or misaligned cartridge can prevent the latch from moving freely. The cartridge must sit perfectly in its chamber. Even slight misalignment causes jamming that cleaning alone cannot fix.
Test the release tether for tension problems. The tether should pull smoothly without resistance. If it feels tight or sticky, the cable may have corrosion inside its sheath. Tether issues often cause the latch to jam because they control the deployment sequence.
Check the vest’s internal frame around the latch area. Metal frames can bend slightly during impacts or storage, creating binding points. Run your fingers along the frame edges to feel for bends or warping.
If jamming persists after these checks, the latch assembly itself may need replacement. Many manufacturers offer replacement latches specifically for this situation. Contact the vest maker directly to discuss your options.
Keep detailed notes of when jamming occurs. Does it happen only after cold weather? Does it jam randomly or consistently? These details help you identify whether the problem is mechanical or environmental. Persistent jamming that doesn’t improve with cleaning usually means internal component failure, not user error.
Maintaining Your Vest to Prevent Future Jamming
Regular maintenance stops jamming before it starts. Your motorcycle airbag vest needs attention between rides to stay reliable.
Clean the latch mechanism monthly if you ride regularly. Use a soft brush to remove dirt and debris around the deployment latch. Compressed air works well to blow out particles from tight spaces. Avoid harsh chemicals that can damage seals or internal components.
Check the release tether regularly for signs of wear. The tether should move freely without kinks or tangles. If you notice stiffness, gently flex it by hand to restore movement. A stuck tether can prevent smooth deployment when you need it most.
Inspect the CO2 cartridge housing for corrosion or damage. Moisture and salt air accelerate rust formation. Wipe the housing dry after rides in wet conditions. Replace cartridges every few years even if unused, as they lose pressure over time.
Store your vest in a cool, dry place away from direct sunlight. Heat and UV rays degrade rubber seals and internal components. Keep the vest flat or hung on a padded hanger to prevent latch stress.
Test the latch mechanism quarterly by pressing it gently. It should click smoothly without resistance or grinding sounds. If it feels stiff, clean it immediately before jamming develops.
Examine all seams and connections monthly for loose parts. Vibration during rides can loosen screws or fasteners around the latch area. Tighten any loose components with appropriate tools.
Replace the release tether if it shows fraying or damage. A worn tether can slip during deployment, leaving the latch jammed. Regular maintenance catches these issues early and keeps your safety gear working properly.
Final Thoughts
Fixing a jammed deployment latch is a task you can handle with patience. Most jamming problems come from dirt, debris, or a worn tether. Simple cleaning and careful reassembly solve many cases.
Always replace the CO2 cartridge after any deployment. This step keeps your vest ready for the next ride. Skipping it leaves you unprotected when you need the vest most.
Check the outer shell every time you work on the latch. Cracks or weak spots mean the vest needs professional attention. Never ignore structural damage, even if the latch works fine.
Safety comes first in every step of this process. If you feel unsure about a repair, contact the manufacturer. Many brands replace or rearm vests free of charge for genuine malfunctions.
Regular maintenance makes a big difference over time. A few minutes of cleaning each month can prevent most jamming issues. This small habit saves you time and stress later.
Remember that airbag vests protect your life on the road. Treat the latch mechanism with the same care you give your helmet or boots. Your safety gear deserves attention before and after every ride.
If jamming continues despite your best efforts, seek expert help. Some issues need specialized tools or parts that only trained technicians have. Trying to force a stubborn latch can cause more harm than good.
Stay proactive about your gear’s condition. Test the latch often and note any changes in how it feels. Catching small problems early keeps your vest reliable when it matters most.
A well maintained airbag vest gives you confidence on every ride. Take these steps seriously, and your gear will serve you well for years to come.
Frequently Asked Questions
Why does my deployment latch jam after I’ve used the vest?
After deployment, the latch mechanism needs a full reset. The CO2 cartridge empties completely, and the internal spring loses tension. You must replace the cartridge with a new one to restore proper pressure. Without this replacement, the latch stays weak and jams easily. The release tether also needs reattachment to its anchor point. Many riders skip this step and wonder why jamming happens next.
Can I repair a jammed latch myself or should I contact the manufacturer?
You can handle basic repairs at home. Start by replacing the CO2 cartridge and reattaching the tether. Check the outer shell for cracks or dents that affect latch movement. Most manufacturers cover malfunction repairs free of charge under warranty. If jamming continues after cartridge replacement, contact them directly. They often replace or rearm vests at no cost when defects occur.
What’s the difference between tethered and electronic deployment systems?
Tethered systems use a mechanical cord that pulls the latch when you fall. Electronic systems detect impact through sensors and trigger deployment automatically. Tethered vests require manual tether reattachment after use. Electronic vests need cartridge replacement but no tether work. Both types jam for similar reasons: dirt, corrosion, or worn cartridges. The fix process stays mostly the same regardless of system type.
How often should I test my latch to prevent jamming problems?
Test your latch quarterly by pressing it gently. This keeps the mechanism loose and functional. Monthly inspections catch early wear signs on the tether. Check the cartridge housing for corrosion every month. Store your vest in cool, dry conditions between rides. These simple habits stop jamming before it becomes a real problem.

Hello, i’m Ivoria i am the face behind Tech Tracker Blog. I am passionate about my work and love to explore gadgets and share about my experience.