How To Fix Smart Pizza Oven Thermocouple Melting?
Your smart pizza oven heats up fast. It hits 800°F or more within minutes. But then you notice something troubling. The thermocouple tip looks melted or damaged.
This problem happens more often than you think. Excessive heat exposure and poor positioning cause most of the damage. Your oven’s brain cannot sense temperature correctly once this part fails.
The result? Your oven struggles to hold steady heat. It might trip a thermal breaker around 250°F. Temperatures could drop suddenly right when you start cooking your pizza.
In a Nutshell
- Excessive heat exposure is the top cause. When the thermocouple tip sits too close to direct flame, it melts or warps over time.
- Wrong positioning makes things worse. If the thermocouple sits in the wrong spot, it reads temperatures incorrectly and overheats.
- Replacement is often necessary. Loosen the housing bolts, disconnect the water hoses, and remove the old part. Clean the mounting surface before installing the new thermocouple.
- Watch for thermal breaker trips around 250°F. This signals your oven has deeper heat regulation issues beyond just the thermocouple.
- Recalibration matters just as much as replacement. Skipping this step after installing a new thermocouple leads to repeat failures.
- Test everything before full use. Check the gas supply, pilot ignition, and relay function to confirm your repair actually worked.
What Causes a Thermocouple to Melt in a Smart Pizza Oven
A thermocouple melts in your smart pizza oven when it faces more heat than it can handle. The metal tip sits inside your oven to measure temperature, but direct flame exposure pushes it past its limits.
Excessive heat is the primary culprit. Your oven reaches 800 to 850 degrees Fahrenheit during normal operation. If the thermocouple tip points directly into the fire or sits too close to hot surfaces, the metal softens and fails. This happens faster than you might expect.
Improper positioning creates a second major problem. The thermocouple must sit at the correct angle and distance from your heat source. When installers place it too far into the combustion chamber or at the wrong angle, flames lick the sensitive tip constantly. This repeated exposure weakens the metal until it melts completely.
Faulty components make things worse. An old or damaged thermocouple loses its protective coating over time. Rust and corrosion eat away at the metal, making it more vulnerable to heat damage. A thermocouple that already has internal damage fails much faster than a new one.
Thermal breaker trips signal the problem. You might notice your oven’s thermal breaker activating around 250 degrees Fahrenheit during cooking. This protection device shuts down your system when it detects problems. Temperature drops happen even after your oven reaches the right heat while idle.
Scale buildup accelerates melting too. Mineral deposits and combustion residue coat the thermocouple over months of use. This buildup traps extra heat against the metal surface, raising the local temperature beyond safe levels.
Understanding these causes helps you prevent future melting and keep your pizza oven working reliably.
Signs Your Thermocouple Is Damaged or Failing
Your thermocouple sends temperature readings to your oven’s control system. When it fails, you notice clear warning signs that demand immediate attention.
Temperature readings become unreliable. Your oven display shows one temperature, but the actual heat inside differs significantly. You might see the dial jump around unpredictably. The oven struggles to maintain your desired cooking temperature. This inconsistency makes it impossible to cook pizzas evenly.
The thermal breaker trips frequently. Your oven shuts down around 250 degrees Fahrenheit during normal operation. This happens even though your oven should reach much higher temperatures. The breaker activates as a safety measure when it detects faulty signals. You’ll need to reset it repeatedly, which becomes frustrating fast.
Temperature drops suddenly during cooking. Your oven reaches 800 to 850 degrees when idle, but drops the moment you start cooking. This happens because the thermocouple sends incorrect information to the control system. Your oven compensates by reducing heat output. Pizza cooks slower and unevenly as a result.
Burnt or discolored thermocouple tips. Look at the thermocouple end directly. If it appears blackened, melted, or heavily corroded, replacement is necessary. A damaged protective coating exposes the internal wires to excessive heat.
Relay components show burn marks. Inside your oven’s control panel, burnt relay components indicate thermocouple failure. These components burn out when they receive continuous incorrect signals. This damage spreads quickly to other electrical parts if left unaddressed.
Pilot ignition problems. Your pilot light flickers or won’t stay lit consistently. Air traps in the pilot line or blocked orifices prevent proper gas flow. These issues connect directly to thermocouple malfunction and require immediate inspection.
Tools and Parts You Need Before Starting the Repair
Before you start fixing your smart pizza oven’s melting thermocouple, gather the right tools and parts. Having everything ready makes the job faster and safer.
Basic hand tools are essential for this repair. You’ll need an adjustable wrench to loosen housing bolts. A socket set helps you remove fasteners quickly without stripping them. Needle nose pliers let you disconnect small connectors and wires carefully.
Replacement thermocouple assembly is the main part you need. Check your oven’s manual to find the correct model and specifications. A new thermocouple comes with fresh protective coatings that resist high heat better than old, damaged ones.
Gasket and seal materials matter more than people realize. The old gasket residue must come off completely before installation. You’ll need gasket scraper or a soft brush to clean the mounting surface without scratching it.
Safety equipment protects you during work. Wear heat resistant gloves even though the oven will be cool during repair. Safety glasses keep debris out of your eyes when loosening bolts. A work apron with pockets keeps your tools organized and within reach.
Optional but helpful items include a flashlight to see inside tight spaces and a small container to hold loose bolts. A clean cloth wipes away scale and residue from the mounting area. Having a camera or phone handy lets you photograph the old assembly before removal, so you remember the correct positioning for the new thermocouple.
Collect these items before you begin. Proper preparation prevents frustration and helps you complete the repair correctly the first time.
Step-by-Step Guide to Replacing a Melted Thermocouple
Start by turning off your smart pizza oven completely. Wait at least 30 minutes for the unit to cool down fully. This step keeps you safe from burns during the replacement process.
Locate the thermocouple housing on your oven. You’ll find it near the firebox or burner area. Take a photo with your phone so you remember the exact positioning before removal.
Use your wrench to loosen the housing bolts carefully. Turn each bolt a quarter turn, then move to the next one. This prevents the housing from tilting unevenly. Once all bolts are loose, remove them completely and set them aside in a safe spot.
Disconnect any water hoses attached to the thermocouple assembly. Gently pull these away from the connection points. If water drips out, place a small container underneath to catch it.
Slide the old thermocouple assembly out of its mounting bracket. You may need to wiggle it slightly to free it from the housing. Don’t force it, as you could damage the bracket itself.
Clean the mounting surface thoroughly with a dry cloth. Remove all scale buildup, gasket residue, and debris. Wipe away any rust or discoloration you see. A clean surface ensures your new thermocouple sits properly and makes good contact.
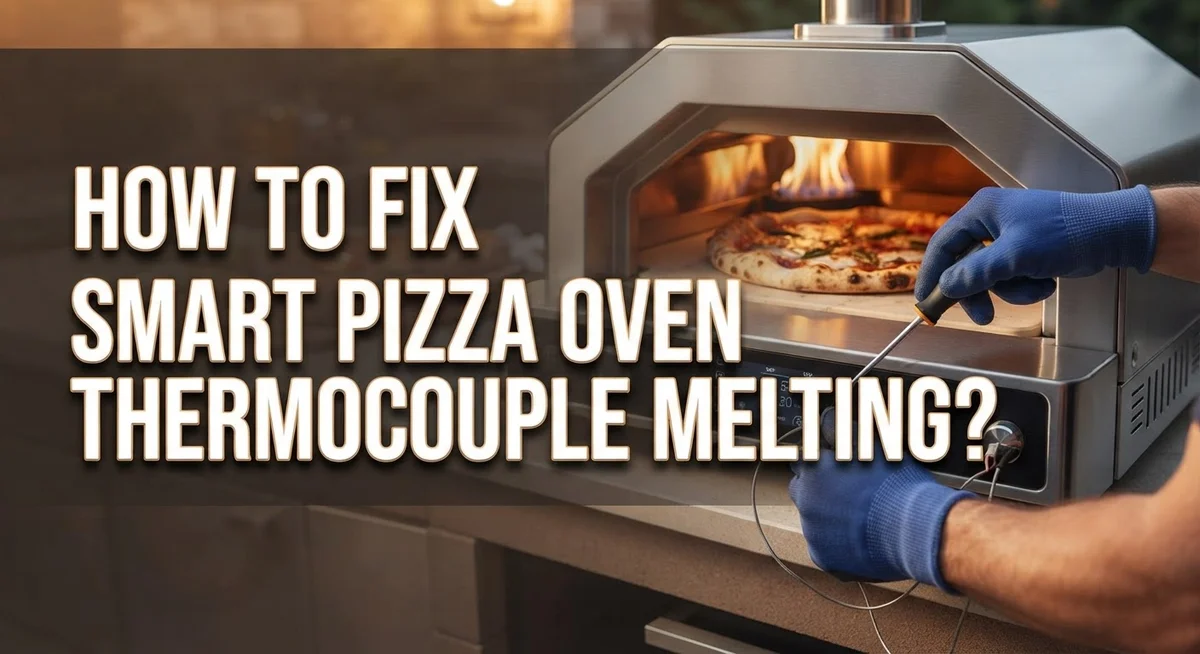
Insert your new thermocouple assembly into the same position. Make sure it angles correctly toward the heat source. Reconnect the water hoses to their original connection points. Tighten all housing bolts in a star pattern, alternating sides for even pressure.
Allow the oven to sit for 5 minutes before powering it back on. This gives all connections time to settle properly.
How to Properly Position the New Thermocouple to Prevent Future Melting
Proper positioning of your new thermocouple is critical. The thermocouple tip must sit in the right spot inside your oven to measure temperature accurately without melting again.
Position the thermocouple tip away from direct flame. This is the most important rule. Direct heat exposure causes the tip to melt or fail rapidly. Your thermocouple should read ambient chamber temperature, not direct burner heat.
Insert the thermocouple so the sensing end sits approximately 2 to 3 inches into the cooking chamber. This distance allows the sensor to detect average oven temperature while staying safe from intense flame. Check your oven’s manual for the exact depth your model requires.
Angle matters significantly. Mount the thermocouple horizontally or slightly angled downward. Avoid pointing it directly at the burner or flame source. A horizontal position helps the sensor measure consistent heat throughout the chamber.
Ensure the thermocouple housing sits flush against the mounting surface. Gaps between the housing and wall allow hot air to escape. This causes false temperature readings and can damage the new thermocouple prematurely.
Tighten all bolts securely but do not overtighten. Excessive force can crack the housing or strip threads. Hand tighten first, then use your wrench with gentle pressure.
Test the positioning before full operation. Turn on your oven and watch the temperature display. The reading should climb steadily without fluctuating wildly. If temperature jumps around, reposition the thermocouple slightly.
Allow the oven to reach full temperature during your first test. Monitor the thermal breaker to confirm it does not trip unexpectedly. Proper positioning prevents future melting and ensures reliable temperature control during cooking.
Recalibrating Your Oven After Replacement
After you install your new thermocouple, recalibration ensures accurate temperature readings. Your smart oven needs this adjustment to work correctly with the replacement part.
Start by powering on your oven and letting it heat up slowly. Allow at least 10 to 15 minutes for the oven to reach a stable temperature. This warm up period lets the new thermocouple settle into its operating range.
Check your oven’s control panel or display screen. Most smart pizza ovens show both the current temperature and the target temperature you set. Watch these numbers closely during the warm up phase.
Once your oven reaches 400°F, compare the actual temperature to what your thermostat reads. Use an external temperature gauge or infrared thermometer to verify accuracy. If the readings match, your recalibration is complete and working properly.
If numbers don’t match, your oven likely needs adjustment. Look for a calibration menu in your control panel settings. Some models have a simple offset adjustment that lets you add or subtract degrees to match reality.
Test your oven at different temperature points like 500°F, 650°F, and 800°F. Record what the display shows versus what your external thermometer reads. This helps you understand if the error is consistent across all temperatures.
After adjusting calibration settings, run another test cycle. Let the oven heat fully and verify the new readings are accurate. Never skip this testing step because poor calibration causes temperature swings during cooking.
Document your calibration settings in case you need them later. Take photos of your adjustment values. This information helps if you ever need to troubleshoot temperature problems again.
Common Mistakes That Lead to Repeat Thermocouple Failures
Many pizza oven owners repeat the same mistakes that cause thermocouple failure. Understanding these errors helps you avoid costly replacements and keep your oven working properly.
The most common mistake is exposing the thermocouple tip directly to flame. When the sensing end sits too close to fire, extreme heat melts the protective coating and damages internal components. Your thermocouple cannot survive prolonged direct contact with active flames.
Another frequent error involves poor thermocouple positioning inside the cooking chamber. Some people install the sensor too deep into the oven or angle it incorrectly. This placement causes uneven heat exposure and accelerates wear on the sensitive tip.
Neglecting recalibration after replacement creates ongoing problems. Many owners install a new thermocouple but skip the adjustment step. Without proper calibration, your oven cannot maintain accurate temperature readings, which leads to cooking failures and potential overheating.
Failing to clean the mounting surface before installation causes issues too. Old gasket residue and scale buildup prevent proper contact between components. This reduces heat transfer accuracy and stresses the new thermocouple unnecessarily.
Overtightening the housing bolts damages the thermocouple assembly. Too much force cracks internal connections and warps the protective casing. You should tighten bolts firmly but gently.
Ignoring pilot line air traps and blocked orifices creates excessive heat buildup. A faulty pilot system forces your oven to work harder, generating temperatures that melt the thermocouple prematurely.
Finally, many owners skip testing after repairs. Running a quick temperature check before full operation catches problems early. Test your oven at different temperature settings to confirm everything works correctly.
Troubleshooting Related Temperature and Ignition Issues
When your thermocouple melts, the root cause is usually excessive heat exposure or incorrect installation. The sensor tip should never sit directly in the flame path. Heat damage happens fast when the thermocouple sits too close to the burner or faces intense radiant heat from the oven walls.
Start by checking if your thermocouple is actually broken or just misaligned. Turn off your oven completely and let it cool. Once safe to touch, inspect the thermocouple tip for visible damage, discoloration, or warping. A melted tip looks dull and deformed compared to a healthy shiny sensor.
If damage is confirmed, you need to replace the entire thermocouple assembly. Loosen the housing bolts carefully. Disconnect any water hoses attached to the assembly. Remove the old thermocouple by pulling it straight out. Clean the mounting surface thoroughly to remove scale buildup and gasket residue. This step prevents future installation problems.
Before installing the new thermocouple, understand why the old one failed. Did you position it too close to the flame? Was the angle wrong? These factors matter because they determine heat exposure levels.
Install your replacement thermocouple with the tip positioned 2 to 3 inches into the cooking chamber, angled slightly downward or horizontal. Ensure the housing sits flush against the mounting surface. Tighten bolts firmly without overdoing it.
Test your oven at low temperatures first. Run it at 400°F for 15 minutes before pushing higher. Watch the temperature display for stability. If the new thermocouple fails quickly again, the problem isn’t the sensor itself. You likely have a deeper issue like a faulty relay, blocked pilot line, or improper gas supply affecting overall heat control.
Final Thoughts
Fixing a melted thermocouple in your smart pizza oven takes patience and careful attention. You now understand why melting happens and how to prevent it.
The key takeaway is simple: heat exposure and poor positioning cause most thermocouple failures. Fix the root cause, not just the symptom.
Always test your oven at lower temperatures before running full cooking cycles. This simple habit catches problems early and protects your new thermocouple.
Remember to check gas supply lines and pilot ignition function regularly. These small maintenance steps prevent bigger issues down the road.
Recalibration matters just as much as replacement. A perfectly installed thermocouple still gives wrong readings without proper calibration. Skip this step and you risk repeating the same problem.
Keep your oven’s mounting surface clean during every repair. Scale buildup and gasket residue create gaps that lead to heat leaks and premature failure.
If your thermal breaker keeps tripping around 250°F, don’t ignore it. This signals deeper electrical or component issues that need attention beyond the thermocouple itself.
Burnt relay components often accompany thermocouple problems. Check these parts whenever you replace your thermocouple to avoid calling a technician twice.
Your pizza oven should reach and maintain temperatures between 800°F and 850°F without dropping when cooking starts. If it doesn’t, revisit your installation steps.
Fixing this issue yourself saves money and builds confidence. Take your time with each step, test thoroughly, and document your settings.
A well maintained thermocouple means consistent cooking results and a longer lifespan for your oven. Stay proactive with maintenance, and your smart pizza oven will serve you reliably for years ahead.
Frequently Asked Questions
Why does my thermocouple keep melting inside the pizza oven?
Your thermocouple melts when it experiences excessive heat exposure or sits in the wrong position. The tip should stay 2 to 3 inches into the cooking chamber, angled slightly away from direct flame. If you place it too close to the heat source, the metal breaks down and fails.
Another cause is a faulty thermocouple that was already damaged before installation. Always inspect the replacement part before putting it in your oven.
What happens when a thermocouple fails?
A failed thermocouple stops sending accurate temperature signals to your oven’s control system. Your oven may not maintain the temperature you set. It might reach 800 to 850°F when idle but drop significantly once you start cooking.
You might also notice your thermal breaker trips around 250°F during operation. This safety feature activates when the system detects a problem.
How do I know if my thermocouple is broken?
Test your oven at low temperatures first. Run it at 400°F for 15 minutes and watch the temperature display. If the reading jumps around or stays stuck at one number, your thermocouple likely needs replacement.
Check if the temperature drops suddenly when you open the door or add food. Consistent temperature loss points to a faulty thermocouple.
Should I recalibrate after replacing my thermocouple?
Yes, recalibration is essential. A new thermocouple still gives wrong readings without proper adjustment. Your oven’s control system needs to learn the new sensor’s characteristics.
After installation, test at low heat before cooking. This helps you verify the thermocouple works correctly before full operation.

Hello, i’m Ivoria i am the face behind Tech Tracker Blog. I am passionate about my work and love to explore gadgets and share about my experience.