How To Fix Electronic Can Opener Drive Wheel Teeth Dulling?
Does your electronic can opener struggle to grip cans like it used to? You are not alone. Drive wheel teeth dulling is one of the most common problems can opener owners face.
Over time, food residue, rust, and simple wear cause the teeth to lose their sharp edge. This means your opener slips instead of cutting cleanly through metal lids.
The good news? You can often fix this issue yourself. No need to toss out your appliance just yet.
In a Nutshell
- Unplug the unit first. Safety comes before any repair work on your can opener.
- Clean with a soft toothbrush. Warm soapy water removes food residue and rust buildup from the teeth.
- Check the feed gear closely. Replace it if you notice worn or broken parts inside.
- Open the case for inspection. Look at internal gears to spot hidden damage or grime.
- Apply light oil or lubricant. This step keeps the mechanism moving smoothly and prevents future sticking.
- Dry everything completely. Moisture left behind can cause new rust to form quickly.
What Causes Drive Wheel Teeth to Dull
Your electronic can opener’s drive wheel teeth dull for several specific reasons. Understanding these causes helps you prevent the problem before it starts.
Food residue buildup ranks as the top culprit. When you use your opener, tiny bits of food stick to the teeth and blade. Over time, this residue hardens and creates a coating. The teeth lose contact with the can’s edge, so they slip instead of grip.
Rust formation happens when moisture sits on metal teeth. Your opener sits in kitchens where humidity is high. Water droplets settle on the drive wheel after cleaning. If you don’t dry the unit completely, rust spots form. Rust makes teeth rough and uneven, reducing their cutting power.
Normal wear and tear occurs naturally with regular use. Every time your opener grips a can, the teeth experience friction. Metal gradually wears down from repeated contact. This process takes months or years, but it’s unavoidable with frequent use.
Improper can alignment accelerates tooth dulling. When you position the can crooked under the opener, teeth make contact at wrong angles. This causes uneven pressure and faster wear on specific tooth edges.
Lack of lubrication inside the mechanism creates friction between gears. Without proper oil, internal parts rub together harshly. This friction transfers to the drive wheel, making it work harder and wear faster.
Battery power issues on cordless models also matter. Weak batteries don’t provide enough power to turn the wheel smoothly. The motor strains, and teeth experience extra stress during operation.
Regular cleaning after each use prevents most of these problems. Dry your opener thoroughly and store it in a dry location. These simple habits keep your drive wheel teeth sharp and functional for years.
Signs Your Can Opener Needs Repair
Your electronic can opener shows clear warning signs when the drive wheel teeth start to dull. Recognizing these signs early helps you fix problems before they get worse.
The most obvious sign is slow or incomplete cutting. If your opener takes longer than usual to pierce the can lid, the teeth are losing their grip. You might notice the wheel spinning without actually cutting through the metal.
Listen for unusual grinding or squeaking sounds. These noises mean the teeth are struggling to catch the can properly. The motor works harder to compensate for worn teeth, creating friction that produces sound.
Watch for slipping or skipping during operation. Your can opener may start and stop repeatedly instead of moving smoothly around the can. The dulled teeth cannot maintain steady contact with the lid edge.
Check if the opener struggles with standard cans. When it easily handled regular cans before but now fails, the drive wheel is definitely wearing down. Softer aluminum lids become harder to pierce.
Look for visible damage on the wheel teeth themselves. Open the case and inspect them closely under good light. Flat or rounded tooth tips instead of sharp points confirm dulling has occurred.
Notice if you need multiple attempts to open one can. Your opener should grip and cut on the first try. Repeated attempts indicate the teeth cannot bite effectively into the metal.
Feel for increased vibration during use. Excessive shaking means the mechanism is working inefficiently. Dull teeth create uneven contact that causes vibration throughout the unit.
These signs tell you it’s time to clean, inspect, and possibly repair your can opener’s drive wheel system.
Tools and Supplies You’ll Need
Before you start fixing your electronic can opener, gather the right supplies. You need these items to clean and repair the drive wheel safely.
Safety equipment comes first. Unplug your can opener from the wall outlet before touching any parts. Wear safety glasses to protect your eyes from small metal pieces or debris. Gloves keep your hands clean and safe from sharp edges on the blade and teeth.
Cleaning supplies are essential. Get a soft toothbrush with gentle bristles. Hard brushes can scratch or damage the wheel further. Warm soapy water works best for removing stuck food and rust. Have several clean, dry cloths ready for wiping down all parts. Paper towels work fine too.
Tools for opening the case matter. You’ll need a screwdriver set with different sizes. Check your opener’s manual to see which type you need, either Phillips or flat head. Some models use small bolts instead of screws. A flashlight helps you see inside the case clearly when inspecting gears.
Lubrication supplies help everything move smoothly. Light machine oil or white lubricant keeps the mechanism functioning well. Avoid heavy greases that attract dust and debris. You only need a small amount.
Replacement parts should be on hand if needed. Have the feed gear available if inspection shows damage. Check your manual for the exact part number. A small container holds all these supplies together neatly.
Organization saves time. Keep everything in one place before you begin. This prevents searching for items mid repair and keeps you focused on the task.
Step-by-Step Guide to Fixing Dulled Teeth
Start by unplugging your electronic can opener from the wall outlet. This step keeps you safe while you work on the machine. Never skip this part, even if you’re in a hurry.
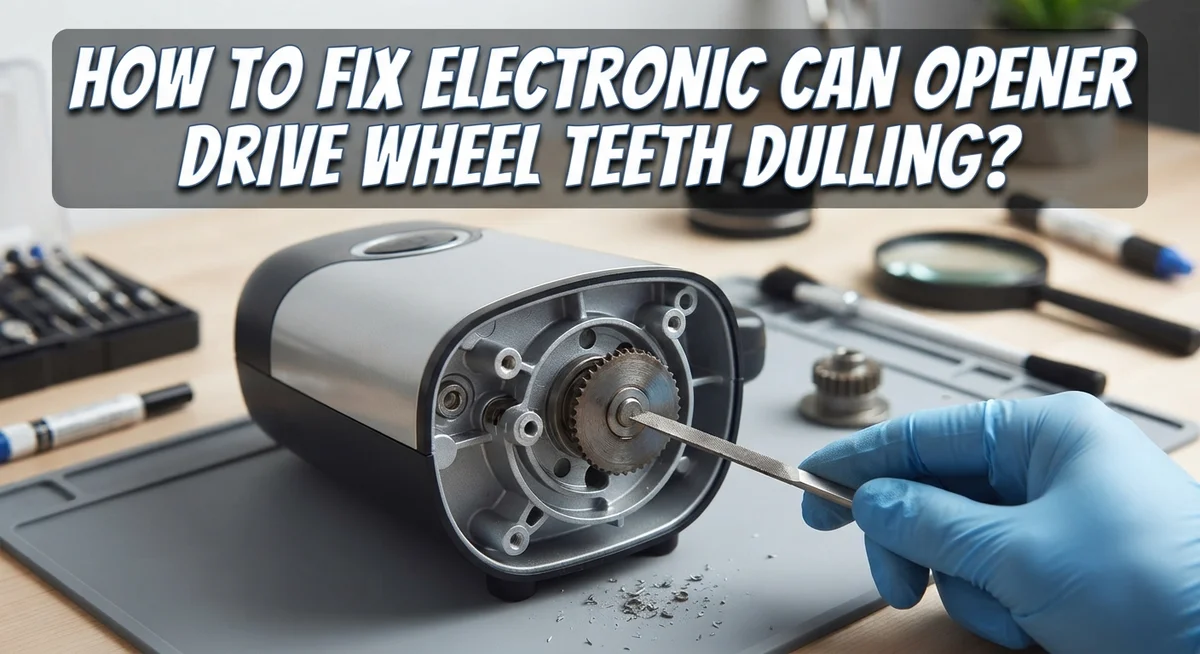
Use a soft toothbrush with warm soapy water to clean the drive wheel directly. Gently scrub around each tooth to remove hardened food particles and rust buildup. Pay attention to tight spaces where debris hides. Rinse with clean water and dry everything completely with a cloth.
Next, inspect the feed gear carefully. Look for visible cracks, broken teeth, or excessive wear. If the gear shows damage, you’ll need to replace it. A damaged feed gear won’t grip the can properly, which causes the drive wheel to slip.
Open your appliance case using the appropriate screwdriver. Check all internal gears for rust or sticky residue. Wipe away any buildup with a dry cloth. This step reveals whether your problem is surface level or deeper inside the mechanism.
Apply light lubrication to moving parts and gear teeth. Use only a small amount. Too much oil attracts dust and creates more problems. Wipe away excess lubricant with a clean cloth.
Reassemble your can opener carefully. Make sure all screws are tight but don’t overtighten them. Plug the unit back in and test it on an old can you don’t mind damaging.
The key to success is patience and attention to detail. Work slowly through each step. Take photos before disassembling so you remember how pieces fit together. Most dulled teeth issues come from simple neglect, and this process fixes them effectively.
Lubrication and Reassembly Best Practices
Proper lubrication and reassembly are critical steps that determine whether your can opener works smoothly again. After you’ve cleaned the drive wheel thoroughly, lubrication becomes your next priority.
Apply a small amount of light oil or white lubricant directly to the gear teeth. Use just enough to coat the surfaces without creating excess buildup. Too much lubricant attracts dust and food particles, which defeats the purpose. Focus on the areas where teeth mesh together, as these spots experience the most friction and wear.
Wipe away any excess lubricant with a clean, dry cloth. This prevents residue from accumulating and causing the same dulling problems you just fixed. Pay special attention to tight spaces around the cutting mechanism where oil can pool.
Before reassembling, double check all parts for proper alignment. Gears should sit in their correct positions without forcing. If a gear feels stuck or misaligned, stop and reposition it. Forcing parts together can cause additional damage.
Reassemble your can opener by reversing the steps you used to open it. Insert screws in the correct holes and tighten them firmly but not excessively. Overtightening can crack plastic components or strip screw holes.
Once reassembled, plug your opener back in and test it on a regular can. Listen for smooth operation without grinding sounds. The cutting should feel effortless and consistent.
Maintenance after reassembly matters just as much as the repair itself. Wipe the blade dry after every use to prevent food from hardening on teeth. This simple habit extends the life of your drive wheel and keeps it functioning like new for years.
Maintenance Tips to Prevent Future Dulling
Preventing future dulling starts with simple daily habits. Wipe your blade dry after every use with a clean cloth. This stops food from hardening on the teeth and causing rust spots.
Clean your can opener right after opening cans. Use a soft toothbrush and warm soapy water on the drive wheel and blade. Don’t let residue sit and build up over time. Dried food is harder to remove and damages teeth faster.
Check your can alignment before each use. Position the opener parallel to the can’s top edge. Crooked angles force the teeth to work harder and wear down quicker. Proper positioning reduces stress on the drive wheel.
Store your opener in a dry location. Moisture creates rust, which eats away at metal teeth. Keep it away from damp areas like sinks or windowsills.
Inspect the drive wheel monthly for early signs of wear. Look for flat spots or visible damage on the teeth. Catching problems early prevents complete failure later.
Lubricate your opener every three months during regular use. Apply a small amount of light oil to the gear teeth and moving parts. This reduces friction and extends the life of your drive wheel.
Don’t force your opener when cutting tough cans. If it struggles, stop and check for jams or misalignment. Forcing it puts extra pressure on teeth and speeds up dulling.
Replace worn feed gears promptly. A damaged gear forces the drive wheel to work harder and dulls faster.
Test your opener on different can types occasionally. Some cans have thicker lids that require more cutting power. Knowing your opener’s limits helps you use it properly and maintain it better.
Common Mistakes to Avoid
Many people make mistakes that speed up the dulling process. Understanding what NOT to do helps you keep your can opener working longer.
Neglecting post-use cleaning is the biggest mistake. Food particles stick to the drive wheel teeth and harden over time. This buildup acts like sandpaper, wearing down the metal faster. You should wipe your blade dry immediately after each use with a clean cloth.
Another common error is allowing rust to develop. Moisture left on the metal creates rust spots that damage teeth. Store your opener in a dry place, never near a sink or damp area.
Forcing the opener when it struggles is harmful. Many people push harder when the can opener hesitates. This extra pressure damages the gears and wears teeth faster. If your opener struggles, stop and check the can alignment instead.
Skipping lubrication is also problematic. Dry gears create more friction, which speeds up tooth wear. Lubrication reduces friction and protects metal surfaces from damage.
Using the wrong cleaning tools causes damage too. Harsh scrubbers or steel wool scratch the metal and remove protective coatings. Always use a soft toothbrush with warm soapy water for cleaning.
Many people ignore misalignment issues. If your can sits crooked in the opener, teeth wear unevenly and dull faster. Position each can parallel to the top edge before opening.
Finally, waiting too long to replace worn feed gears is a mistake. A damaged feed gear forces the drive wheel to work harder, dulling teeth rapidly. Check your feed gear monthly and replace it at the first sign of damage.
Troubleshooting Persistent Cutting Problems
When your can opener struggles to cut, the problem usually stems from one of three sources: residue buildup, rust, or worn internal components. Start by unplugging the unit immediately. Safety comes first.
Check the drive wheel and blade directly. Look for dried food, discoloration, or visible rust spots. These signs tell you exactly what’s happening. Food particles harden on teeth over time and create a barrier that prevents clean cutting.
Use a soft toothbrush with warm soapy water to scrub the drive wheel thoroughly. Get into every crevice. Rinse completely and dry with a cloth. This simple step solves most cutting problems right away.
Next, inspect the feed gear. This small component sits beneath the drive wheel. If it’s cracked, broken, or severely worn, it cannot grip the can properly. A damaged feed gear forces the opener to slip instead of cut.
Open the appliance case to examine internal gears. You may need a screwdriver to access them. Look for signs of wear, debris, or misalignment. Internal gears that don’t mesh correctly cause the entire mechanism to fail.
Apply light oil or white lubricant to all gear teeth. Use a small amount only. Excess lubricant attracts dirt and worsens performance. Wipe away surplus with a dry cloth.
Test your opener on a regular can before returning to normal use. If cutting remains difficult after cleaning and lubrication, the feed gear likely needs replacement. This repair usually requires professional service or a replacement unit, depending on your opener’s age and value.
Final Thoughts
A dull can opener does not mean you need a new one. Most cutting problems come from simple, fixable issues. Residue, rust, and worn gears cause the trouble more often than you think.
Taking a few minutes to clean and inspect your appliance saves money and hassle. Small habits create big results over time. You do not need special skills to keep your opener working well.
Think of your can opener like any other kitchen tool. It needs attention to perform its best. Regular care extends its life significantly.
The steps in this guide are simple. Unplug the unit. Scrub away buildup. Check the gears. Add lubricant. These actions take little time but make a real difference.
Many owners give up on their appliance too soon. They assume dull teeth mean the end. In truth, most units can be restored with basic maintenance.
Your can opener works hard every time you use it. Give it the same care you give other kitchen tools. This keeps it cutting smoothly for years.
If you follow these tips consistently, you will notice fewer problems. Your cans will open easily. Your blade will stay sharp longer. Your gears will turn without struggle.
Consistency matters more than perfection. You do not need to be flawless with maintenance. You just need to be regular.
A well maintained can opener saves you frustration in the kitchen. It also saves you the cost of buying a replacement too soon.
Take care of your appliance, and it will take care of your cooking needs for a long time.
Frequently Asked Questions
What causes drive wheel teeth to dull in the first place?
Dulled teeth happen when food residue sticks to the wheel and hardens. Rust develops when moisture sits on the metal surface. Normal wear also happens over time as the teeth grip cans repeatedly. The combination of these three factors speeds up dulling significantly.
How often should I clean my can opener to prevent dulling?
Clean your opener after every single use. Wipe the blade and drive wheel with a dry cloth immediately after opening a can. This simple step prevents food from hardening on the teeth. Deep cleaning with a soft toothbrush and warm soapy water should happen weekly if you use your opener daily.
Can I fix dulled teeth or do I need a replacement?
You can often restore function without buying a new opener. Thorough cleaning removes most residue and rust that makes teeth seem dull. Proper lubrication helps the wheel grip better. However, if teeth are visibly broken or severely worn down, you may need to replace the feed gear or the entire unit.
Why does my opener suddenly stop cutting well?
The most common reason is dried food stuck around the blade and wheel. Rust spots also reduce cutting power. Check for misalignment where the opener sits crooked on the can. All three issues are fixable with basic cleaning and inspection.
Does lubrication really help with dulled teeth?
Yes, lubrication helps significantly. Light oil or white lubricant reduces friction between gears and helps teeth grip better. Apply lubricant to all gear teeth, then wipe away excess. Lubricated openers cut more smoothly and experience less wear overall.

Hello, i’m Ivoria i am the face behind Tech Tracker Blog. I am passionate about my work and love to explore gadgets and share about my experience.