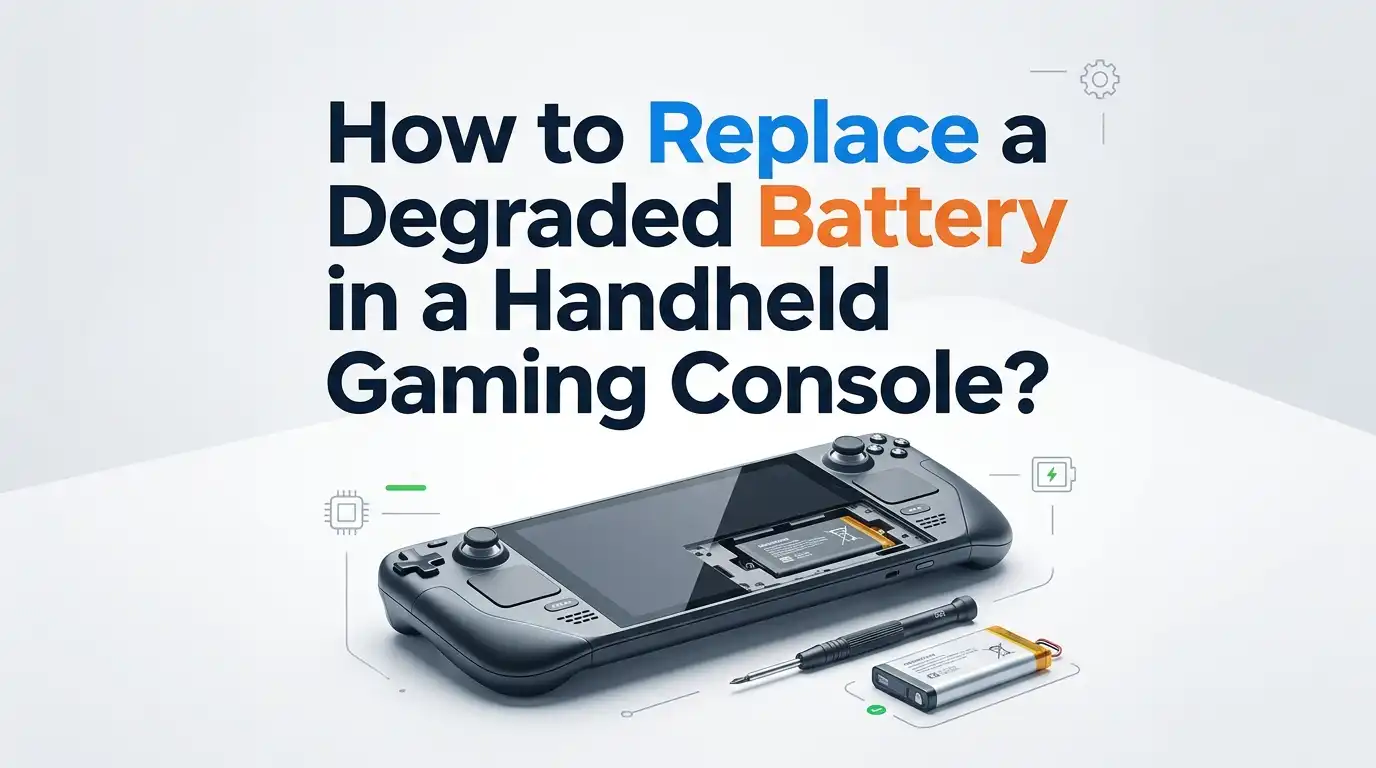
How to Replace a Degraded Battery in a Handheld Gaming Console?
Your handheld gaming console used to last hours on a single charge. Now it dies within minutes, gets uncomfortably warm, or refuses to power on at all.
A degraded battery is the most common cause behind these frustrating issues, and the good news is that you can fix it yourself with the right tools and a bit of patience.
This guide walks you through every stage, from spotting a failing battery to safely installing a new one. You will learn the tools required, the safety steps you must respect, and the pros and cons of each repair method available to you.
Key Takeaways
- Spot the symptoms early. A swollen casing, rapid charge drops, sudden shutdowns, or a console that runs hotter than usual all point to a failing lithium ion battery. Acting fast prevents permanent damage.
- Choose the right repair path. You can send the unit to the manufacturer, visit a local repair shop, or perform a DIY replacement. Each option has clear cost, time, and risk tradeoffs that we cover later.
- Buy a quality replacement battery. Always pick a cell with the same voltage, capacity, and connector type as the original. Cheap knockoffs often degrade fast and pose fire risks.
- Use proper tools. A precision screwdriver kit, plastic spudgers, a suction cup, isopropyl alcohol, and an antistatic mat protect both you and your device. Skipping these tools causes most DIY failures.
- Respect lithium safety rules. Never puncture, bend, or overheat a battery. Discharge the console below 25 percent before opening it, and recycle the old battery at an approved drop off site.
- Calibrate the new battery. Charge it fully, drain it down, and recharge it again to help the console read the new capacity correctly.
Recognize the Signs of a Degraded Battery
Knowing when to replace your battery saves you from sudden gaming interruptions. Lithium ion cells lose capacity with every charge cycle, and most handheld batteries start showing wear after 500 to 800 cycles, which is roughly two to three years of regular use.
Look for these warning signs. The console drains from 100 percent to 0 within an hour. The device shuts off even though it shows 30 percent charge. The back panel feels puffy or curved. The charging port gets hot during normal play. The console refuses to power on unless plugged in.
A swollen battery is the most urgent warning. Stop using the device immediately and replace the cell, because bloated batteries can rupture, leak, or catch fire. Catching these signs early protects your hardware and your safety.
Gather the Tools You Need
A successful battery swap starts with the correct gear. Trying to open a sealed handheld with a kitchen knife or random screwdriver leads to stripped screws, cracked plastic, or worse, a punctured battery.
You will need a precision screwdriver set that includes Phillips PH00, Tri-wing Y00 (for Nintendo devices), and Torx T5 or T6 bits. Add plastic opening picks, a flat plastic spudger, tweezers, a suction cup, and isopropyl alcohol with a lint free cloth.
An antistatic wrist strap and a magnetic mat are highly recommended. They keep tiny screws organized and prevent electrostatic discharge from damaging the motherboard. Some users also prepare a small bowl of warm water or an iOpener pad to soften the adhesive that holds the battery in place. Skipping any of these tools makes the job much harder than it needs to be.
Buy the Right Replacement Battery
Choosing the correct replacement battery is the single most important decision in this project. Lithium polymer cells vary by voltage, capacity, connector shape, and wire length, and using the wrong one can damage the console or cause a fire.
Check your console model number, often printed on the back panel. For example, the original Switch uses model HAC-001, the Switch Lite uses HDH-001, and the Steam Deck LCD uses model 1010. Match the battery part number listed by the manufacturer or a reputable repair parts retailer.
Buy from sellers who clearly state the cell brand and capacity. Avoid listings with vague specs or unusually low prices, because counterfeit batteries often hide reduced capacities and missing safety circuits. A genuine replacement should arrive with a built in protection board and a clean, undamaged connector.
Prepare Your Workspace Safely
Battery work demands a clean, organized, and well lit space. Lithium ion cells store a lot of energy in a small package, so any spark, puncture, or short circuit can trigger a thermal runaway event.
Clear a flat table near a power outlet. Lay down an antistatic mat or a soft cloth. Keep a fire safe surface like a ceramic tile nearby in case the battery starts to swell or smoke. Remove flammable items such as paper, fabric scraps, or aerosol cans from the area.
Drain your console battery to below 25 percent before opening it. A low charge state reduces the risk of sparks during disassembly. Wash your hands, remove metal jewelry, and avoid working on carpet, which builds static electricity. A calm and tidy workspace prevents most accidents.
Open the Console Without Damaging It
Each handheld has its own opening procedure, but the general flow is similar. Power the device off completely and unplug any cables, including memory cards and game cartridges.
Remove every external screw on the back panel. Place screws on your magnetic mat in the same pattern they came out, because many handhelds use different screw lengths in different positions. Mixing them up can crack the plastic shell or short circuit internal parts.
Use plastic picks to separate the shell, never metal tools. Slide the pick along the seam slowly while applying gentle outward pressure with a suction cup. Heat may be needed for devices like the Steam Deck OLED or Switch OLED, where adhesive holds parts together. Apply a warm iOpener pad for one to two minutes, then try opening again.
Disconnect the Old Battery Carefully
Once the shell is open, you will see the motherboard, ribbon cables, and the battery. The battery is usually the largest flat rectangle, often wrapped in colored plastic or foil.
Locate the battery connector on the motherboard. It is a small white or black plug with two or more wires running to the cell. Always disconnect the battery first before touching any other component, because a powered board can short out if you slip with a tool.
Lift the connector straight up using a plastic spudger. Never pull on the wires themselves, since they tear easily. Some consoles, like the Steam Deck, also require disconnecting the display ribbon cable to access the battery fully. Take a phone photo of every cable position before unplugging anything. This makes reassembly much easier.
Remove the Old Battery from the Chassis
Most modern handheld batteries are glued to the chassis with strong adhesive strips. Pulling too hard or prying with metal can puncture the cell and cause smoke or fire.
Slide a plastic card or spudger under one edge of the battery. Apply steady, slow upward pressure while gently warming the back of the chassis if needed. Some kits include adhesive remover or isopropyl alcohol, which softens the glue without damaging plastic.
Never bend, fold, or twist the old battery during removal. If it feels stuck, apply more heat rather than more force. A punctured lithium cell can ignite within seconds. Once free, place the old battery on a fire safe surface, away from your workspace, until you can dispose of it properly at a recycling center.
Install the New Battery Correctly
With the old battery out, clean the chassis cavity with isopropyl alcohol and a lint free cloth. Remove any leftover adhesive residue so the new battery sits flat and secure.
Peel the backing off the new adhesive strips and place them in the same positions as before. Lower the new battery into place, making sure the connector wires reach the motherboard without stretching. Press the battery down gently for 30 seconds to bond the adhesive.
Plug the battery connector in last, after confirming it is the right orientation. The plug should slide in smoothly without force. Forcing a misaligned connector bends the pins and can short circuit the protection board. Reconnect any other ribbon cables you unplugged, double check your photos, and prepare to close the shell.
Reassemble and Test the Console
Before sealing the shell, do a quick power on test. Press the power button and look for the boot logo. If the screen lights up and the battery icon appears, you are in good shape. If nothing happens, recheck every connector.
Close the back panel and replace every screw in its original spot. Tighten screws firmly but not too hard, since over tightening cracks plastic posts inside the chassis.
Plug the console into its original charger and let it charge fully before heavy use. Some devices need a battery calibration cycle, which means a full charge to 100 percent, a full discharge until shutdown, and another full charge. This helps the console read the new battery capacity correctly and prevents inaccurate percentage displays for weeks afterward.
Compare Your Repair Options
You have three main paths for replacing a degraded handheld battery, and each comes with clear advantages and drawbacks.
The manufacturer repair service is the safest route. Pros include genuine parts, trained technicians, and warranty protection. Cons include high cost, long wait times of two to four weeks, and possible data loss if the device gets reset.
The local repair shop offers a middle ground. Pros include faster turnaround, often same day service, and lower prices than the manufacturer. Cons include variable quality, the use of third party parts, and limited warranty coverage.
The DIY replacement is the cheapest and most rewarding option. Pros include full control, fast completion, and skills you can reuse on future devices. Cons include the risk of damaging your console, voiding the warranty, and handling lithium cells without professional training.
Avoid Common Battery Replacement Mistakes
Many DIY repairs go wrong because of small avoidable errors. Knowing them in advance saves your console and your wallet.
The most common mistake is using metal tools near the battery. Even a small scratch on the cell wrapper can cause a short. Another frequent error is forgetting to disconnect the battery first, which leads to fried chips on the motherboard.
Skipping the battery calibration step is also widespread. Without calibration, the console may show wrong charge percentages or shut down early for weeks. Other mistakes include mixing up screws, ignoring ribbon cable orientation, and using too much heat when softening adhesive.
Take your time, follow each step in order, and resist the urge to rush. Patience is the difference between a successful repair and a broken handheld.
Extend the Life of Your New Battery
A fresh battery only stays healthy if you treat it well. Lithium ion cells last longest when kept between 20 and 80 percent charge most of the time. Avoid leaving your console plugged in overnight every night, since constant top offs accelerate wear.
Keep the device away from extreme heat. Hot cars, sunny windowsills, and stuffy backpacks all speed up chemical breakdown inside the cell. Cold temperatures also reduce capacity temporarily, though they cause less long term damage.
Use the original charger or a certified replacement that matches the wattage. Cheap chargers often deliver unstable voltage, which stresses the battery.
Power down the console when you are not playing, update the system software for power optimizations, and lower screen brightness when possible. With these habits, your new battery should last another two to three years easily.
Recycle the Old Battery Responsibly
Throwing a lithium battery in the regular trash is dangerous and illegal in many regions. Damaged or swollen cells can ignite in garbage trucks, causing fires that injure workers and damage property.
Take the old battery to an electronics recycling center, a hardware store with a battery drop off bin, or a local hazardous waste facility. Many big box retailers also accept used lithium cells for free.
Wrap the terminals in electrical tape before transport to prevent accidental shorts. Place the battery in a fireproof bag or a small metal container if you must store it briefly at home.
Never store damaged batteries indoors for more than a few days. Responsible recycling protects your community and helps recover valuable materials like lithium, cobalt, and nickel for new batteries.
Frequently Asked Questions
How long does a handheld gaming console battery typically last before needing replacement?
Most lithium ion batteries in handheld consoles last between two and four years with regular use. This translates to roughly 500 to 800 full charge cycles. Heavy gamers who play daily may notice degradation sooner, while casual users can stretch this lifespan to five years or more.
Can I replace my Nintendo Switch or Steam Deck battery myself without voiding the warranty?
Opening your console almost always voids the manufacturer warranty. If your device is still under warranty, contact the manufacturer first for a free or low cost replacement. DIY repairs make the most sense for older units already out of warranty coverage.
What should I do if my handheld console battery is swollen?
Stop using the device immediately and do not charge it. Store it in a fireproof container away from flammable materials. Replace the battery as soon as possible, and take the swollen cell to a certified recycling facility. Never puncture, squeeze, or attempt to deflate a swollen battery.
How much does a typical handheld console battery replacement cost?
DIY replacement kits usually range from 20 to 50 dollars depending on the console model. Local repair shops charge between 60 and 120 dollars including labor. Manufacturer repair services can cost anywhere from 80 to 150 dollars and may include extra fees for shipping or diagnostics.
Do I need to calibrate the new battery after installation?
Yes, calibration is strongly recommended. Charge the new battery to 100 percent, use the console until it shuts down on its own, then charge it back to full without interruption. This process helps the firmware read the true capacity of the new cell and gives you accurate battery percentage readings.

Hello, i’m Ivoria i am the face behind Tech Tracker Blog. I am passionate about my work and love to explore gadgets and share about my experience.