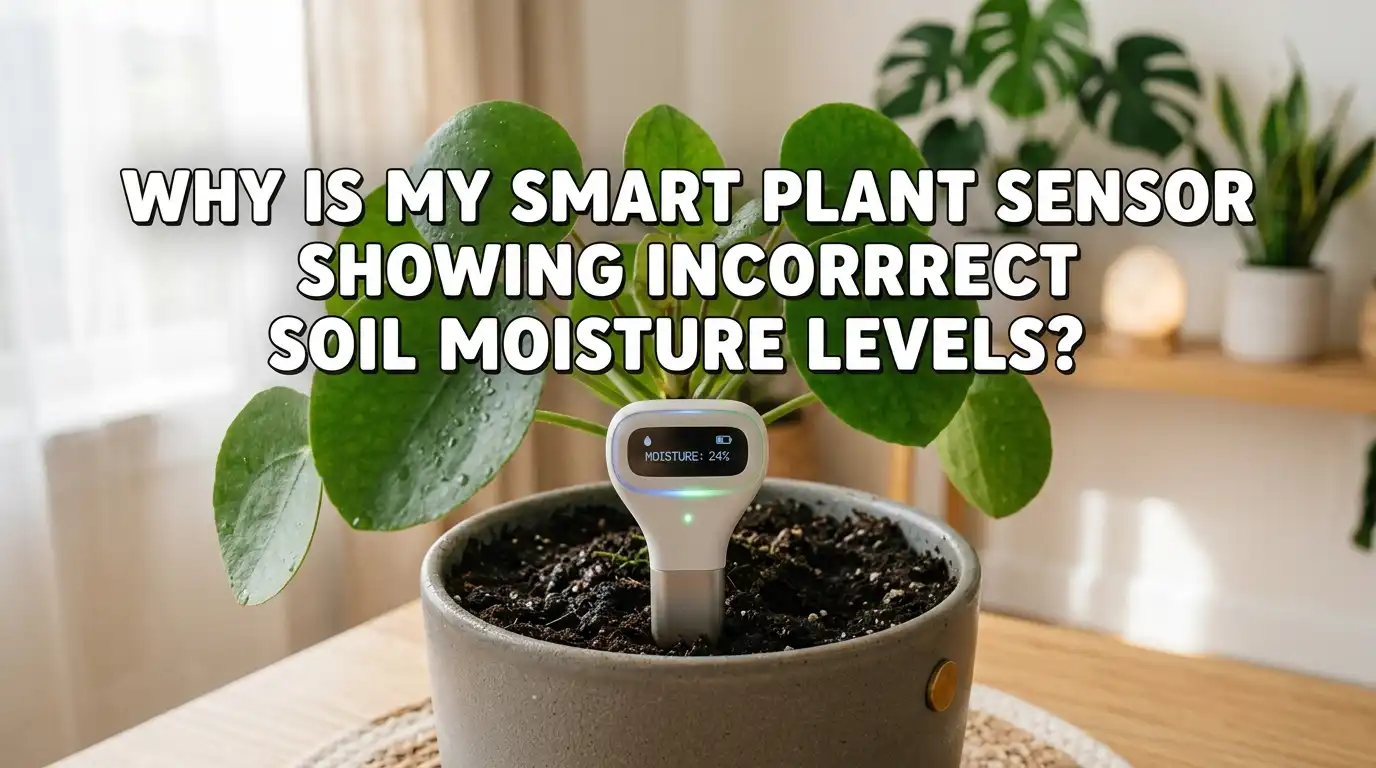
Why Is My Smart Plant Sensor Showing Incorrect Soil Moisture Levels?
Smart plant sensors promise easy plant care. They sit in the soil and tell you when to water. But sometimes the numbers look strange.
The sensor says dry while the soil feels wet. Or it shows wet when the pot has not seen water for a week. This problem is common, and you are not alone in facing it.
This guide walks you through every reason your smart plant sensor may show incorrect soil moisture. You will learn how to spot each issue. You will also get clear steps to fix it.
Key Takeaways
- Air gaps around the probe are the top reason for wrong readings. Soil must touch the metal or plastic surface on all sides for the sensor to work right.
- Low battery power causes drift and false numbers. Always check the battery first before you try anything else, since weak cells often send wrong signals to the app.
- Sensor type matters a lot. Capacitive sensors last longer and stay accurate. Resistive sensors corrode fast and give false dry readings within months.
- Placement depth changes everything. A probe stuck too shallow reads the dry top layer. A probe pushed too deep misses the root zone where water counts.
- Soil type affects accuracy. Sandy soil, clay, and peat all hold water in different ways. Many sensors need calibration for the soil mix in your pot.
- Firmware bugs and app glitches can show stale data. Sometimes the sensor works fine, but the app shows old numbers because of a sync error.
Air Gaps Around the Sensor Probe
Air gaps are the number one cause of wrong soil moisture readings. When you push a probe into dry or compact soil, small pockets of air form along the sides. These pockets break the contact between the soil and the sensor. The probe then reads the air, not the soil, and the app shows a much drier number than reality.
To fix this, pull the sensor out and water the pot first. Let the water soak in for ten minutes. Then push the probe back in slowly with a gentle twist. Press the soil around the probe with your fingers to close any gaps.
Pros of fixing air gaps: free, takes one minute, and works for all sensor types.
Cons: you may need to redo this after each repotting or deep watering since soil settles and shifts over time.
Low Battery Power Causing Drift
A weak battery is one of the most overlooked causes of bad readings. Smart sensors use small coin cells or AAA batteries to power the probe and send data. When voltage drops below a safe level, the sensor still works, but the readings start to drift. You may see slow rises, sudden spikes, or flat lines that never change.
Check the battery icon in your app first. If it shows less than thirty percent, swap the cell with a fresh one. Use the exact type listed in the manual, not a cheaper substitute, because voltage matters.
Pros of battery replacement: cheap, fast, and fixes drift right away.
Cons: some sensors hide the battery slot behind glued covers, which makes the swap harder than expected. Always keep spare cells at home so you do not delay the fix.
Resistive Sensor Corrosion Over Time
Many budget smart plant sensors use a resistive probe. This type passes a small current between two metal prongs. Over weeks and months, the metal reacts with water and minerals in the soil. The prongs corrode, turn green or black, and lose conductivity. The sensor then reads dry even when the soil is soaking wet.
Pull your sensor out and look at the metal. If you see rust, pitting, or green crust, the probe is damaged. Try cleaning it with a soft brush and white vinegar. If readings still fail, the probe is done.
Pros of resistive sensors: low price and simple wiring.
Cons: short life span, often less than a year, and constant drift as corrosion grows. Many gardeners switch to capacitive models for this reason alone.
Capacitive Sensors and Their Common Issues
Capacitive sensors do not use exposed metal. They measure the soil through a sealed plastic body, which stops corrosion and lasts much longer. But they are not perfect. They can still give wrong readings when the protective coating cracks, when the soil is too salty, or when the factory calibration does not match your soil mix.
Inspect the probe for hairline cracks along the body. Even small breaks let water reach the inner board and ruin the signal. Wipe the surface clean before each use.
Pros: long life, stable readings, and low maintenance.
Cons: higher cost than resistive types, and you may still need to calibrate for unusual soil blends like cactus mix or pure peat. Most modern smart plant sensors now use this design.
Wrong Sensor Placement Depth
Depth matters more than most people think. If you push the probe only one or two inches down, it reads the dry surface layer. If you push it too deep, it sits below the root zone and misses what the plant actually feels. Both errors lead to bad watering choices.
For small houseplants, aim for half the pot depth. For medium plants, place the probe near the main root ball. For large outdoor pots, use two sensors at different depths if your model allows it.
Pros of correct depth: gives true root zone data and matches plant needs.
Cons: you may need to move the sensor after the plant grows or after repotting. Mark the depth with tape on the probe so you can repeat it next time.
Soil Type and Calibration Mismatch
Every soil holds water in a different way. Sandy soil drains fast and feels dry on the surface. Clay traps water deep down and stays wet for days. Peat and coco coir act in their own ways too. Most smart sensors come with factory settings made for average loamy soil. If your pot has something else, the readings will be off by a wide margin.
Check your app for a soil type setting. Many brands now let you pick sandy, loamy, clay, or potting mix. Match the choice to what you have.
Pros of calibration: more accurate numbers and better watering choices.
Cons: not all sensors support custom calibration, and the process can be slow if you must do it by hand with wet and dry reference samples.
Salt and Fertilizer Buildup
Fertilizer leaves behind salts in the soil. Over time, these salts build up and change how the soil conducts electricity. Both resistive and capacitive sensors can be fooled by high salt levels. The probe may read very wet even when the soil is dry, because salt boosts conductivity in a way that mimics water.
Flush the pot with plain water once a month. Pour slowly until water runs out of the drain hole. Do this two or three times to wash out extra salts.
Pros of flushing: cleans the soil, helps the plant, and resets sensor readings.
Cons: not safe for plants that hate wet feet, like succulents and cacti. Skip this method for dry-loving species and pick a different fix.
Temperature Effects on Readings
Soil temperature changes how sensors read moisture. Cold soil holds water differently than warm soil. The same amount of water can show as wetter in winter and drier in summer because of how the probe measures. This is more common in outdoor pots and near windows with strong sun or cold drafts.
If your sensor has a temperature display, check it. Wild swings often match wild moisture swings. Move the pot away from heat vents, AC units, or cold window glass.
Pros of stable temperature: better readings and a happier plant.
Cons: hard to control in homes with big temperature changes through the day. Some advanced sensors include temperature compensation built in, which solves this problem on its own.
App and Firmware Sync Problems
Sometimes the sensor itself works fine. The problem lives in the app or the firmware. A bad sync can show old numbers for hours. A buggy update can freeze the reading or send the wrong unit. You may think the probe is broken when it is just a software glitch.
Open the app and pull down to refresh. Check for updates in the device settings. Restart the app, then restart the sensor by removing the battery for thirty seconds.
Pros of software fixes: free, fast, and no hardware change needed.
Cons: some older sensors lose support after a few years, and firmware updates may stop coming from the maker. When that happens, the sensor still works, but bug fixes never arrive.
Wireless Range and Signal Loss
Smart plant sensors send data over Bluetooth, Wi-Fi, or Zigbee. When the signal weakens, the app may show old readings or jump to error values. Walls, metal shelves, and other devices can block the signal. The sensor keeps measuring, but the data never reaches your phone in time.
Move your router or hub closer to the plant. Remove metal objects between the sensor and the receiver. For Bluetooth models, keep your phone within thirty feet of the plant.
Pros of better signal: live data, fast alerts, and no missed updates.
Cons: you may need a Wi-Fi extender or a smart home hub, which adds cost. Wired sensors avoid this issue but limit where you can place them in the home.
Damaged Probe or Internal Wiring
Physical damage can wreck a sensor in seconds. A drop on the floor, a yank during repotting, or a chew from a pet can break the inner wires. The probe may still turn on, but the readings make no sense. You see flat lines, max values, or random jumps.
Inspect the probe and the cable, if any. Look for bent prongs, cracked plastic, or torn wires. Wiggle the connector to test for loose joints.
Pros of checking for damage: clear answer about whether to repair or replace.
Cons: most smart sensors are sealed units and cannot be opened without breaking them. If the inside is damaged, replacement is often the only path. Handle your sensor with care to avoid this in the first place.
Moisture on the Sensor Body
A wet sensor body can fool the probe. When you water the plant, drops can splash on the top of the sensor where the electronics live. Water can also creep up the probe if the seal is weak. This extra moisture gives a false wet reading even after the soil dries.
Wipe the top of the sensor with a dry cloth after each watering. Check the seal between the probe and the body for cracks or gaps. Let the unit air dry for an hour if water got inside.
Pros of keeping it dry: longer sensor life and accurate numbers.
Cons: takes a small habit change at watering time. Use a watering can with a narrow spout to keep splashes off the sensor body.
When to Replace Your Smart Plant Sensor
Sometimes the fix is a new sensor. If you have tried fresh batteries, new placement, soil flushing, app updates, and probe cleaning with no luck, the unit has likely failed. Most consumer smart plant sensors last two to four years. After that, internal parts wear out, seals fail, and readings drift past the point of repair.
Look for signs like constant errors, dead battery within days, or readings that never match a manual finger test. These point to end of life.
Pros of replacement: fresh accuracy, new features, and support for current apps.
Cons: cost and e-waste. Try to recycle the old unit through a local electronics drop-off. Pick a new model with good reviews on battery life and capacitive design for the best results next time.
FAQs
How often should I calibrate my smart plant sensor?
Most home sensors do not need regular calibration. Check once when you first set it up, then again only if you change soil type or notice odd readings. Lab-grade probes need more frequent checks, but consumer models are stable for months at a time.
Can I leave my smart plant sensor in the pot all year?
Yes, most sensors are made for full-time use. Just check the battery every few months and clean the probe during repotting. Avoid leaving outdoor sensors out in freezing weather unless the maker says they handle cold.
Why does my sensor read zero or one hundred percent all the time?
A stuck reading at the extreme low or high end usually means the probe is broken or the battery is nearly dead. Try a fresh battery first. If the reading still sticks, the probe has likely failed and needs replacement.
Do smart plant sensors work in all types of pots?
They work in most pots, but very small pots can throw off readings because the probe takes up too much soil. Self-watering pots can also confuse sensors since the water sits at the bottom. Pick a sensor size that fits your pot.
Should I trust my sensor or my finger test more?
Use both. Your finger gives a quick check of the top inch. The sensor reads deeper near the roots. When they disagree, water the plant based on the root zone reading but also look at the plant for signs of stress like droopy leaves or yellowing.

Hello, i’m Ivoria i am the face behind Tech Tracker Blog. I am passionate about my work and love to explore gadgets and share about my experience.