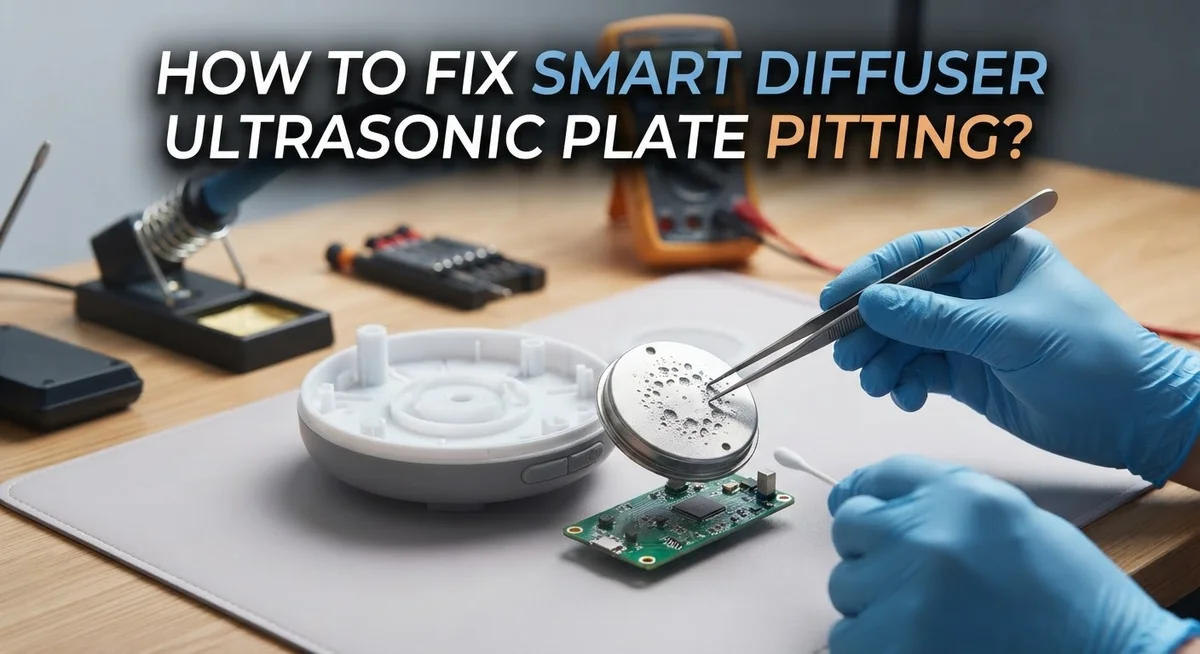
How To Fix Smart Diffuser Ultrasonic Plate Pitting?
Does your smart diffuser stop misting the way it used to? The problem might be pitting on the ultrasonic plate.
This small metal disc creates the fine mist you enjoy. Over time, oil residue and mineral deposits build up on its surface. This buildup causes tiny pits and scratches.
Pitting is a common issue in essential oil diffusers. It happens when users forget to clean the disc regularly. Oil and hard water minerals stick to the plate and slowly damage it.
The good news is that you can often fix this problem yourself. With simple tools like a cotton swab, vinegar, or rubbing alcohol, you can restore your diffuser’s performance.
In a Nutshell
- Pitting comes from buildup. Oil residue and mineral deposits sit on the ultrasonic plate over time. This buildup blocks the disc from vibrating properly.
- Cleaning is simple. Dip a cotton swab in vinegar or isopropyl alcohol. Gently wipe the disc to remove grime.
- Wipe the reservoir too. Use a wet cotton cloth on the water tank. This stops fresh buildup from forming.
- Be gentle during cleaning. Pressing too hard on the plate can scratch or damage it further. Light strokes work best.
- Replace the disc if needed. If pitting stays after cleaning, or the damage looks severe, a new ultrasonic disc solves the issue.
- Prevent future pitting. Clean your diffuser regularly and check water levels often. This keeps mist output strong and steady.
What Causes Ultrasonic Plate Pitting
Ultrasonic plate pitting happens when tiny holes or corrosion marks form on the metal disc inside your diffuser. These marks disrupt the vibration pattern that creates mist. Understanding the root causes helps you prevent this damage from happening again.
Oil residue buildup is the primary culprit. When you add essential oils to your diffuser, some oils stick to the ultrasonic plate over time. Oils are thick and don’t dissolve easily in water. They accumulate in layers on the metal surface.
Mineral deposits are another major cause. Tap water contains minerals like calcium and magnesium. These minerals settle on the ultrasonic plate and harden into crusty layers. Distilled water has fewer minerals, but even it can leave some residue behind.
The combination of oils and minerals creates a corrosive environment. The plate vibrates constantly while these substances sit on it. The friction between the vibrating metal and the buildup eventually creates pitting marks. Think of it like repeated scratching that slowly wears away the surface.
Neglecting regular cleaning speeds up this process significantly. The longer oil and mineral deposits stay on the plate, the deeper they embed themselves. Once pitting starts, it gets worse quickly if you don’t address it.
Hard water makes the problem worse than soft water. If your tap water is very hard, mineral deposits form faster. This means you need to clean your diffuser more often.
Improper cleaning methods can also cause pitting. Scrubbing too hard or using harsh tools damages the delicate plate surface. Even aggressive wiping can create tiny scratches that turn into pitting spots.
The good news is that understanding these causes lets you prevent future damage. Regular cleaning stops oils and minerals from building up. Using gentler cleaning methods protects your plate from accidental damage. Switching to distilled water reduces mineral deposits significantly.
Signs Your Diffuser Needs Cleaning or Repair
Your smart diffuser gives you clear signs when the ultrasonic plate needs attention. Misting stops or becomes very weak is the most obvious signal. If you turn on your diffuser and see little to no vapor, the plate likely has pitting damage.
Listen for strange sounds coming from your device. A buzzing or grinding noise means the plate is struggling to vibrate properly. This happens when pits create an uneven surface.
Check if the mist comes out in irregular bursts instead of steady streams. A healthy diffuser produces continuous, fine mist. Pitting disrupts this smooth operation.
Look at the water level in your reservoir. If it’s not decreasing as it should, the ultrasonic plate isn’t working efficiently. The water should gradually disappear as mist.
Visible discoloration or buildup on the metal disc is another warning sign. You might see white, brown, or yellowish deposits. These are mineral and oil accumulations that cause pitting.
Feel around the exterior of your diffuser for any leaks. Pitting can sometimes create small cracks that allow water to escape. Moisture on the outside means internal damage is likely present.
Notice if your diffuser runs but produces no scent. Even if mist appears, a damaged plate won’t disperse essential oils properly. The vibrations become too weak to break oils into fine particles.
Pay attention to how long your diffuser lasts per fill. A pitted plate requires more energy to operate. Your device might shut off earlier than usual or run much hotter than normal.
The key is catching these signs early. Regular inspection prevents small pitting problems from becoming severe damage. Check your diffuser monthly, especially if you use it daily with essential oils.
Tools and Cleaning Solutions You’ll Need
Before you start fixing your smart diffuser, gather the right supplies. Having everything ready saves time and prevents you from damaging the ultrasonic plate further.
You need a few basic cleaning solutions. Vinegar works well for breaking down mineral deposits and oil residue. White vinegar is your best choice here. Isopropyl alcohol is another excellent option that evaporates quickly and kills bacteria. Most households have one or both of these items already.
Cotton swabs are essential for reaching the ultrasonic plate safely. They let you clean the metal disc without applying too much pressure. Regular cotton swabs work fine, so no special versions are needed.
Grab some soft, lint-free cloths or cotton cloths. These are perfect for wiping your reservoir and the exterior surfaces. Avoid paper towels because they leave fibers behind.
A small bowl helps you prepare your cleaning solution. Mix vinegar or isopropyl alcohol with a small amount of water if you prefer a gentler approach. You don’t need much, just enough to dampen your cotton swab.
Keep a dry cloth nearby for the final wipe down. This removes any remaining moisture from your diffuser components.
Optional but helpful items include a soft brush with fine bristles. This can gently remove stubborn buildup without scratching the plate. A magnifying glass lets you inspect the ultrasonic disc closely and see if pitting is severe.
Never use harsh scrubbing pads, steel wool, or abrasive materials. These damage the delicate ultrasonic plate and make pitting worse. Avoid bleach or strong chemical cleaners as well.
Have a clean, flat workspace ready. Lay down a towel to catch any drips. Keep your diffuser parts organized so nothing gets lost during cleaning. This simple preparation makes the entire repair process smoother and faster.
Step-by-Step Guide to Cleaning the Ultrasonic Disc
Start by unplugging your smart diffuser from the power outlet. This keeps you safe while you work on the ultrasonic plate.
Empty any remaining water from the reservoir into a sink. Pour out the liquid slowly to avoid spilling on your workspace. Set the empty diffuser on a clean, dry towel.
Locate the ultrasonic disc at the bottom of the water tank. This is the metal plate that vibrates to create mist. Look carefully at its surface to see the pitting damage.
Dip a cotton swab into your cleaning solution. Use either white vinegar or isopropyl alcohol for best results. Both solutions dissolve oil residue and mineral deposits effectively.
Gently rub the cotton swab across the entire surface of the ultrasonic plate. Use light, circular motions to avoid pressing hard on the disc. Hard pressure causes additional damage to the delicate metal surface.
Pay special attention to areas with visible discoloration or buildup. These spots contain concentrated mineral and oil deposits. Work slowly through each section of the plate.
Rinse the disc with a fresh cotton swab dampened in clean water. This removes any cleaning solution residue left behind. Make sure no vinegar or alcohol remains on the plate.
Wipe the entire reservoir with a wet cotton cloth to remove loose particles. Get into corners and edges where debris collects easily.
Use a dry cloth to pat everything completely dry. Moisture left behind can cause new pitting to form quickly.
Let the diffuser air dry for an additional 10 to 15 minutes before reassembling. This ensures all moisture evaporates from hard to reach areas.
Check that all parts are dry before plugging the diffuser back in. Your ultrasonic plate is now clean and ready to produce mist again.
Mistakes to Avoid During Cleaning and Repair
When cleaning your smart diffuser’s ultrasonic plate, you must avoid several common mistakes that make pitting worse. Never press hard on the ultrasonic plate during cleaning. The metal surface is delicate and aggressive pressure causes additional damage. Use gentle, circular motions with your cotton swab instead.
Skipping regular maintenance is another major error. Many people wait until their diffuser stops misting completely before cleaning it. By then, oil residue and mineral deposits have hardened on the plate. Clean your diffuser every two weeks to prevent this buildup from getting stubborn.
Don’t neglect the water level in your reservoir. Running your diffuser with too little water forces the ultrasonic plate to work overtime. This increases pitting and shortens the plate’s lifespan. Always fill your reservoir to the recommended line before each use.
Avoid using the wrong cleaning solutions. Harsh chemicals, bleach, or abrasive cleaners damage the ultrasonic plate further. Stick to vinegar or isopropyl alcohol, which safely dissolve mineral deposits without harming the metal surface.
Many people make the mistake of cleaning only the visible parts of the disc. The edges and corners also collect oil residue. Make sure you clean the entire surface, including hard to reach spots around the plate’s perimeter.
Don’t leave moisture on the plate after cleaning. Any water left behind can cause corrosion and new pitting. Always dry the ultrasonic disc completely with a lint-free cloth before reassembling your diffuser.
Finally, avoid ignoring early warning signs. If you hear unusual sounds or notice weak misting, clean immediately. Catching problems early prevents severe pitting that requires plate replacement. Regular attention keeps your smart diffuser working properly and extends its useful life significantly.
Preventing Future Pitting Through Regular Maintenance
Regular maintenance stops pitting before it starts. The key is consistency. You should clean your ultrasonic plate every two weeks if you use your diffuser daily.
Set a cleaning schedule on your phone. This reminder helps you stay on track. Many people forget maintenance until their diffuser stops working properly.
Clean the water reservoir regularly between uses. Empty old water after each session. Stagnant water creates mineral deposits faster. Fresh water reduces buildup significantly.
Use distilled water instead of tap water when possible. Distilled water has fewer minerals. Tap water leaves behind calcium and other deposits. These deposits cause pitting over time.
Check your ultrasonic plate weekly for early signs of damage. Look for white spots or discoloration. Catching pitting early makes it easier to fix. You can often reverse minor damage with gentle cleaning.
Dry your diffuser completely after each cleaning. Moisture left on the plate promotes corrosion. Pat everything dry with a soft cloth. Store your diffuser in a cool, dry place.
Avoid letting essential oils sit in the reservoir too long. Oil residue hardens and sticks to the plate. Empty the tank if you won’t use your diffuser for several days. This simple step prevents stubborn buildup.
Keep your diffuser away from dust and debris. Dust particles settle on the ultrasonic plate. They combine with water to form a paste that damages the surface. Cover your diffuser when not in use.
Replace the water in your reservoir every three days minimum. Even if you’re not using your diffuser actively, water can grow bacteria. Fresh water keeps everything clean inside.
Monitor your diffuser’s misting output. Weak misting often signals early pitting. Address this immediately with a thorough cleaning. Regular maintenance catches problems before they become expensive repairs.
Troubleshooting Common Diffuser Issues
When your smart diffuser stops misting properly, ultrasonic plate pitting is often the culprit. This damage appears as tiny pits or corrosion marks on the metal disc that vibrates to create mist. Understanding what causes this problem helps you fix it faster.
Oil residue builds up on the ultrasonic plate over time. Essential oils don’t fully dissolve in water, so they stick to the metal surface. Mineral deposits from tap water also accumulate and harden. Together, these substances create a rough, pitted texture that prevents proper vibration.
The good news is that mild pitting responds well to simple cleaning. Use either white vinegar or isopropyl alcohol as your cleaning solution. These liquids break down oil buildup and mineral deposits without harming the plate. Dip a cotton swab into your chosen solution and gently work across the entire disc surface. Focus on areas showing visible discoloration or crusty buildup.
Gentle pressure is essential during this process. Pressing hard actually worsens pitting by creating new damage. Your goal is to dissolve and remove buildup, not scrub it away forcefully. After treating the disc, rinse it thoroughly with a fresh cotton swab dampened in clean water.
If pitting remains severe after cleaning, replacement becomes necessary. A heavily damaged ultrasonic plate won’t vibrate properly no matter how well you clean it. Replacement discs are straightforward to install and restore full misting function.
The key difference between temporary fixes and permanent solutions is consistent maintenance. When you clean regularly, pitting never develops in the first place. Set reminders to inspect your ultrasonic plate weekly. This simple habit keeps your diffuser working smoothly for years. Catching early oil buildup takes just minutes but saves you from major repairs later.
Final Thoughts
Fixing ultrasonic plate pitting does not need to be hard. Simple cleaning steps solve most misting problems.
Vinegar or isopropyl alcohol removes oil residue and mineral deposits. A cotton swab and gentle hands get the job done.
Regular maintenance makes the biggest difference. Diffusers that get cleaned often rarely develop severe pitting.
Think of cleaning as a habit, not a chore. Just 30 minutes every few days keeps your diffuser working well.
Watch for warning signs early. Weak misting or strange sounds mean it’s time to check the plate.
Sometimes cleaning is not enough. If pitting stays after you clean it, the disc may need replacement.
This is normal wear over time. Ultrasonic plates work hard, and even good care cannot make them last forever.
The good news is that replacement discs are easy to find. You do not need special skills to swap them out.
Your diffuser should reward good care with years of reliable service. Clean water, gentle cleaning, and steady habits protect the ultrasonic plate.
Skip harsh chemicals and rough scrubbing. These cause more damage than the pitting itself.
Stick to proven methods like vinegar and soft cotton swabs. They clean well without harming the plate’s surface.
Small efforts now prevent bigger problems later. A few minutes of care each week saves you money and frustration.
Remember that water quality matters too. Distilled water reduces mineral buildup and slows down future pitting.
In the end, fixing ultrasonic plate pitting comes down to consistency. Clean regularly, watch for problems, and act fast when you spot them.
Your diffuser will thank you with better misting and a longer life. That is the real secret to keeping it running smoothly.
Follow these steps, and pitting will become a rare issue. Your smart diffuser stays fresh, effective, and ready to use whenever you need it.
Frequently Asked Questions
Why is my diffuser not misting anymore?
The ultrasonic plate likely has pitting or buildup. Oil residue and mineral deposits block the vibrations needed to create mist. Start by checking your water level. If it’s full, clean the ultrasonic disc with a cotton swab dipped in vinegar or isopropyl alcohol. Gently wipe away any oily film or white crusty deposits.
This simple cleaning fixes most misting problems. The process takes about 30 minutes. If misting returns after cleaning, you’ve solved the issue.
How do I safely clean the ultrasonic plate?
Use gentle pressure. This is the most important rule. Hard scrubbing damages the plate further.
Dip a cotton swab in vinegar or rubbing alcohol. Wipe the ultrasonic disc in circular motions. Work slowly and carefully. Remove all visible oil and mineral buildup.
Wipe the water reservoir with a wet cotton cloth too. Rinse everything thoroughly with clean water. Let the diffuser dry completely before refilling.
When should I replace the ultrasonic plate?
Replace it if pitting persists after thorough cleaning. Also replace it if you see visible cracks or deep pitting marks. A damaged plate cannot vibrate properly, no matter how clean it is.
Most replacement discs are affordable and easy to install. Check your diffuser’s manual for the correct part. Replacement is worth it for reliable performance.
Can I prevent ultrasonic plate pitting?
Yes. Regular maintenance stops pitting before it starts. Clean your diffuser weekly with vinegar or alcohol. Use distilled water instead of tap water when possible.
Empty the reservoir every three days. Don’t let essential oils sit in stagnant water. These habits prevent oil residue from hardening on the plate. Small efforts now prevent expensive problems later.

Hello, i’m Ivoria i am the face behind Tech Tracker Blog. I am passionate about my work and love to explore gadgets and share about my experience.